
Set Up a Storefront
Introduction
The YaaS Storefront is a ready-to-use template that can be set up as a fully transactional storefront within minutes, or you can use the template as a starting point to customize your own features and functionality. Its architecture makes the YaaS Storefront easy to extend with the creation and implementation of new or existing services.
To set up the storefront, you must clone the YaaS Storefront and then run it on your local machine. You must have node.js and npm installed locally. (For more information about installing these, see Prerequisites.) You must also subscribe to the packages described in the Commerce as a Service guide. For additional information about how to run and use the YaaS Storefront, see the Readme.md file in the public repository.
After your storefront is running locally, you can examine the storefront files on your local drive to familiarize yourself with the cloned storefront directory structure.
Clone and Run the Storefront Locally
The source code for the YaaS storefront application is available on GitHub at https://github.com/sap/yaas-storefront. If you do not already have a GitHub account, you will need to sign up for one. Fork the repository to your GitHub account by clicking the Fork button, and then clone the yaas-storefront repository by executing the following command:
git clone https://github.com/SAP/yaas-storefront.git
Ensure that you are on the master branch. From within the directory above, download the dependencies and install the build tools using the following command:
npm install
After the installations for the npm and bower dependencies are successful, and the installation of the build tools complete, find your project ID in the project administration settings in the Builder under Projects > Project Name > Administration. In the gruntfile.js file, replace the PROJECT_ID with your own project ID. When you build the project, the default project ID in the bootstrap.js file is replaced with your project ID. Also, configure the CLIENT_ID and the REDIRECT_URI variables in the gruntfile.js file with the values set in the application associated with your project.
Run your storefront by executing the following command:
npm start
In your web browser, navigate to the URL http://localhost:9000/#!/ to see your store running on your local machine.
Examine the Directory Structure
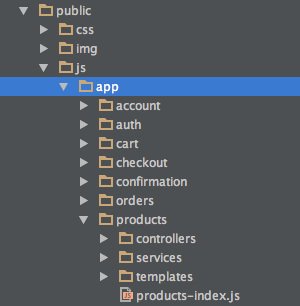
The directory structure of the template is organized by module, which means that all of the HTML code, controller code, and service code for anything related to products is all under the same products directory. Navigate into the public/js/app/products directory. All HTML and JavaScript code for both the Product Details page and the Product listing page exists here. The products-index.js file at the root of the products directory defines the product module and its dependencies. Following is an example of the directory structure:
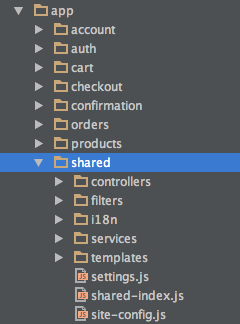
Navigate to the public/js/app/shared directory. This special module contains various JavaScript components and HTML templates that are shared by more than one module in the application. This directory contains two important files: settings.js and site-config.js. The settings.js file stores crucial information, such as cookie names and REST header values. The site-config.js file configures the various service endpoints utilized by your storefront. Following is an example of the shared folder:
If you find any information that is unclear or incorrect, please let us know so that we can improve the Dev Portal content.
Use our private help channel. Receive updates over email and contact our specialists directly.
If you need more information about this topic, visit hybris Experts to post your own question and interact with our community and experts.