
Integrate a Service in the Storefront
Introduction
The purpose of this tutorial is to demonstrate how a connection is established between a service and the YaaS Storefront. By adding the Wishlist service endpoint and creating a Wishlist module, you can then implement the service and controller code to demonstrate the following functionality:
- Create a new wishlist
- Pass a single item
- Add a Wishlist button to the storefront
You can observe the outbound REST request from the storefront to the Wishlist service in your browser's developer console.
Prerequisites
Before going through this tutorial, follow the guide for Create a Service, and make sure you have the Wishlist service running on http://localhost:8080. Also, follow the guide for Set Up a Storefront. Lastly, you need to have a working knowledge of the following technologies:
- AngularJS
- Restangular, UI Router, and Angular Bootstrap
Refer to Set up a Project, the YaaS Storefront, and the Algolia Builder Module documents for more details about the storefront, package subscription, project configurations, and project management.
Add the Wishlist Service Endpoint
The site-config.js file configures the endpoints for the services that the storefront consumes. The endpoints are properties of the this.apis object. The URLs are configured dynamically depending on the deployment. For the purpose of this tutorial, the Wishlist service does not need a dynamic endpoint.
With the Wishlist service running on your local machine at port 8080, insert the following code sample at the bottom of the endpoint list to add the Wishlist service endpoint:
wishlist: {
    baseUrl: 'http://localhost:8080/'
}
Create the Wishlist Module
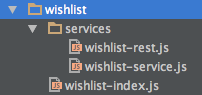
Create a new directory named wishlist in the public/js/app directory of your project. For example:

In the wishlist directory, add the wishlist-index.js file, which defines the wishlist module. Insert this code sample into the file:
/** Module related to wishlists. */

'use strict';

angular.module('ds.wishlist', [
    'ds.shared'
]);
The wishlist module has a dependency on the ds.shared module. An Angular service is needed to handle the REST requests and responses for your Wishlist service. Create a subdirectory of the wishlist directory named services. Add some new empty JavaScript files to the wishlist/services directory named wishlist-service.js and wishlist-rest.js. Your wishlist directory should look like the following example:
Add references to these files in the public/index.html file so the application can locate them. For example:
<script src="js/app/wishlist/wishlist-index.js"></script>
<script src="js/app/wishlist/services/wishlist-rest.js"></script>
<script src="js/app/wishlist/services/wishlist-service.js"></script>
Implement the Service Code
The storefront template follows the convention of creating two factories for each service. There is one file to configure the endpoint, and another file that handles the UI business logic. Open the public/js/app/cart/services/cart-rest.js file to examine the REST configuration file for the existing cart service. This file configures a Restangular object named Cart by setting the cart's base URL as the endpoint defined for it in the site-config.js file. The CartREST factory has dependencies on both Restangular and SiteConfigSvc, as seen in the example below:
'use strict';

angular.module('ds.cart')
    .factory('CartREST', ['Restangular', 'SiteConfigSvc', function(Restangular, siteConfig){

        return {
            /** Endpoint for Main Cart.*/
            Cart: Restangular.withConfig(function (RestangularConfigurer) {
                RestangularConfigurer.setBaseUrl(siteConfig.apis.cart.baseUrl);
            })
        };


    }]);
Add the following code sample to the wishlist-rest.js file:
'use strict';

angular.module('ds.wishlist')
   .factory('WishlistREST', ['Restangular', 'SiteConfigSvc', function(Restangular, siteConfig){
       return {
           /** Endpoint for wishlist.*/
           Wishlist: Restangular.withConfig(function (RestangularConfigurer) {
               RestangularConfigurer.setBaseUrl(siteConfig.apis.wishlist.baseUrl);
           })
       };

   }]);
Before you implement the client logic in the wishlist-service.js file, examine the cart-service.js file. This file is a little more complicated because it handles all of the cart-related operations that travel across the wire, and online shopping cart functionality is fairly complex. The top of the file defines some private variables and functions that are only available to the rest of the cart-service.js file. The return block contains the CartSvc functions that are publicly available to the rest of the application, including the cart's controller. You can get carts, refresh carts, and update the contents or properties of carts. For the purpose of this tutorial, your WishlistSvc is much simpler, because you are only implementing the functionality for creating a new wishlist. To create the WishlistSvc factory, copy the following code sample into the wishlist-service.js file:
'use strict';

angular.module('ds.wishlist')
    .factory('WishlistSvc', ['WishlistREST',
        function(WishlistREST){
            return {
                createWishlist: function (newWishlist) {
                    WishlistREST.Wishlist.all('wishlists').post(newWishlist);
                }
            };
        }]);
Examine the createWishlist function to gain an understanding of how the WishlistREST Restangular object is used. The .all('wishlists') portion of this call specifies to append the string wishlists to the end of the wishlist endpoint. The complete URL of this POST request is http://localhost:8080/wishlists/, in accordance with the service's specification. The newWishlist object, defined in the wishlist controller, is passed as a JSON-formatted object.
Implement the Controller Code
The controller is responsible for defining the view's model in the scope, as well as intercepting user interactions and passing them to the appropriate functions in the UI service, which then delegates to the REST endpoint. Because the button to add a product to a wishlist will be on the Product Detail page, some simple controller code is added to the public/js/app/products/controllers/product-detail-ctrl.js file. Open the products-index.js file and add the ds.wishlist module as a dependency:
'use strict';

angular.module('ds.products', [
    'restangular',
    'ds.shared',
    'ds.cart',
    'ui.bootstrap',
    'ds.wishlist'
]);
Because you are calling the addProductToWishlist function from the Wishlist service, add the WishlistSvc as a dependency on the ProductDetailCtrl function. For example:
.controller('ProductDetailCtrl', ['$scope', '$rootScope', 'WishlistSvc', 'CartSvc', 'product', 'lastCatId', 'settings', 'GlobalData', 'CategorySvc','$filter',
    function($scope, $rootScope, WishlistSvc, CartSvc, product, lastCatId, settings, GlobalData, CategorySvc, $filter) {
Create an empty function on the controller's scope called addToWishlist(). For example:
$scope.addToWishlist = function () {

};
After inspecting the schema, note the required attributes for the POST request body are id, owner, and title, all of which are string types. In a real-world scenario, you want to generate an ID, use the currently logged-in customer account number for the owner attribute, and enable the user to define their wishlist title. For this tutorial, simply set some arbitrary data for these attributes. Because the example Wishlist service that is running locally doesn't actually store any data, it enables you to make multiple posts with this same data without throwing any errors.
Create a new JavaScript object inside the addToWishlist() function named newWishlist. This object contains the title property. Set the value for this property to defaultWishlistTitle. The newWishlist function also contains a property called items, which, in accordance with the RAML specification for the Wishlist service, is an array. The item in this array has two properties: product and amount. The data for these properties is available on the $scope line. After this object is constructed, it gets passed to the createWishlist function of the WishlistSvc. Your $scope.addToWishlist() function should look similar to the following:
$scope.addToWishlist = function () {
    var newWishlist = {
        id: 'defaultWishlistId',
        owner: 'wishlistOwner@hybris.com',
        title: 'defaultWishlistTitle',
        items: [
            {
                product: $scope.product.product.id,
                amount: $scope.productDetailQty
            }
        ]
    };
    WishlistSvc.createWishlist(newWishlist);
};
At this point, you have completed all of the JavaScript logic for creating a new wishlist with a single item. The only remaining step is to add the necessary HTML to add the button on the page.
Add the Button
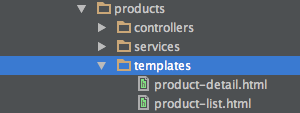
Find the product detail HTML file in the templates directory of the products module:
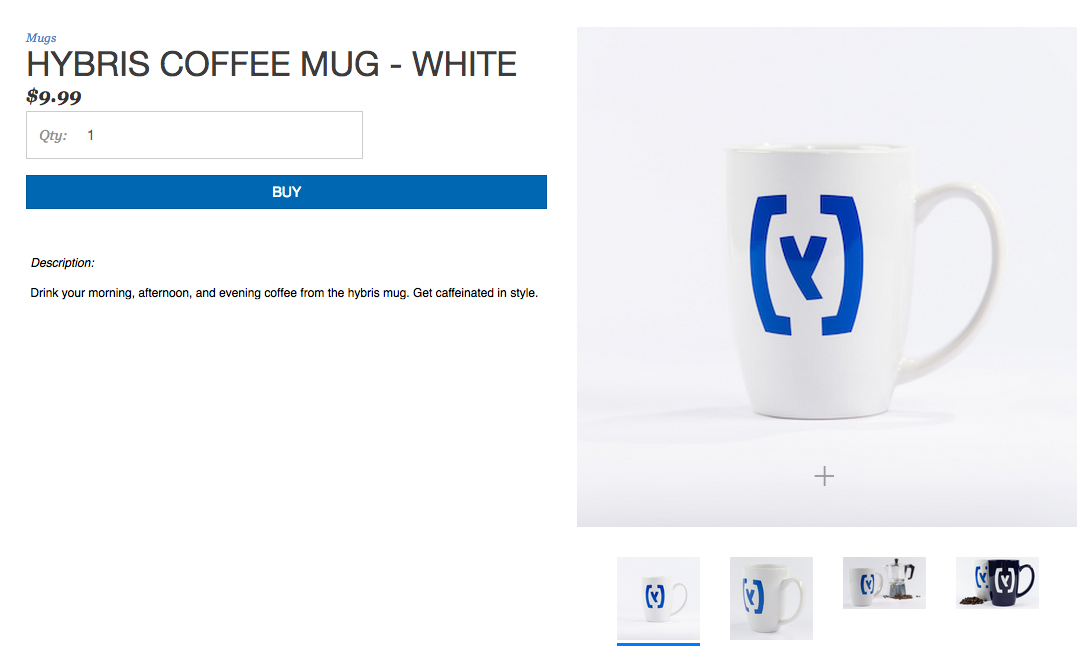
Look at the Product Detail page in your browser:
A good place for the Add to Wishlist button is directly under the BUY button and above the product's description, so find the code for the BUY button in the product-detail.html file. Search the file for the word buy, and you quickly find this block of code:
<div class="col-md-12 col-lg-12 buyButton">
    <button id="buy-button" ng-show="{{product.product.mixins.inventory.inStock}}" class="btn btn-primary " ng-click="addToCartFromDetailPage()" ng-disabled="!buyButtonEnabled">{{'ADD_TO_CART' | translate}}</button>
    <button id="out-of-stock-btn" ng-show="{{!product.product.mixins.inventory.inStock}}" class="btn btn-primary ">{{'OUT_OF_STOCK' | translate}}</button>
</div>
To have the Add to Wishlist button display under the BUY button, insert the following HTML code sample under the closing </button> tag for the Out of Stock button:
<div class="col-md-12 col-lg-12">
    <a ng-click="addToWishlist()">Add to Wishlist</a>
</div>
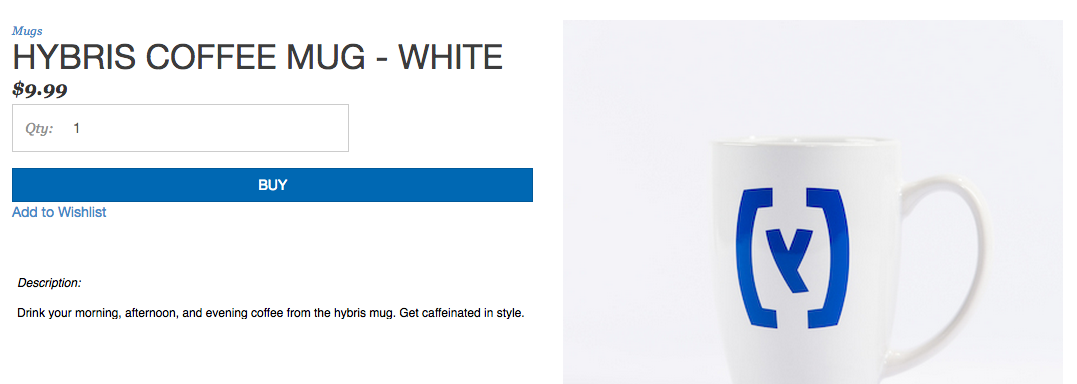
The class="col-md-12 col-lg-12" CSS attribute is for alignment purposes. Because the text is wrapped in an <a> tag, it is automatically styled as a blue underlined link. Refresh the page, and you see the text under the BUY button:
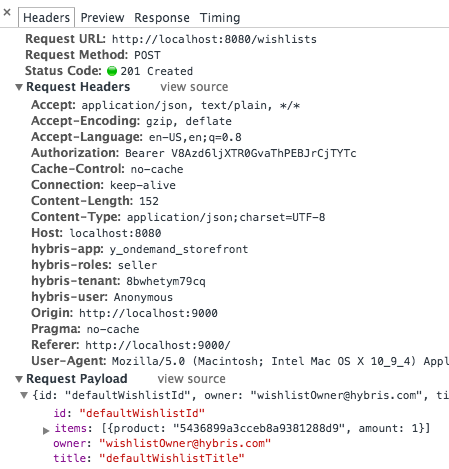
Clicking the link calls the addToWishlist() function that you added to the scope of the Product Detail page controller. Open the network tab on your developer console, and click Add to Wishlist. The following request data is passed:
Unit tests for all controllers and services in the storefront template are written utilizing the Jasmine testing framework for JavaScript. The tests are located in the yaas-storefront/test directory, and they are executed by running the Bash script scripts/test.sh from the root of the repository. Coverage reports are located in the yaas-storefront/coverage directory.
If you find any information that is unclear or incorrect, please let us know so that we can improve the Dev Portal content.
Use our private help channel. Receive updates over email and contact our specialists directly.
If you need more information about this topic, visit hybris Experts to post your own question and interact with our community and experts.