
SAP Hybris Profile
Overview
SAP Hybris Profile allows businesses to create, maintain, and continually extend customer profiles from a range of data sources. The SAP Hybris Profile platform is extensible and leverages a schema-less, flexible data structure to allow you to capture new data and insights to enrich and extend customer profiles. Consuming applications benefit from rich, contextually consistent, and relevant representations of customers that evolve over time.
SAP Hybris Profile works with SAP Hybris solutions and beyond. Starting with SAP Hybris Commerce and SAP Hybris Marketing Cloud, the connectivity will grow with innovations from the SAP Hybris ecosystem and our partners. Capturing context across all these systems of engagement supports consistently relevant experiences.
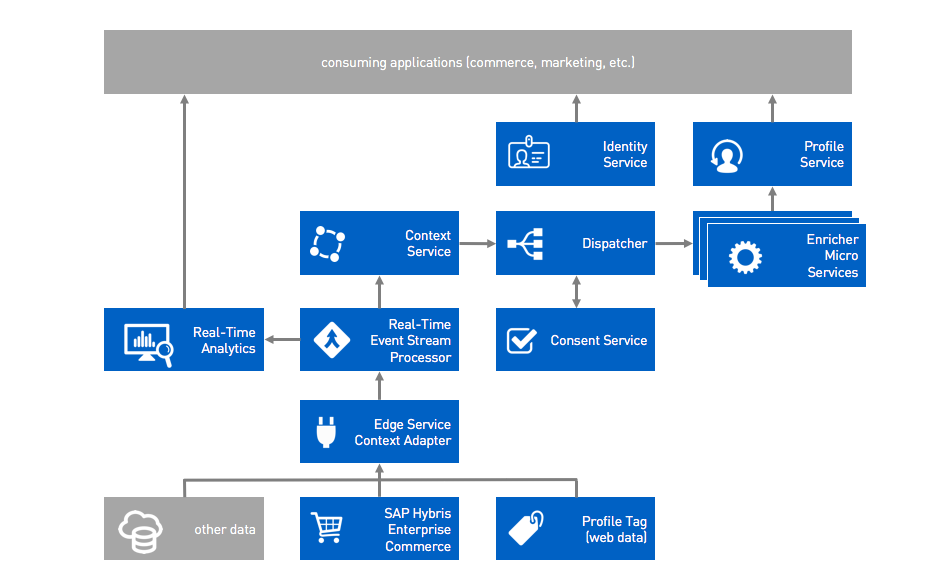
The current release version of SAP Hybris Profile focuses on the web channel, which means that it captures and processes either data coming from any website (captured using Profile's own tagging solution, Profile Tag), or clickstream and commerce data coming from an Enterprise Commerce Platform (ECP) — SAP Hybris Commerce. The following image illustrates the different types of data sources used when you extend SAP Hybris Profile on a project basis. In addition, you can extend SAP Hybris Profile to process any data, also coming from other channels or systems.
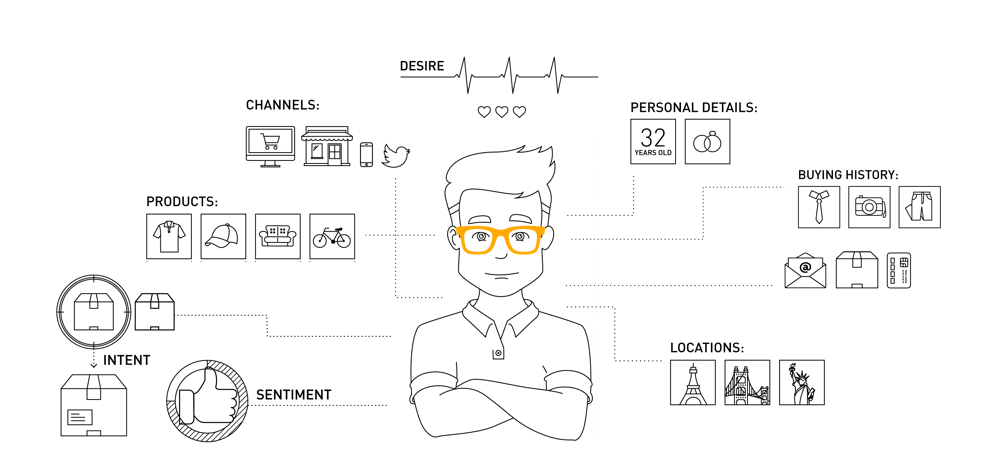
A customer profile is a collection of factual attributes, observations, conclusions, and classifications about a customer. You can derive this information from customer interactions with a brand. The customer profile can also include all business transactions in relation to that brand. Further details regarding the Profile data model and attributes can be found here
Business benefits of using SAP Hybris Profile
Using SAP Hybris Profile entails various business benefits, including:
- Improved identification of customers across different websites and channels, both for anonymous and registered users, resulting in the improved ability to communicate with precision and consistency
- Real-time context and insights into individual customer behavior, allowing to personalize and target the customer in a more relevant manner, individually and at a given moment, leading to higher take rates and improved customer experience
- Insights into audience behavior in context of channel, content and location, allowing to improve planning and optimizing customer engagement strategy
Use cases
SAP Hybris Profile is not a system of engagement in itself, but adds customer identity and deeper context to front office applications, where out-of-the-box integration exists, including SAP Hybris Commerce and SAP Hybris Marketing. The following use cases indicate how SAP Hybris Profile actively supports a data-driven customer experience across applications and channels.
Anonymous visitor tracking: create a cross-site interest profile, which builds up for recurring visits. Leverage this profile to personalize the purchase journey from initial landing page to conversion.
Optimize conversion: understand current customer insight, and react to apparent changes during sessions in real time. Track the purchase journey across multiple sessions and apply Commerce Personalization, Search and Promotion tools to drive the conversion.
Improve personalization: use insights on long term consumer behavior and preferences (brands, products, purchase patterns) to optimize your personalization strategy.
Personalized guiding selling: expose the customer profile within Assisted Selling Module (ASM) to enable the customer representative to fully personalize the engagement with the customer.
Track interactions: track every visitor interaction across multiple content types and locations to identify every touch of every piece of content for all visitors. Feed this data into SAP Hybris Marketing as rich content for segmentation, scoring and recommendations.
Score interactions: Only feed customers who meet a quality threshold into marketing for action. Trigger directly relevant actions in SAP Hybris Marketing as they happen.
- Track, measure, and aggregate visitor activity and content engagement across multiple content types, locations and channels in real time. Show aggregated information on a real-time dashboard. Integrate into your analytics platform of choice through our real-time query API.
Data Journey
How Profile works is best illustrated through an overview of the data journey with the solution. The following picture explains the steps that are relevant in this context:

Data capturing: Incoming data that contributes to a profile is called context. Profile generally supports capturing context from both streaming data and transactional data sources. For web clickstreams, SAP Hybris Profile provides a dedicated tagging solution called Profile Tag. Profile Tag allows easy mapping of web events for both commerce sites and regular web sites to Profile’s extendable event data model. For transactional data, the pre-built integration with SAP Hybris Commerce allows the capture of all customer master and commerce transactional data with minimal effort. In addition, you can extend the existing data model and API endpoints to support third-party data sources as required.
Identity management: SAP Hybris Profile focuses on identifying customers from their first interaction with the brand, which applies both to anonymous identities, on the basis of web cookies, and known identities, based on customer login. After the system processes context, the context is attributed to an existing profile if the system can match the identity. Alternatively, the system creates a new profile. Profile identity management supports session matching, cross-site matching, and cross-device matching use cases to attribute as much context as possible to an existing customer profile. In addition, if two profiles are identified as belonging to the same customer at a later point in time, the profiles are merged into a single profile through the fully-automated Profile Merge service.
Context processing: Context processing, or enrichment, happens through the so-called enricher microservices, which analyze the context in real time and then persist it as observations, transactions, or insights in a customer profile. You can freely extend enricher logic by adding additional services as part customizing SAP Hybris Profile for specific customer requirements. You can find further information for extending SAP Hybris Profile in the Extensibility chapter.
Consumption: After the system processes and persists context from SAP Hybris Profile, which happens instantaneously, the context can be consumed in two different ways. The Profile API allows real-time access to each customer’s individual profile. This API is well-structured according to the Profile Domain Model, and can either retrieve the entire profile document or subsections of it. In addition, SAP Hybris Profile provides the Real-time Reporting service, which allows you to query customer data on different aggregation levels, from a single event to aggregated calculations spanning multiple months or years.
Profile Domain Model
SAP Hybris Profile uses a document database to store each customer's profile, sessions, interactions, insights, and other relevant data. In contrast to traditional relational databases, a document database is one you can flexibly extend without explicitly redefining the structure of the database. This allows you to easily augment customer profiles with new data. Additionally, the document database allows you to store customer data in one place, within a single JSON document, and to retrieve all customer profile data with just a single request.
The profile document contains different sections which store different pieces of information. For example, one section might store observations, such as product views in a web shop. Another section may contain insights, such as affinities, classifications, etc.

Consent management
Customers might share personal information with a company through SAP Hybris Profile. Data privacy and responsible data management are essential to building trust between a company and its customers. Privacy encompasses not only data security and data encryption, but also a robust consent management system that allows customers to control the collection and use of their personal data.
Personal data could include:
- Technical browser attribute and device information
- Products viewed in a web store
- Conclusions based on interactions in a web store
- Location-based data, such as data derived from the IP address of the user
- Demographic conclusions, such as age, hobbies, and spending patterns
To address data privacy, SAP Hybris Profile allows customers to grant and revoke consent at any time. Revoking consent has these effects:
- No more data of that type is collected about this customer. This restriction applies as soon as consent is revoked.
- Existing data of that type, and all associated data, becomes inaccessible.
There are two ways to manage consents:
- You can grant and revoke consents from the REST API level, using the Consent service. To learn more, see the Extensibility chapter and the Consent service documentation.
- As an end customer, you can grant and revoke consents using the Consent Manager.
Profile components
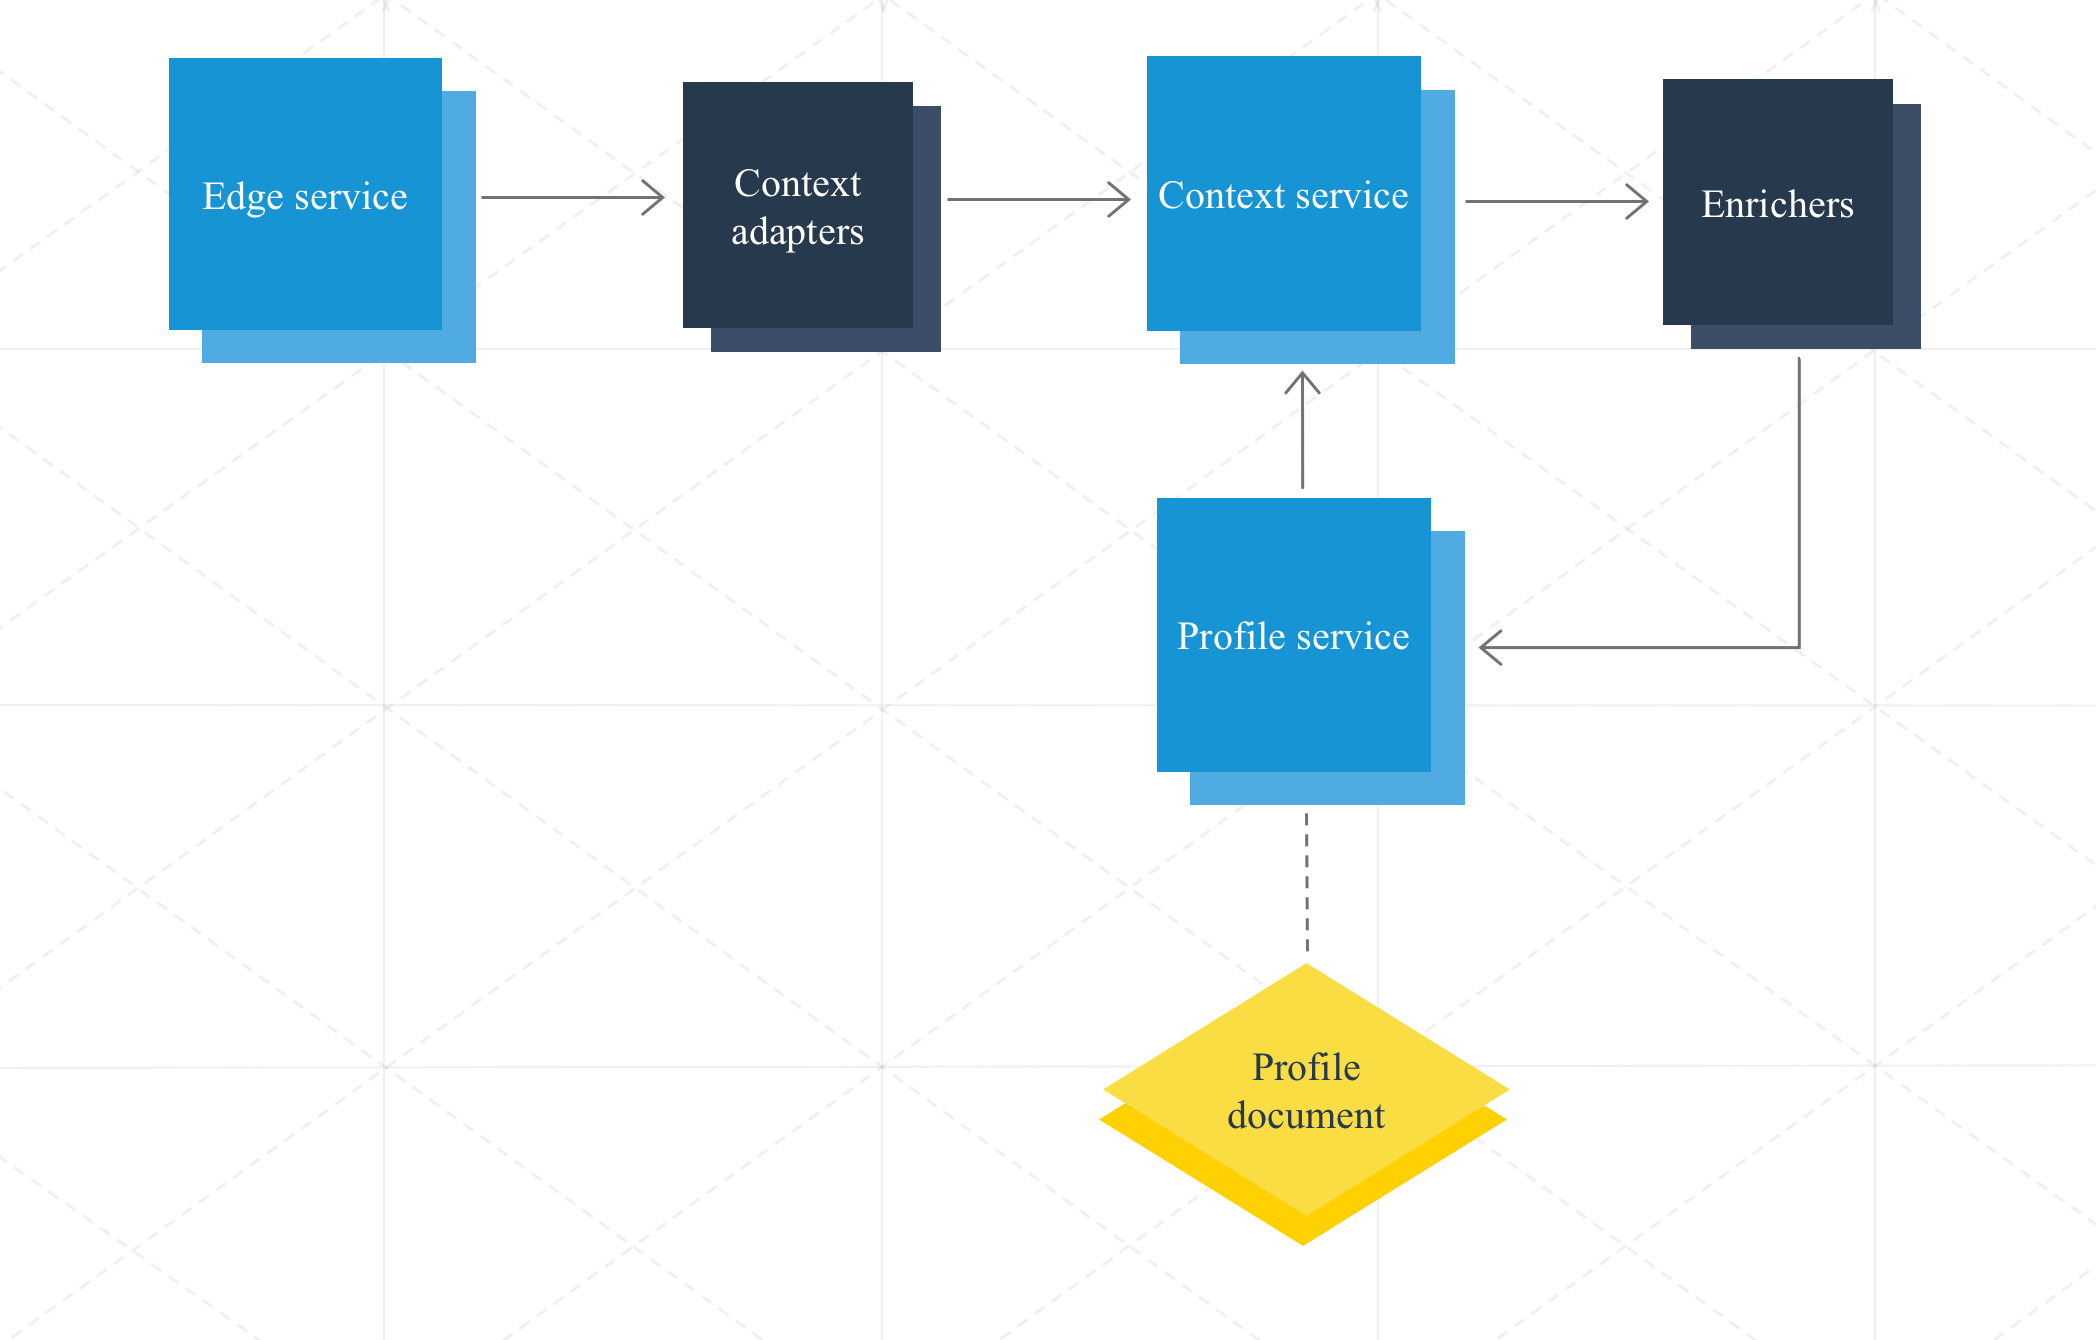
The following picture shows the main building blocks and the main data flow of SAP Hybris Profile:
You need the following components to use, integrate and extend SAP Hybris Profile:
Profile Tag: Profile Tag is the tagging solution of SAP Hybris Profile. You can use it to tag any website in order to effortlessly capture data.
Context adapters: SAP Hybris Profile retrieves data using context adapters. The system provides pre-built context adapters, such as the Edge service, to collect clickstreams and commerce data. Additionally, you can develop and register new context adapters to receive additional data streams, for example for IoT scenarios. Data flowing through context adapters need to follow a pre-defined schema. Context adapters process all received data as events, or context, inside SAP Hybris Profile.
Context service: The Context service is a big data cluster that stores all raw events before the system forwards them to the respective enricher microservices. Each enricher microservice can query the Context service to access all the message details (contexts) for further processing.
Enricher microservices: Enricher microservices process data which flows through a context adapter. Enrichers usually analyze the data, then persist insights and observations in the profile document. You can freely extend the enricher logic. For example, you can create additional insights for specific use cases.
Data privacy and consent management: In SAP Hybris Profile, you cannot collect or use customer data without the customer's consent. Using SAP Hybris Profile consent services, the brand or store owner exposes consent management to customers at any level of data granularity, from global control to fine-grained control of particular data types and sources. See the Consent management topic for details.
Dispatcher: Based on the schema of the context message, a dispatcher forwards the message to the respective enricher microservice.
Consent service: The Consent service manages all tenant and user-specific consents. It creates and returns consent references, which you can subsequently use for all requests and operations.
Profile service: SAP Hybris Profile provides a dedicated service to manage and retrieve profile documents. Consuming applications use the Profile service to retrieve either a full profile or selected parts of it.
Real-time Reporting service: In parallel to the regular data processing through the Context service and enricher microservices, the system sends data also to the Real-time Reporting service. The Real-time Reporting service of SAP Hybris Profile allows you to process large event streams (such as clickstreams or commerce data) in real time. Data aggregation happens continuously and allows you to query data on different aggregation levels, from raw event (single click) to aggregated calculations spanning multiple months or years. You can use the Real-time Reporting service either stand-alone or combined with enricher microservices, for example to create additional insights, such as average cart value, total order volume, referrer analysis, etc.
Identity service: The Identity service clusters all of a user's identities around a single profile. It provides service endpoints to create, read, alter, and delete identities, profiles, and their relations.
GDPR Overview
The General Data Protection Regulation (GDPR) is a new framework for data protection laws soon to apply in the European Union. The aim of the legislation is to strengthen and unify data protection for individuals across all EU member states. The intention behind the GDPR is to give control back to citizens and residents over their personal data, and to simplify the regulatory environment for international business by harmonizing the regulation within the EU. The regulation becomes effective as of May 25, 2018 and, unlike the previous directive, it does not require national governments to pass any enabling legislation, and is thus immediately binding in all member states. The GDPR requires companies to implement reasonable data protection measures to protect consumers’ personal data and privacy against data loss or exposure. SAP Hybris Profile meets all requirements of the new GDPR legislation.
Control Personal Data
Export all tenant customer data
SAP Hybris Profile allows you to export tenant customer data collected in a JSON file.
Example of the exported consent data
[
  {
    "14066335-b87c-4503-adff-34ba83ab1e88": [
      {
        "schema": "https://api.yaas.io/metamodel/v1/context/cdm/ProductView",
        "granted": true
      },
      {
        "schema": "https://api.yaas.io/metamodel/v1/context/commerce/AddedToCart",
        "granted": true
      },
      {
        "schema": "https://api.yaas.io/metamodel/v1/context/commerce/CategoryView",
        "granted": true
      },
      {
        "schema": "https://api.yaas.io/metamodel/v1/context/commerce/FrontendEntered",
        "granted": true
      },
      {
        "schema": "https://api.yaas.io/metamodel/v1/context/commerce/KeywordSearch",
        "granted": true
      }
    ]
  },
  {
    "65812389-z47c-6201-cdfg-12b5av495m77": [
      {
        "schema": "https://api.yaas.io/metamodel/v1/context/cdm/ProductView",
        "granted": true
      },
      {
        "schema": "https://api.yaas.io/metamodel/v1/context/commerce/AddedToCart",
        "granted": true
      },
      {
        "schema": "https://api.yaas.io/metamodel/v1/context/commerce/CategoryView",
        "granted": true
      },
      {
        "schema": "https://api.yaas.io/metamodel/v1/context/commerce/FrontendEntered",
        "granted": true
      },
      {
        "schema": "https://api.yaas.io/metamodel/v1/context/commerce/KeywordSearch",
        "granted": false
      }
    ]
  }
]
Example of the exported context data
Example of the exported profile data
To request the file, the tenant must contact the support team and then specify the preferred delivery method.
Export data of a single customer
To exercise the GDPR right to access their data, customers should contact their tenants. To export the data for a single customer, the tenants can use APIs in the:
Example of the exported consent data
{
  "14066335-b87c-4503-adff-34ba83ab1e88": [
    {
      "schema": "https://api.yaas.io/metamodel/v1/context/cdm/ProductView",
      "granted": true
    },
    {
      "schema": "https://api.yaas.io/metamodel/v1/context/commerce/AddedToCart",
      "granted": true
    },
    {
      "schema": "https://api.yaas.io/metamodel/v1/context/commerce/CategoryView",
      "granted": true
    },
    {
      "schema": "https://api.yaas.io/metamodel/v1/context/commerce/FrontendEntered",
      "granted": true
    },
    {
      "schema": "https://api.yaas.io/metamodel/v1/context/commerce/KeywordSearch",
      "granted": true
    }
  ]
}
Example of the exported context data
Example of the exported profile data
[
  {
    "id": "7e3e51c8-8d44-4777-af5d-b9b20d214b6e",
    "profile": {
      "metadata": {
        "consentReference": "7e3e51c8-8d44-4777-af5d-b9b20d214b6e",
        "lastUpdatedAt": "2017-10-27T17:27:38.254Z"
      },
      "insights": {
        "affinities": {
          "categories": {
            "category123": {
              "score": 0.3010299956639812,
              "recentViewCount": 0,
              "recentScore": 0
            }
          },
          "products": {
            "product123": {
              "score": 0.3010299956639812,
              "recentViewCount": 0,
              "recentScore": 0
            },
            "product456": {
              "score": 0.3010299956639812,
              "recentViewCount": 0,
              "recentScore": 0
            }
          }
        }
      }
    }
  }
]
Remove all tenant customer data
Upon the tenant's request, the support team can remove all the tenant's customer consent settings. This means that the system no longer stores any data regarding tenant's customers. If the tenant requests a data export before the deletion, the support team can restore the deleted data.
Rectify data of a single customer
In line with the GDPR provisions, SAP Hybris Profile allows customers to rectify their personal data in case it is inaccurate. Tenants can manually correct their customers' data using APIs in:
Integration Overview
SAP Hybris Profile provides you with a number of pre-built integrations, which allow you to set up and use pre-defined scenarios with low effort. Capture and analyze customer interactions, contexts and behaviors to create a continually evolving intelligent profile, enabling a deeper understanding of your customer's motivation and intent, in real time. This enables customer facing touchpoints, like commerce and marketing, to react and interact in much more personal ways.
Integrate SAP Hybris Profile with SAP Hybris Commerce
SAP Hybris Profile provides multiple pre-built integrations into SAP Hybris Commerce, including:
Event capture
The SAP Hybris Profile integration into SAP Enterprise Commerce allows you to capture multiple interactions and commerce events from a Hybris Enterprise Commerce storefront and to process it in SAP Hybris Profile in real time. The SAP Hybris Profile integration allows the following events to be sent to SAP Hybris Profile:
- User registration and logon events
- List item
- Order events
- Order creation
- Order shipping status
- Complete return
- Partial return
- Click events collected by the Hybris Analytics AddOn
- Category or product page views
- Add to cart
- Remove from cart
- Change quantity
- Technical data
- User agent
- Operating system
- Accept-headers
- Device type
- Piwik ID
- Referrer
- Screen resolution
To find more information, see the SAP Hybris Commerce documentation.
Customer Experience (CX) Smart Edit for personalization
The integration with SAP Hybris Profile allows you to map the user data from SAP Hybris Profile to segments, and use it in the personalization process.
To learn more about the integration process, visit the Integrating Personalization with SAP Hybris Profile section.
Assisted Service Module (ASM)
Assisted Service Module (ASM) enables customer service personnel to provide real-time customer sales and service support using the same storefront across the omni-channel framework. Customer Agents can provide support using ASM in physical shoulder-to-shoulder in-store scenarios and virtual online scenarios. You can integrate ASM Additional Information Framework (ASM-AIF) with SAP Hybris Profile to support displaying personalized customer-related information to customer support agents. The integration is not provided out-of-the-box and you must set it up manually.
More information can be found at help.hybris.com.
Integrate SAP Hybris Profile with SAP Hybris Marketing
SAP Hybris Profile services for Marketing allow you to consolidate user tracks and behaviors captured by SAP Hybris Profile, and to transfer this information to SAP Hybris Marketing. SAP Hybris Marketing persists this data as Interactions and Contacts. You can further use the persisted information in the marketing processes within SAP Hybris Marketing.
The system consolidates web and commerce insights from SAP Hybris Profile on a per session basis, and publishes this data for consumption by the SAP Hybris Marketing application. During the consolidation process, the system considers both interactions followed by registration and only-unique interactions. The consolidation process starts upon the web session timeout. SAP Hybris Marketing includes these interactions, for example, in segmentation, scoring, campaign execution, and so on.
For information on how to integrate with:
- SAP Hybris Marketing Cloud, see Integration with SAP Hybris Profile.
- SAP Hybris Marketing, see Integrating with SAP Profile Services for Marketing.
The SAP Hybris Profile services for Marketing package includes an enricher, a microservice, and a dedicated user interface.
Hybris Marketing Consolidation enricher
This enricher aims to consolidate interactions of a user on a commerce website. This enricher segregates marketing-relevant events, consolidates them, and publishes them for consumption in SAP Hybris Marketing. The PubSub mechanism facilitates receiving messages and publishing them to SAP Hybris Marketing.
Hybris Marketing Consolidation enricher has a default configuration. After the session times out, this enricher retrieves data related to user activities performed during the session from SAP Hybris Profile core services. Currently, the system supports the following interaction types from SAP Hybris Marketing:
for non-e-commerce:
- WEBSITE_VISIT: Visits to the website
- WEBSITE_SEARCH: Searches on the website
- WEBSITE_DOWNLOAD: Downloads from the website
- WEBSITE_VIDEO: Videos viewed on the website
- WEBSITE_REGISTRATION: Registrations at the website
for e-commerce:
- SALES_ORDER: Orders completed on the e-commerce website
- SHOP_ITEM_ADD: Product added to the shopping cart
- SHOT_ITEM_VIEW: Product viewed on the e-commerce website
The enricher then processes the responses received and builds the consolidated output in the format required by SAP Hybris Marketing. Finally, the enricher publishes the consolidated output to the marketing PubSub topic.
Profile Services for Marketing Configuration microservice
Use this service to configure the data sent to the SAP Hybris Marketing system from SAP Hybris Profile. This service enables you to configure fields in the payload and set filter criteria to transfer data to the SAP Hybris Marketing system. For example, configure a threshold against an interest and if the user’s interest score goes beyond the threshold, the user is transferred to SAP Hybris Marketing. You can configure these fields using the dedicated user interface as well.
Integrate SAP Hybris Profile with other systems
You can integrate SAP Hybris Profile into any third party system to:
- Tag a commerce or non-commerce website using Profile Tag
- Send data to a profile using the Edge service
- Use existing enrichers (Contact Details enricher, Commerce enricher, etc.) to enrich or extend a profile
- Use the Profile service to retrieve the profile
- Use the Identity service to manage identities
- Use the Real-time Reporting service for integration into Analytics systems
Extensibility Overview
SAP Hybris Profile offers you several ways to extend the system. The flexibility of the microservice-based architecture allows businesses to ingest, process, and analyze data from various sources.
As a business, you can augment the SAP Hybris Profile system with custom-developed extensions that capture and interpret profile data.
If you lack an entry point for particular customer or context data, extend the product and add that entry point. For example, to add a customer's Instagram data to SAP Hybris Profile, you can write and submit a new service to collect that data. Extensions can also analyze existing data to find new patterns and draw new conclusions. For example, a new service could analyze product view history and conclude that a customer has an affinity for button-down dress shirts with stripes. Other applications can use that analysis to enhance customer service and send the customer online coupons for these types of shirts.
SAP Hybris Profile offers the following extension points to:
- add additional data
- process data
- create additional insights
Introduction to enrichers and context adapters
The extensible architecture of SAP Hybris Profile relies on microservices, namely context adapters and enrichers. These extensions are responsible for fetching, processing, and analyzing data within the system. To collect rich and meaningful data about your customers, you can use the pre-developed extensions that are available in your licensed packages, or develop your own services.
For example, if you are curious about where your customers come from, what devices they use to browse your website, or which product categories are their favorites, you can retrieve such data from the enrichers, which you activate in your package. If the pre-defined set of extensions does not offer a functionality that you seek, you can always develop your own customized extension that meets all your business needs.
Data processing
This section explores the flow of data that enters the SAP Hybris Profile system.
A request enters the system through the Edge service, which forwards the request to the relevant context adapters. Context adapters optionally transform context, for instance, by normalizing address formats, before passing it to the Context service.
The system dispatches an event to enrichers. Note that each request, such as a product-view event, contains a schema that is associated with a set of enrichers.
A single schema can trigger multiple enrichers.The enricher optionally fetches additional context data. For example, it can interpret purchasing data and contemporaneous weather station data to yield new data that indicates the customer is a rainy-day shopper. The enricher can use additional data from the customer profile document during this enrichment process.
The enricher calls the Profile service to persist the enriched data in the customer profile document. The Profile service writes the information about the changes in the customer profile document to the Context service, which, in turn, can trigger other enrichers.
Sections of the profile document
A dedicated enricher writes particular data to the profile document, such as a customer's identifying information, or a customer's orders. Metadata for each dedicated enricher specifies a context schema defining the request that triggers the enricher, and profile schemas defining the data that the enricher writes to the profile document. For example, the metadata specifies the following schemas for the Contact Details enricher:
- Schema
context/commerce/UserRegistered: Specifies that a user-registered event triggers this enricher - Schema
context/commerce/UserLoggedIn: Specifies that a user-logged-in event triggers this enricher - Schema
context/commerce/FrontendEntered: Specifies that a frontend-entered event triggers this enricher - Schema
profiles/observations/web: Specifies that this enricher writes web-related data to the profile document - Schema
profiles/contactDetails: Specifies that this enricher writes customer contact details data to the profile document - Schema
profiles/addresses: Specifies that this enricher writes customer address data to the profile document
Events processed by SAP Hybris Profile
Every time you perform an action, SAP Hybris Profile gathers information and records it in your profile document. Extensions configured to react to certain events communicate with the Profile service, which saves relevant data to users' profiles. Here are the events that the SAP Hybris Profile system processes:
| Event | Sent when... | Event processing outcome | Sample event sent to Edge service | Event outcome in the profile document |
|---|---|---|---|---|
| user-registered | a new user registers for the storefront and provides personal data | The Contact Details enricher saves the user's personal data to the profiles/contactDetails, profiles/addresses, and profiles/observations/web sections. | Sample event | Sample profile |
| user-logged-in | a user signs in to the storefront using the created credentials | The Contact Details enricher saves the user's personal data to the profiles/contactDetails, profiles/addresses, profiles/observations/web sections. | Sample event | Sample profile |
| frontend-entered | a user enters the storefront | The event activates the Contact Details enricher that saves information in the profiles/contactDetails and profiles/addresses sections, and the Page View enricher that saves information to the profiles/observations/web, profiles/insights, and profiles/extensions section. | Sample event | Sample profile |
| session-started | a user begins a storefront browsing session | The Session Data enricher writes information about the start of a session to the profiles/observations/web section, and the Device Characteristics enricher saves information to the profiles/observations/web, and profiles/userAgents sections. | n/a | Sample profile |
| session-timed-out | the current session ends due to a time-out | The Session Data enricher writes the information to the profiles/observations/web section, and the Search Characteristics enricher writes to the profiles/observations/web and profiles/insights/affinities sections. The Page View enricher writes to the profiles/insights/assets section. | n/a | Sample profile |
| session-idled | no new events appear after the last session-timed-out event | If a session is idle for a predefined amount of time, the Session Data enricher sends an event to the Scheduled Event service to remove all information about the session upon the lapse of the period. | n/a | n/a |
| product-view | a user views details of a particular product during the current session | The Commerce enricher saves this data to the profiles/observations/web and profiles/insights/affinities sections. The Lightweight Masterdata enricher also saves the data to the profiles/insights/affinities section. The Page View enricher saves the data to the profiles/observations/web/ section. | Sample event | Sample profile |
| category-view | a user browses a particular category during the current session | The Commerce enricher saves this data to the profiles/observations/web and profiles/insights/affinities sections, and the Page View enricher saves the data to the profiles/observations/web section. The Lightweight Masterdata enricher saves the data to the profiles/insights/affinities section. | Sample event | Sample profile |
| added-to-cart | a user adds a product to the cart | The Commerce enricher saves this data to the profiles/observations/web section, and the Page View enricher saves the data to the profiles/observations/web/ section. | Sample event | Sample profile |
| modified-cart | the quantity of products in the cart changes | The Commerce enricher saves this data to the profiles/observations/web section, and the Page View enricher saves the data to the profiles/observations/web/ section. | n/a | Sample profile |
| order-cancellation | a user cancels the order | The Commerce enricher saves this data to the profiles/transactions/orders section. | Sample event | Sample profile |
| order-created | a user places a new order | The Commerce enricher saves this data to the profiles/transactions/orders section, the Page View enricher saves the data to the profiles/observations/web section, and the Order-Statistics enricher adds the data to insights.metrics.orders section. | Sample event | Sample profile |
| order-shipment-update | the order is shipped | The Commerce enricher saves this data to the profiles/transactions/shipments section. | Sample event | Sample profile |
| partial-return | a user performs a partial return | The Commerce enricher saves this data to the profiles/transactions/returns section. | Sample event | Sample profile |
| removed-from-cart | a user removes a product from the cart | The Commerce enricher saves this data to the profiles/observations/web section. It does not delete the product entry from the profile JSON but sets the quantity to 0. The Page View enricher saves the data to the profiles/observations/web section. | Sample event | Sample profile |
| return | a user performs a complete return | The Commerce enricher saves this data to the profiles/transactions/returns section, and the Order-Statistics enricher adds the data to insights.metrics.orders section. | Sample event | Sample profile |
| keyword-search | a user performs a keyword search when browsing a storefront | The activated Search Characteristics enricher writes to the profiles/observations/web and profiles/insights/affinities sections, and the Page View enricher saves the data to the profiles/observations/web section. | Sample event | Sample profile |
Profile enrichment
Processing events leads to customer profile enrichment. The system contains numerous pre-developed microservices that provide you with significant information about your customers. This section presents an overview of the available enrichers.
Contact Details Enricher
Upon registration or login, the Contact Details enricher adds subdocuments containing address and contact details to the user's profile document. The enricher also connects these details using internal links, and associates them with a relevant session. Read more about this enricher in the Contact Details enricher documentation.
Session Data Enricher
The Session Data enricher adds session data to a session-related section in the profile document. The enricher also extracts the strongId, if applicable, and links it with the user's profile in the Identity service, as well as removes idle sessions. Read more about this enricher in the Session Data enricher documentation.
Lightweight Masterdata Enricher
The Lightweight Masterdata enricher is a lambda enricher that allows you to store the names of products and categories in a profile document. Read more about this enricher in the Lightweight Masterdata enricher documentation.
Current Session Enricher
The Current Session enricher is a lambda enricher that copies the last updated session data into the property path observations.web.currentSessions.{sessionId}. Read more about this enricher in the Current Session enricher documentation.
Metadata management
The metamodel is a graph database within the SAP Hybris Profile system that persists metadata describing service functions and relationships. See the Enricher Authorization service for details about how to register, view, and manage service metadata in the metamodel.
Context adapter metadata
Each context adapter registers writesTo metadata in the metamodel that describes its generated context events. The following metamodel registration entry specifies that the Piwik context adapter generates context/commerce/FrontendEntered events that are encrypted at the user level:
{
  "name": "Piwik Context Adapter",
  "writesTo": [
    {
      "schema": "context/commerce/FrontendEntered",
      "schemaTitle": "FrontendEntered",
      "schemaDescription": "Customer entered shop",
      "consentClass": "Observations",
      "searchable": false,
      "encryptionType": "user"
    }
  ]
}
Enricher metadata
Each enricher registers two types of schemas in the metamodel:
- triggeredBy: The schemas defining the context events that trigger the enricher
- writesTo: The schemas defining the data structures that each enricher writes to the profile document
This example illustrates a registration entry in the metamodel for an enricher triggered by, among others, Piwik events. The enricher writes observations (observations), contact details (contactDetails), and address (addresses) data to the database:
{
  "name": "Contact details enricher",
  "triggeredBy": [
    "context/commerce/UserRegistered",
    "context/commerce/UserLoggedIn",
    "context/commerce/FrontendEntered"
  ],
  "writesTo": [
    {
      "schema": "profiles/observations",
      "schemaTitle": "Observations",
      "schemaDescription": "Section to store the profile-relevant observations.",
      "consentClass": "Observations",
      "encryptionType": "user"
    },
    {
      "schema": "profiles/contactDetails",
      "schemaTitle": "ContactDetails",
      "schemaDescription": "Section to store information about this profile contact details.",
      "consentClass": "ContactDetails",
      "encryptionType": "user"
    },
    {
      "schema": "profiles/addresses",
      "schemaTitle": "Addresses",
      "schemaDescription": "Section to store information about this profile addresses.",
      "consentClass": "Addresses",
      "encryptionType": "user"
    }
  ]
}
Other metadata
The metamodel also includes more global information, such as:
- The available tenants and enricher services
- The enricher services to which each tenant is subscribed
Modify the metamodel event flow
Because the metamodel stores data in a form of a graph that you can arbitrarily alter and extend, the relationships among data in the metamodel are not fixed, and you can significantly alter these relationships by changing the metamodel data structure.
Subscribing to new enrichers and context adapters, as well as unsubscribing from pre-existing enrichers and context adapters, changes data-flow pathways in the system. Adding or removing enrichers in the metamodel might cause the other enrichers that exist within a project to either initiate or cease communication with one another. As a result, the data flow that an event triggers can follow a new route.
This diagram illustrates the data flow definition in the metamodel: Enricher 1 writes to Schema 1, which in turn triggers Enricher 2 to write to Schema 2.
Consider a scenario in which you add a new enricher to the metamodel. The new enricher writes a type of data similar to that of Enricher 2 in the diagram. If the client prefers the newly-added enricher because it is more efficient than Enricher 2, you can direct the data towards, and process it through, the new enricher instead of the original.
In this scenario, Enricher 2.1 is added to the metamodel so that it replaces Enricher 2's functionality. Note the change of the data flow.
Create a context adapter
Create a service for your context adapter
To create the proper environment to register your context adapter and integrate it with SAP Hybris Profile, you must create a new service in YaaS.
Unlike enrichers, you can access context adapters directly through an API. Therefore, when registering your context adapter, define it as a service.
Go to the Builder and select an organization.
Navigate to Projects > {Your Project} > Services, and click + SERVICE.
You need a project to create a new service. To learn how to create a new project, see the Create Projects section.Complete the required fields in the Register New Service section.
The identifier must be unique within your organization.Click Save to register your service in YaaS.
Define writesTo schemas
Before you register your context adapter, you must specify the schema or schemas that identify the type of events that the context adapter passes into the SAP Hybris Profile system. For example, the schema context/commerce/ClickstreamStatistics indicates that the context adapter generates a clickstream statistics event.
Browse available schemas
To check whether the schemas that you require are already defined in the system, browse the list of all available schemas. To learn how to retrieve the list of schemas, see the Browse available schemas topic in the Enricher Registration section.
writesTo schemas.Define new schemas
If, among the available schemas, you cannot locate the schemas that you require, you can define your own writesTo schemas. For details about registering new schemas, see the Define new schemas topic in the Enricher Registration section.
Store events in the Context service
Context adapters receive events and adapt the data for entry into the profile documents. However, context adapters cannot directly call the Profile service to persist data in the profile documents. Instead, context adapters pass the events to the Context service. The service then dispatches the events to enrichers, which persist the data in the profile documents.
Create an enricher
Create a new enricher
To create the proper environment for the registration of your enricher and its integration with SAP Hybris Profile, create a Builder module in YaaS.
Unlike services, you do not need to directly access enrichers through an API to integrate them with SAP Hybris Profile. Therefore, if you want to register your enricher, define it as a Builder module rather than as a service.
Go to the Builder and select an organization.
Navigate to Projects > {Your Project} > Builder Modules, and click + NEW BUILDER MODULE.
You need a project to create a new Builder module. To learn how to create a new project, see the Create Projects section.Select a package, or packages, according to your needs. Your enricher needs the Profile Core Services package to function properly.
Select the required scopes, then click Next. To use your enricher efficiently, you need these scopes:
- hybris.profile_view - required if your enricher reads data from the profile document
- hybris.profile_manage - required if your enricher introduces changes to the profile document
- hybris.profile_context_view - required for your enricher to read events
Complete the required fields in the Register Builder Module section.
The identifier of the Builder module becomes your enricherId in the metamodel. The identifier must be unique within your organization.Click Save to register your Builder module in YaaS.
Enricher registration
To convert your Builder module into an enricher, register it in the SAP Hybris Profile metamodel. Before you register an enricher, you must define the schemas that trigger your enricher, as well as the schemas that represent the data structures it affects in SAP Hybris Profile.
Define triggeredBy and writesTo schemas
If the enricher that you create reacts to unique events, or affects unique data types in the profile document, you might need to define new triggeredBy and writesTo schemas. Otherwise, browse a list of available schemas to locate the schemas that you require.
Browse available schemas
To check if the schemas that you require are already defined in the system, browse the list of all available schemas. Make a GET request using a /schemas endpoint, as demonstrated in the API Reference section of the Enricher Authorization service documentation.
The response returns all schemas registered in the metamodel. This example displays only a subset of the returned schema list:
writesTo schemas.Define new schemas
If you are unable to locate the schemas that you require among the available schemas, you can define your own triggeredBy and writesTo schemas. When defining the properties of your schema, make sure to retain the standard schema format.
The properties that you need to determine when creating a new schema:
- schemaTitle - the name of your schema
- schemaDescription - a brief description of the scope of your schema
- consentClass - the consent class to which your schema belongs
- searchable - "true" or "false"; determines whether the schema is searchable
- encryptionType - the type of encryption used to encrypt the data (
tenantoruser)
For details about how to register new schemas, see the Enricher Authorization service documentation.
Trigger by context events
Both context adapters and profile document changes create context events that trigger enrichers.
Your enricher's 'triggeredBy' schemas specify which context events your enricher reacts to.
The Profile service writes to the Context service an event message that triggers changes to the profile document.
Create a topic
Enrichers read messages from PubSub topics. Each enricher has its own topic. The topic name for your enricher is profile.profile-dispatcher.{hybris-client}, where hybris-client parameter is your hybris client name from the Builder.
A topic for your enricher is automatically created upon enricher registration. See the PubSub documentation for more details.
Store data in the Profile service
Enrichers have full access to the Profile service API. Through calls to this API, your enricher can introduce changes to the profile documents.
Get messages from PubSub
When an event occurs, the system sends a message to the PubSub service. The SAP Hybris Profile system creates a separate messaging channel, called a topic, for each enricher in the PubSub service. The topic owner is "profile.profile-dispatcher". Only one enricher is permitted to read messages from a given topic. For example, if you register an enricher with the ID "myorg.myenricher" in the metamodel, you can read its messages using the https://api.yaas.io/hybris/pubsub/v1/topics/profile.profile-dispatcher/myorg.myenricher/read endpoint. See the PubSub API Reference for more details.
By subscribing your tenant to the package that contains a given enricher, you implicitly allow that enricher to read, from its topic, the messages that belong to that tenant. An enricher reads only the events that are associated with the tenants subscribed to these packages:
- any packages containing this enricher
- the Events package
- the Profile Core package
When you call the PubSub service, you must provide your enricher's credentials: Client ID and Client Secret. To retrieve those credentials, follow these steps.
- Go to the Builder.
- Select your organization.
- Navigate to Projects > {Your Project} > Builder Modules.
- Select your enricher and go to the Client authorization section.
- Click Unlock and copy your enricher credentials.
Track data in the Trace Explorer
Tracing module
By monitoring events in SAP Hybris Profile, you can gather the details about the exact time of calls between services, and the duration of specific operations. Monitor events using a tracing tool based on the Zipkin tracking system, and defined in YaaS as a Trace Explorer Builder module.
SAP Hybris Profile collects timing data from the core services and enrichers to help you identify any latency problems. For example, when a service sends a request to an enricher, it passes the information about the time of the call to the system, and you can retrieve the information later. The system also gathers information about the time the enricher receives the request, as well as when that enricher returns the processed data.
Available trace data
This data is available in the Trace Explorer:
- The time the source service sends an outbound request
- The time the target service receives a request
- The time the target service responds to a request
- The time the source service receives an inbound response
By analyzing this data, you can measure how much time a request needs to reach a given service, how long it takes that service to process the request, and how much time passes until the source service receives a response.
Track events
Each event has a unique contextTraceId attribute that you can use to track the route of the event in SAP Hybris Profile. For more details about the contextTraceId attribute, see the Context events section.
To activate event tracking across SAP Hybris Profile, include a X-B3-Sampled header with a value of 1 in your request to the Context service. If you pass this header with a value of 0, or do not include this header in your request at all, tracking is not activated.
Monitor event flow in the Trace Explorer
The Trace Explorer Builder module is part of the Profile Core Services package. Subscribe to that package to get access to the Trace Explorer.
To fetch the tracked data, follow these steps:
- Go to the Builder.
- In the left navigation menu, click Hybris Profile Developer Tools.
- Select the Trace Explorer module.
- To read the timing data about the events processed by a given enricher, go to the ENRICHER ID tab and complete the dedicated field with the ID of that enricher. Alternatively, to see which services processed that event, go to the CONTEXT TRACE ID tab and enter the id from the Context service response in the dedicated field.
- Click SEARCH in either of the tabs to display the visualized traces. The traces consist of the spans that symbolize the services involved in the flow, and their execution time.
Debug enrichers
Using Trace Explorer, you can monitor whether enrichers receive and process events successfully. To track the event flow, pass a X-B3-Sampled header with a value of 1 in your request to the Context service, as shown in the example. For more details, see the Track events section.
curl -X POST -H "Authorization: Bearer 022-f9d7fabb-06bb-4b42-b0c2-c7716a7ff89e" -H "consent-reference: 56bd66f8-22f3-447e-8636-51ef6c9c71c1" -H "X-B3-Sampled: 1" -H "operation: STORE" -H "schema: context/commerce/ProductView" -H "Content-Type: application/json" -d '{
    "customerId": 1122322241,
    "productId" : 11232222315,
    "action"    : "view",
    "tenant"    : "mytenant"
}' "https://api.yaas.io/hybris/profile-context/v1/mytenant/data"
The response includes the id attribute that becomes a contextTraceId of a given event flow:
{
  "id": "523dd1d0-de4d-11e6-99a8-d9bb373dc57d",
  "link": "https://api.yaas.io/hybris/profile-context/v1/mytenant/data/523dd1d0-de4d-11e6-99a8-d9bb373dc57d",
  "consentRefId": "c14cc93c-9b12-46a2-8c47-9bc504412be3"
}
To see which services processed that event, copy the id attribute, and go to the Trace Explorer Builder module. Open the CONTEXT TRACE ID tab and enter the copied id in the dedicated field, then click SEARCH
Alternatively, search the details of enricher event processing by enricherId, which equals the ID of a given Builder module. For more details, see the Create Builder module section.
Enable tracing in your storefront using the dedicated script
To enable tracing in your storefront, follow these steps:
- Insert the following script into the website when building your storefront.
window.Y_TRACING = window.Y_TRACING || function () { (window.Y_TRACING.q = window.Y_TRACING.q || []).push(arguments); }; var s = document.createElement('script'); s.type = 'text/javascript'; s.async = true; s.src = 'https://s3.amazonaws.com/blobs-yaas-storks/tracing-for-storefronts/tracing.min.js'; var x = document.getElementsByTagName('script')[0]; x.parentNode.insertBefore(s, x); window.Y_TRACING( { tenant: 'yourtenant', builderUrl: 'https://builder.yaas.io/', basePiwikUrl: 'https://api.yaas.io/hybris/profile-edge/v1/' });- tenant: Your tenant name
- builderUrl: The URL of the Builder
- basePiwikUrl: The URL of the Edge service
- Add the profileTracingDebug parameter to the storefront URL and set its value to
true. Your storefront URL should look as follows:http://example.com?profileTracingDebug=true. - The script inserts a X-B3-Sampled header with a value of
1into the payload of the events that customer activity in the storefront generates. The storefront then sends the events to the Edge service. - The Edge service response contains the contextTraceId that you can use in the Trace Explorer to read the traces of a given event. Additionally, a link generated on the basis of that contextTraceId appears at the top of the screen.
- Click the link to open the Trace Explorer, where you can view all traces for a specified contextTraceId.
Enable tracing in your storefront using the Profile Tag
You can also enable tracing in your storefront using the Profile Tag in the debug mode. To learn what the Profile Tag is, and how it works, see the Profile Tag documentation.
To trace customer activity in your storefront using the Profile Tag, follow these steps:
- Activate the Profile Tag debug mode by adding the profileTagDebug parameter to your storefront URL and setting the parameter to
true. With this debug flag, your storefront URL should look as follows:http://example.com?profileTagDebug=true. - Open your browser developer tools (for example, in Google Chrome, select the Chrome menu at the top-right of your browser window, then select Tools > Developer Tools) to view the details available only in debug mode, such as tenant name and contextTraceId, associated with events that customer activity generates.
- Copy the contextTraceId from your developer tool.
- Open the Trace Explorer in the Builder.
- Paste the copied contextTraceId into the dedicated field in the CONTEXT TRACE ID tab.
- Click SEARCH to see the traces for a specified event.
Trace logs
To read the data about the events that a given enricher processes, go to the Trace Explorer Builder module and open the ENRICHER ID tab. In the dedicated field, enter the ID of the Builder module that the enricher is registered as, and click SEARCH.
The traces that the Trace Explorer displays consist of spans that indicate how much time each service needed to process a given message.
One contextTraceId identifies a full, single event flow. In this case, the event flow is the route from the Context service through an enricher and the Profile service, back to the Context service. An event from the Context service triggers an enricher. The enricher introduces changes to the profile document, which results in a new event that triggers another enricher. A single contextTraceId identifies this cycle. When changes the enricher makes in the Profile service result in a new event that triggers another enricher, a new event flow with a new contextTraceId begins. This is when a Context Transition takes place.
By displaying contextTraceId attributes in the Context Transition UI element, Trace Explorer shows how many event flows a given enricher was involved in.
Apart from the contextTraceId values, the Trace Explorer also displays schemas associated with each contextTraceId that stands for a given event flow. The schemas define events created by one enricher and triggering another enricher, and indicate where a context transition takes place.
Error scenario
The Trace Explorer helps you diagnose any event processing problems. If your enricher fails to process an event, you will see an error message in the logs. An error message indicates why the operation was not successful so that you can fix the problem.
For example, when the message indicates that you do not have a consent for a given schema, go to the Consent service to resolve the issue.
Extension configurability
SAP Hybris Profile allows you not only to extend the system with various microservices, but also to configure those extensions according to your needs. You can change the behavior of your enrichers and context adapters more easily by adjusting the properties of the code, instead of modifying the code itself.
Use the Configuration Explorer to define some common parts of the code, routines, or even whole services, and later reuse them and run them parametrized. Benefit from creating your own sets of variables, configuring the pre-defined variables, and including them in your source code. That leads to less code, fewer bugs, and more control over the performance of your SAP Hybris Profile instance.
Identity management
Identity resolution and identity management are key enablers for contextual marketing and commerce. They connect multiple sources of identity and customer information to support robust targeting, personalization, and addressability across touchpoints and devices. The SAP Hybris Identity service clusters all of a user's identities around a single profile. It provides service endpoints to create, read, alter, and delete identities, profiles, and their relations.
Use cases
The following examples explain the benefits of proper identity management.
Scenario 1: Customer uses multiple devices
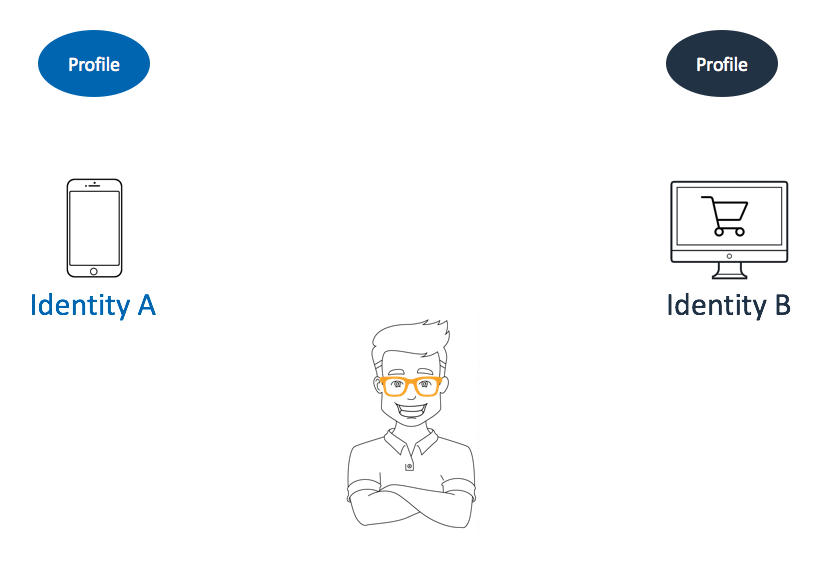
Assume an anonymous customer interacts with a brand without signing in, first using a mobile device and later a PC. At this point, in the beginning, the system can only create two different profiles and two different identities.
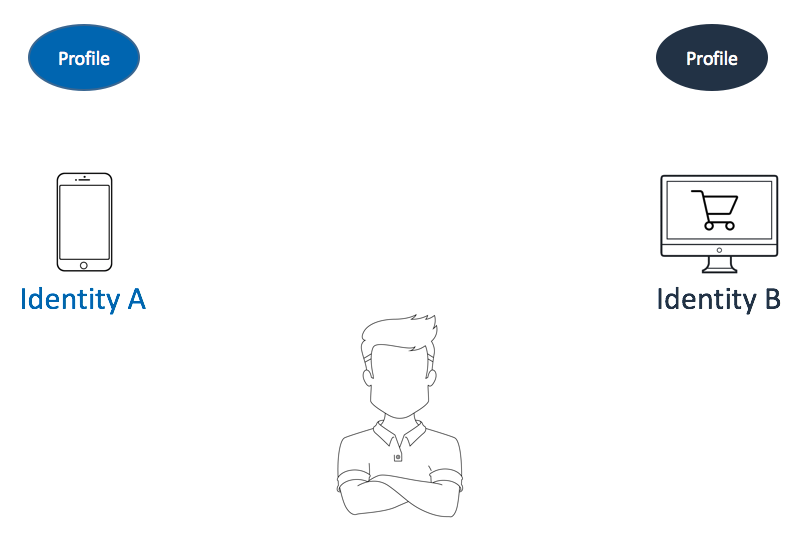
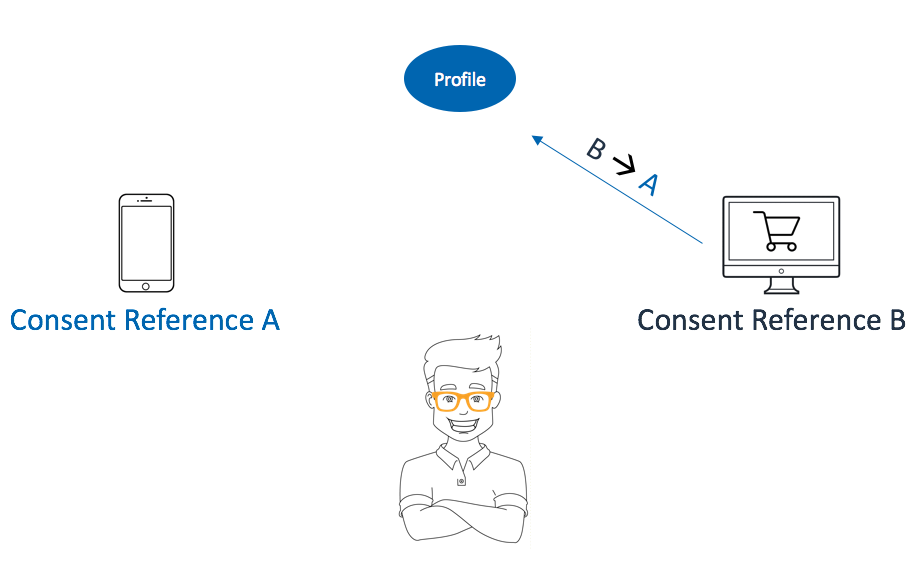
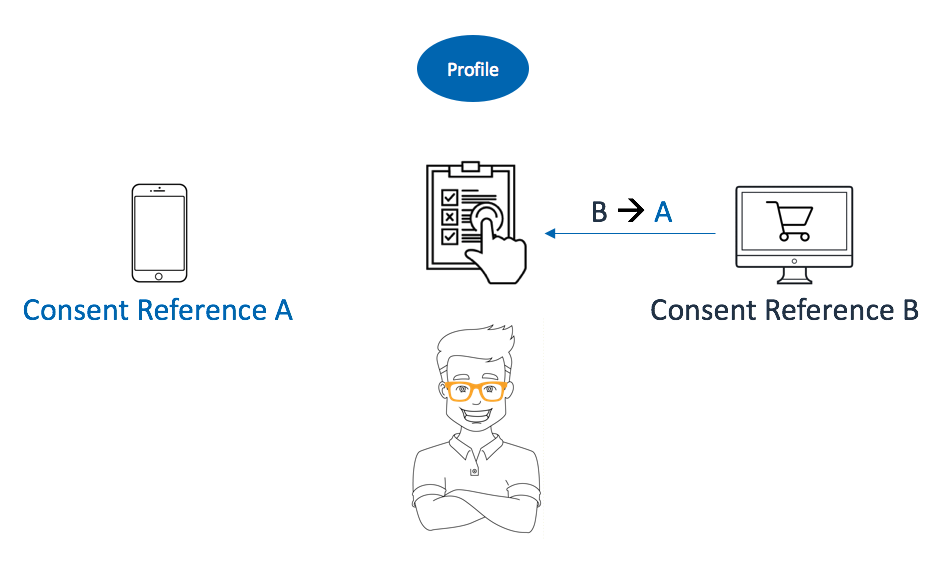
At a later point, that customer signs in for the first time on either of the two devices. One of the profiles receives an additional identity. Then that customer uses the same login on the other device, too. Now SAP Hybris Profile knows that these two profiles are the same person.
This puts SAP Hybris Profile in a position to merge these two existing profiles into one. Suppose that SAP Hybris Profile chooses the light blue profile to live on; the dark blue profile gets abandoned. The customer continues to use the PC. The interactions with the brand send events that come with consent reference B. The Identity service makes sure that these events find their way to the profile with consent reference A.
Scenario 2: Consistent consent management
Whenever customers make changes to their consents, this affects the consent settings on all devices. Consider a customer using a mobile device to revoke consent for age estimation. Later, the same person opens the consent management page on a PC and sees that consent revoked. Such omni-channel consistency is important because it gives the customer a consistent experience across multiple platforms.
Scenario 3: Consistency at consumption
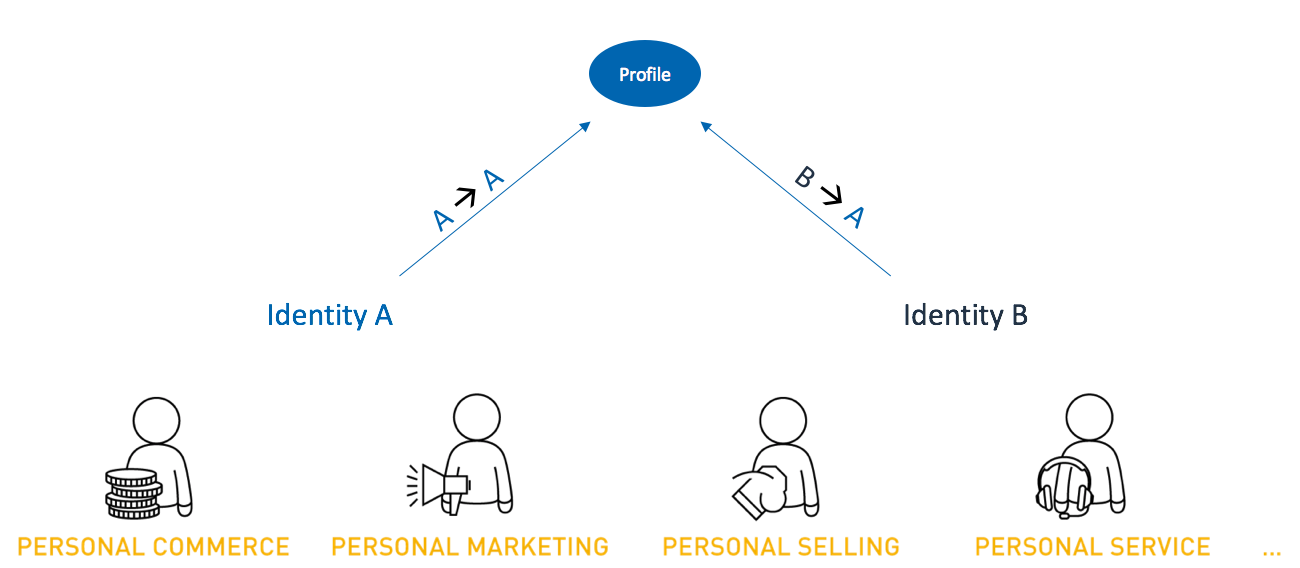
If a consuming application uses SAP Hybris Profile to obtain information on a specific user, the SAP Hybris Identity service makes sure that it does not matter how the consuming application identifies a consumer. It always returns the same profile.
Profile Merge
As soon as two profiles share sufficiently significant identities, for example a registration email or StrongId, the Merge service combines the two profiles into one.
For example, a customer who already has an account surfs a storefront anonymously, without signing in. Until the customer signs in, SAP Hybris Profile keeps two user profiles:
- one connected with the customer's account
- one for the customer's current anonymous session
The moment the customer signs in, the Merge service starts. The service makes sure that for the rest of the current session, the Profile system enriches the customer's known profile. The Merge service transfers every observation or insight from the anonymous session's profile into the existing profile. When the merge is complete, the service deletes the newer, anonymous session profile.
The service combines the profiles in these steps:
- The service aligns both profiles' consent settings. Only those consents that the consumer granted in both profiles' settings remain granted. In other words: as soon as a user revokes any consent settings of the two profiles, or it doesn't even exist in one of them, this consent will not be granted in the consent settings of the merged profile.
- The service redirects the identities, assigning each to a single prevailing profile.
- The service merges the profile documents, bundling all observations, insights, and so forth into one single profile. In cases where the original profiles have contradicting information, such as different affinities to the same product, the system uses the data in the chronologically older profile.
Technically, the Merge service is an enricher. The creation of IDENTIFIES edges between identity and profile nodes triggers the Merge service. If an identity node involved in the creation of an IDENTIFIES edge has one of the following combinations of values, the Merge service enricher combines the profiles.
identityType=sidandidentityOrigin=webidentityType=emailandidentityOrigin=<arbitrary>
Profile document management for profile merge
When merging two profiles, this service carries over all of the necessary information, from the most recently-created profile to the chronologically older profile that the Profile system maintains. The profile document contains the details for both of the profile IDs supplied to the service. Afterward, the service deletes the newer profile.
Identity management for profile merge
When merging, the Merge service sends the two profile IDs to the Identity Service, which keeps the older profile ID and deletes the newer ID. The steps in this process include:
- The service gets all the identities associated with the newer profile ID.
- For all of the identities from the newer profile, the service adds a relationship from these identities to the older profile.
- The service deletes the newer profile, which also deletes the relations between the profile and the identities.
Consent management for profile merge
The Merge service combines profiles that share an identity. This section describes how the Merge service handles consent management for the merged profile.
After the Merge service combines profiles, SAP Hybris Profile maintains only the merged profile document, regardless of which profile's consent references the Profile service uses to retrieve it. The consent merge functionality uses the consent settings of the two profiles to decide on the consent settings of the merged profile. The service picks up all the consent schemas that are either absent in one or both of the consent references, or have different values. It sets these schemas to false and makes no changes to the values granted in both references.
Example
This is an example of a consent table before the merge:
| Consent class | Profile A | Profile X |
|---|---|---|
| Product affinity |  | |
| Category affinity | |  |
| Age | | |
| Cart | | |
| ... | ... | ... |
This is the same consent table after the merge:
| Consent class | Profile A | Profile X |
|---|---|---|
| Product affinity | | |
| Category affinity | | |
| Age | | |
| Cart | | |
| ... | ... | ... |
Query Data
Query profile data
This section describes methods for reading data from the SAP Hybris Profile system.
The Profile service provides GET methods to retrieve data from the profile document. By calling this service, you can retrieve the whole profile document associated with a given customer, or retrieve just a specified property value from a profile document.
The Profile Explorer is a debugging tool that enables you to view and navigate profile data stored in the profile document. The interface is useful for verifying that profile data is stored within the expected document.
For more details about the Profile Explorer and how to use it, see the Profile Explorer documentation.
Query aggregated data from real-time reporting
The SAP Hybris Profile system provides a Real-time Reporting service that enables analysis of data aggregated from multiple sources over time. This documentation provides a comprehensive description of the Real-time Reporting service's functions.
The Real-time Reporting Service provides a rich query language to aggregate ingested data in a wide variety of ways, including:
Targeting specified dimensions, time intervals, and value-matching criteria
For example, targeting product_name within the last week where interest is
sportsGrouping results by hour, day, week, or month
For example, grouping product_name results by hour
Limiting the number of returned results
For example, returning the first ten product_name result groups
Ordering results by specified dimensions and applying hierarchical sub-ordering within result sections
For example, ordering results by browser, and ordering by product_name within each browser group
Aggregating results by requesting one or more of the following: count, distinct count, maximum, mean, minimum, sum, standard deviation, or variance
For example, returning counts of product_name values or returning standard deviation of page_views
For detailed information about querying aggregated data, see the Table Queries section of the Real-time Reporting service documentation.
Schedule Events
The purpose of event scheduling
Event scheduling allows you to plan the delivery of specific events in advance. Using this functionality, you can send events to SAP Hybris Profile after a predefined amount of time, rather than immediately.
You can enable event scheduling when writing your enricher. In the code of your enricher, define the scheduled event and its delivery time. The scheduled event enters the system no sooner than the time specified.
Sample scenario
With the data scheduling functionality, you can determine when the specified data in the profile document undergoes formerly defined modifications, such as subdocument additions, updates, or deletions.
For example, you can define when the system removes a subdocument containing data that pertains to a particular session from a given profile document. By using event scheduling functionality, you can define for how long SAP Hybris Profile stores session data before removing this data from the profile document.
Consider the following scenario: Your enricher reacts to the SessionTimedOut event and, as a result, updates the session-related subdocument. You want to set the lifetime for the updated session data so the database stores that data for the specified amount of time only. With the event scheduling functionality, you can set the delivery time of the SessionIdled event which causes the enricher to remove all previously-saved session data from the profile document. The scheduled SessionIdled event enters the system no sooner than the time specified.
Data flow
The following diagram shows how the data flows in SAP Hybris Profile if you use the event scheduling functionality.
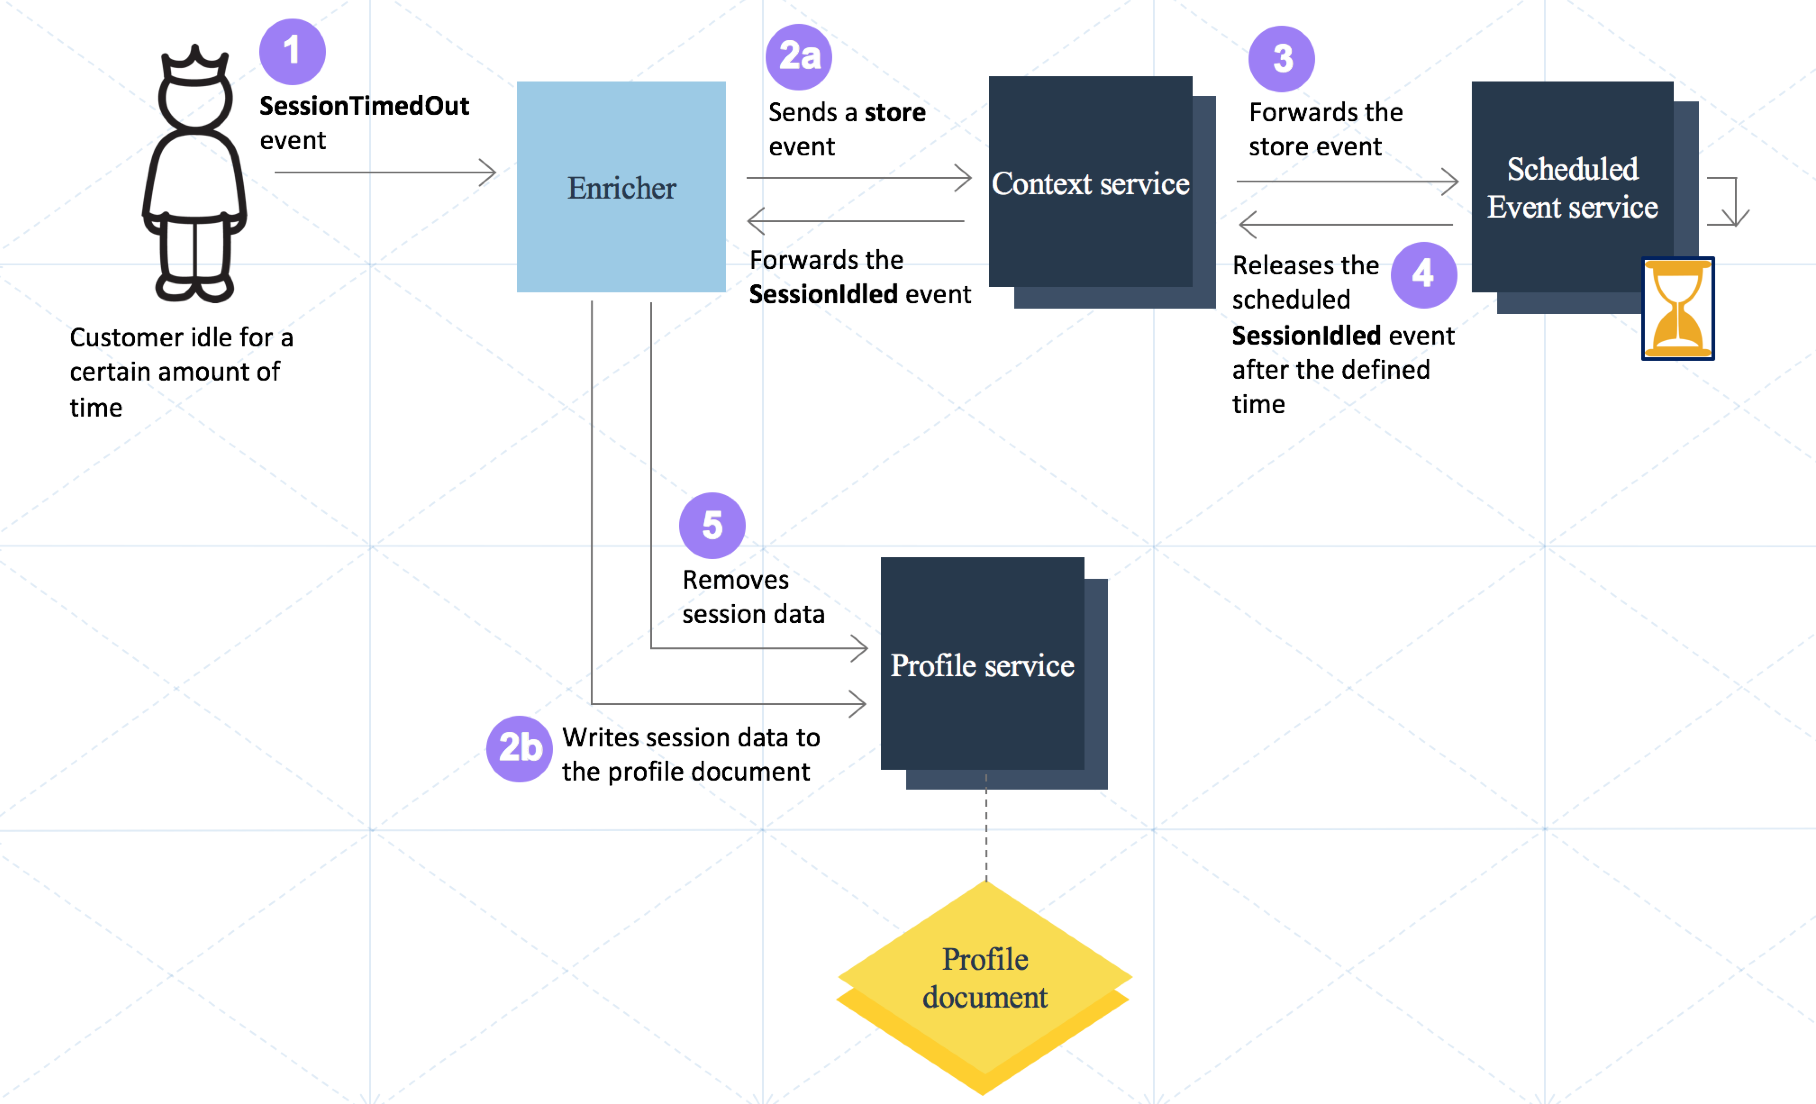
As a result of prolonged customer inactivity in the storefront, the session expires, and the SessionTimedOut event enters the system.
The enricher that reacts to the SessionTimedOut event writes session data to the profile document, creating a new session-related subdocument. Because the enricher has the event scheduling functionality incorporated in its logic, it also sends a store parameter to the Scheduled Event service through the Context service. The store parameter defines the type and the delivery time of the scheduled event to send later. In this scenario, the scheduled event is the SessionIdled event.
The Scheduled Event service receives the store parameter.
The Scheduled Event service releases the scheduled event (SessionIdled event) no sooner than the time specified in the payload of the store parameter.
The SessionIdled event triggers the enricher to remove the session data from the profile document.
Getting started with lambda enrichers
To start developing your lambda enrichers, follow these steps:
- Go to the Builder and select your project (tenant).
- Click Administration > Subscribe. The YaaS Market page opens.
- In the YaaS Market, select the Profile Core Services private package with the version ID 58c904bb0dddc3000e1633cb and click Subscribe Now.
- Select your project and follow the prompts to confirm your subscription.
- In the left navigation menu in the Builder, click Hybris Profile Developer Tools.
- Go to the Enricher Workbench Builder module, and complete the required fields to start creating your lambda enricher.
The Enricher Workbench is a Builder module that allows you to create and test your own lambda enrichers. When you save your lambda enricher in the Enricher Workbench, a Builder module for your lambda enricher is automatically created.
Because lambda enrichers that you can create in the Enricher Workbench are single-tenant, only the owner tenant can use them. For more details about single-tenant enrichers, see the Create a single-tenant enricher section.
For more information on how to create your lambda enricher in the Enricher Workbench, save the draft of your lambda enricher, or deploy it, see the Create your lambda enricher and Lambda enricher API sections.
Create a lambda enricher
Configure lambda enricher draft
To create your lambda enricher, go to the Builder. In the left navigation menu, click Hybris Profile Developer Tools. Select Enricher Workbench Builder module, then select + ADD NEW ENRICHER. In the CONFIGURATION tab, provide the basic information about the lambda enricher that you want to create:
- Enricher Id: The ID of your lambda enricher. You must provide the Enricher Id if you want to save your lambda enricher as a draft, or deploy it.
- Enricher Name: The name of your lambda enricher. This value is optional. When you choose the name for a public enricher, you cannot change it afterwards.
- Triggering Schema: This is the schema that triggers your lambda enricher. Select a triggering schema from the drop-down list. Search by the schema name. Providing a triggering schema is optional when saving a draft, but required for deployment. When you save your lambda enricher as a draft, you can pick the triggering schema or schemas only from the schemas that already exist in the system. When you choose the triggering schema or schemas for a public enricher, you cannot change them afterwards.
Define triggeredBy schemas
To deploy the lambda enricher that you created, define a triggering schema. The Enricher Workbench allows you to select the triggering schema or schemas.
To choose a triggering schema, browse the list of all available schemas. For more details, see the Enricher registration section. Alternatively, select a triggering schema from the drop-down list. You can search by schema name, schema description, and consent class.
If you wish to define a new schema, submit a support request to a system administrator who will register the new schema in the metamodel.
Provide lambda enricher code
After entering the basic details of your lambda enricher in the CONFIGURATION tab, proceed to the CODE tab and define the JavaScript code of your lambda enricher. For more details regarding the lambda enricher source code, see the Lambda Enricher API overview section, as well as the subsequent sections regarding Logger API SDK, Scheduled Event service API SDK, Profile service API SDK, Configuration service API SDK, Identity service API SDK, and Real-time Reporting service API SDK.
Lambda enricher SDK Overview
Lambda enricher SDK overview
Your lambda enricher needs to provide a "processEvent" function:processEvent(event, context): String.
- event: A JavaScript object containing the following information about the event that triggered this enricher:
- metadata A JavaScript object containing descriptive information about the triggering event.
- tenant: A string representing the tenant for which this enricher is triggered.
- schema: A string representing the triggering event's relative schema, for example:
"context/commerce/ProductView". - operation: A string representing an operation performed on the schema. The supported operations are:
CREATE,STORE, andDELETE. - profileId: The consumer profile ID associated with the triggering event.
- data: A JavaScript object representing the triggering event's data, which originated in the Context service.
- metadata A JavaScript object containing descriptive information about the triggering event.
- context: A JavaScript object containing the following information about the execution of this enricher:
- timeout: A numeric value representing the allowed execution time of this enricher before it will be terminated.
The following objects are available in the "processEvent" function's runtime scope:
- sdk: A service development kit object. Provides access to the Profile service access and other useful utilities. See examples for details.
The "processEvent" function can return a string containing information for debugging purposes.
Example
This example shows the source code of a lambda enricher that creates or updates a customer profile.
function processEvent(event, context) {
    // Create or update user profile data.
    var profileData = {
        observations: {
            lambda: {
                fullName: "Tony Stark",
                email: "ironman@marvel.com",
            }
        }
    };
    var profileId = event.metadata.profileId;
    sdk.logger.info('Profile ID: ' + profileId);
    sdk.profile.createOrUpdate(profileId, profileData);
}
Logger API SDK
The SDK Logger provides a variety of methods with which data can be logged.
Example 1
function processEvent(event, context) {
  sdk.logger.debug('Some debug message here')
  sdk.logger.info('Some info message here')
  sdk.logger.warn('Some warning message here')
  sdk.logger.error('Some error message here')
  return 'result'
}
Example 2
function processEvent(event, context) {
  try {
    notExisting.some.property
  }
  catch(err) {
    sdk.logger.error('Error occurred', err)
  }
  return 'result'
}
Functions
Include the parameters listed after each function in your requests.
debug(message, cause)generates a debug-level log message with the cause details.- message is a string containing a debug message.
- cause is an optional string containing a debug message cause.
warn(message, cause)generates a warning-level log message with the cause details.- message is a string containing a warning message.
- cause is an optional string containing a warning message cause.
info(message, cause)generates an information-level log message with the cause details.- message is a string containing an information message.
- cause is an optional string containing an information message cause.
error(message, cause)generates an error-level log message with the cause details.- message is a string containing an error message.
- cause is an optional string containing an error message cause.
Scheduled Event Service API SDK
Use the following methods to communicate with the Scheduled Event service.
Functions
Include the parameters listed after each function in your requests.
scheduleAt(schema, at, scheduledPayload)returns a response body consisting of the parameters id, link, and consentRefId.- schema is a string defining the schedule target.
- at is a string containing the date the Context service sends the scheduled event. Use the ISO-8601 format for the date. Present the value as a duration, for example,
P2DT2H30M5S, or as a combination of date and time, for example,2017-12-10T18:06:17.234Z. For the duration value, the system only supports days, hours, minutes, and seconds. - scheduledPayload (JSON object) is an arbitrary scheduled payload to be delivered at a given time. The service does not interpret it, it only passes the payload through and receives it again after the entire scheduled time elapses.
rescheduleAt(schema, scheduleId, at, scheduledPayload)returns a response body consisting of the parameters id, link, and consentRefId.- schema is a string containing a warning message.
- scheduleId is a unique string identifier for the event. If you set the scheduleId, the system overwrites all previously-sent events containing the same scheduleId.
- at is a string containing the date the Context service sends the scheduled event. Use the ISO-8601 format for the date. Present the value as a duration, for example,
P2DT2H30M5S, or as a combination of date and time, for example,2017-12-10T18:06:17.234Z. For the duration value, the system only supports days, hours, minutes, and seconds. - scheduledPayload (JSON object) is an arbitrary scheduled payload to be delivered at a given time. The service does not interpret it, it only passes the payload through and receives it again after the entire scheduled time elapses.
Properties
serviceBasePath: String [readonly]This property is a string, containing the base path to the Scheduled Event service, used for audit logging. See the Audit SDK documentation for more information.
Example 1
This example shows an enricher that schedules an event.
function processEvent(event, context) {
  sdk.event.scheduleAt("nodes/commerce/Product/affinity", "2017-12-10T18:06:17.234Z", {"affinity" : 1,23});
  sdk.event.scheduleAt("nodes/commerce/Product/addToCart", "2017-10-10T18:08:47.234Z");
}
Example 2
This example shows an enricher that reschedules an event.
function processEvent(event, context) {
  sdk.event.rescheduleAt("nodes/commerce/Product/affinity", "nodes/commerce/Product/name/999", "P0DT0H0M5S", {"affinity" : 1,23})
  sdk.event.rescheduleAt("nodes/commerce/Product/affinity", "nodes/commerce/Product/name/352", "2018-03-10T11:57:53.234Z")
}
Profile Service API SDK
To communicate with the Profile service, use the following API functions and properties.
Functions
Use these functions to communicate with the Profile service.
get(profileId) : JSONreturns a profile document.- profileId is a string representing the ID of a profile.
get(profileId, fields) : JSONreturns the selected fields of a profile document.- profileId is a string representing the ID of a profile.
- fields is an array of strings with the paths to the properties returned in the response. Use a dot (.) as a separator.
createOrReplace(profileId, properties, processingReason)creates a new profile document, or replaces the entire existing document.- profileId is a string representing the ID of a profile.
- properties is an object containing the properties of a profile document.
- processingReason is a string representing the reason for data storing.
createOrUpdate(profileId, properties, processingReason)creates a profile if it does not exist. Otherwise, the function updates part of the profile defined in the properties parameter.- profileId is a string representing the ID of a profile.
- properties is an object containing the properties to create or replace in a profile document.
- processingReason is a string representing the reason for data storing.
setProperty(profileId, propertyPath, value, processingReason)replaces a value of a property. The value can be a map or a single JSON value.- profileId is a string representing the ID of a profile.
- propertyPath is a dot-separated string representing the path to the property.
- value is a map or a single JSON value to replace.
- processingReason is a string representing the reason for data storing.
getProperty(profileId, propertyPath) : JSONreturns part of a profile document from a given property path. The result can be a map or a single JSON value.- profileId is a string representing the ID of a profile.
- propertyPath is a dot-separated string representing the path to the property.
deleteProperty(profileId, propertyPath, processingReason)deletes a property from a profile document.- profileId is a string representing the ID of a profile.
- propertyPath is a dot-separated string representing the path to the property.
- processingReason is a string representing the reason for data deletion.
Properties
Include the following properties in your communication requests.
profileId: String [readonly]This is the customer's profile ID associated with a current event. Use this property as the value of the profileId parameter in the following functions.serviceBasePath: String [readonly]This is a string, containing the base path to the Profile service, used for audit logging. See the Audit SDK documentation for more information.
Profile service operations
The following examples show the source code of lambda enrichers that perform various operations in the Profile service.
Replace a profile document
This example shows an enricher that replaces a profile document with a new profile document.
function processEvent(event, context) {
    var profileId = event.metadata.profileId;
    var profileData = {
      "sessions": {
        "session1": {
          "resolutionSegment": "HIGH",
          "affinity": {
            "color": {
              "red": {"count": 1}
            }
          }
        },
        "session2": {
          "resolutionSegment": "LOW",
          "affinity": {
            "color": {
              "blue": {"count": 2}
            }
          }
        }
      }
    };
    sdk.profile.createOrReplace(profileId, profileData);
}
Get a profile document
This example shows an enricher that retrieves a profile document.
function processEvent(event, context) {
    var profileId = event.metadata.profileId;
    return sdk.profile.get(profileId);
}
Get filtered profile documents
This example shows an enricher that gets a profile document with the specified fields.
function processEvent(event, context) {
    var profileId = event.metadata.profileId;
    var fields = ["sessions.session1.affinity.color","sessions.session2.affinity.color"];
    return sdk.profile.get(profileId, fields);
}
Create or update document properties
This example shows an enricher that updates only the selected properties of the profile document.
function processEvent(event, context) {
    var profileId = event.metadata.profileId;
    var profileData = {
      "sessions": {
        "session1": {
          "resolutionSegment": "LOW"
        },
        "session2": {
          "color": {
            "blue": {"count": 3}
          }
        }
      }
    };
    sdk.profile.createOrUpdate(profileId, profileData);
}
Set a property
This example shows an enricher that replaces a value of a property.
function processEvent(event, context) {
    var profileId = event.metadata.profileId;
    var propertyPath = "sessions.session1.resolutionSegment";
    var value = "MEDIUM";
    sdk.profile.setProperty(profileId, propertyPath, value);
}
Get a property
This example shows an enricher that gets a property.
function processEvent(event, context) {
    var profileId = event.metadata.profileId;
    var propertyPath = "sessions.session1.resolutionSegment";
    return sdk.profile.getProperty(profileId, propertyPath);
}
Delete a property
This example shows an enricher that deletes a property.
function processEvent(event, context) {
    var profileId = event.metadata.profileId;
    var propertyPath = "sessions.session1.resolutionSegment";
    sdk.profile.deleteProperty(profileId, propertyPath);
}
Configuration Service API SDK
Use the following methods to communicate with the Configuration service.
Functions
Include the parameter listed after the following function in your requests.
getProperty(propertyKey)returns a response body consisting of the parameters key, value, secured, and version.- propertyKey is the property key of the variable to return.
Properties
Include the following property in your communication requests.
serviceBasePath: String [readonly]This is a string, containing the base path to the Configuration service, used for audit logging. See the Audit SDK documentation for more information.
Example 1
To read a specified, previously-set tenant's variable, use this simple lambda:
function processEvent(event, context) {
  var defaultAffinity = sdk.config.getProperty('defaultAffinity');

}
Example 2
You can use variables retrieved using getProperty to abstract or automate your code. Examine this example:
function processEvent(event, context) {
  var shortTimeInterval = sdk.config.getProperty('shortTimeInteval'),
      affinityChangeValue = sdk.config.getProperty('affinityChangeValue');

    // schedule system event via EventAPI using tenant's variables:
    sdk.event.scheduleAt('nodes/commerce/Product/affinity', shortTimeInterval, affinityChangeValue)

}
Identity Service API SDK
Functions
Use the following methods to communicate with the Identity service. Descriptions of the required parameters follow each request description.
getProfileReferencesByIdentityKeyTypeAndOrigin(identityKey, identityOrigin, identityType) : JSONreturns all the profiles that have a relationship with the identity key, identity type, and identity origin tuple, and then returns all those profiles and a list of all identities associated with each of those profiles.- identityKey is an element of the tuple that specifies an identity.
- identityOrigin is an element of the tuple that specifies an identity.
- identityType is an element of the tuple that specifies an identity.
getProfileReferencesByProfileId(profileId) : JSONreturns a profile that contains its related identities and other related data. As am example, given a profile with the IDprofile123, the request returns all of the referenced profile's identities and data.- profileId is a string representing the ID of a profile.
getIdentitiesByIdentityKeyTypeAndOrigin(identityKey, identityOrigin, identityType) : JSONreturns the identity for the given identity tuple (key + type + origin) along with all the profiles the identity is associated with.- identityKey is an element of the tuple that specifies an identity.
- identityOrigin is an element of the tuple that specifies an identity.
- identityType is an element of the tuple that specifies an identity.
getIdentitiesByIdentityId(identityId) : JSONreturns data associated with a specific identity specified by the Identity ID.- identityId is the ID of the identity.
createProfileReferencesByIdentityKeyTypeAndOrigin(identityKey, identityOrigin, identityType, consentReference) : JSONcreates a new profile using the provided identity tuple.- consentReference is the identifier referring to an explicit consent from the end user.
- identityKey is an element of the tuple that specifies an identity.
- identityOrigin is an element of the tuple that specifies an identity.
- identityType is an element of the tuple that specifies an identity.
addIdentityByAttribute(profileId, identityKey, identityOrigin, identityType) : JSONadds an identity (specified by key+type+origin) to a profile. The identity that the key+type+origin (tuple) specifies is part of the query parameter sent across to the endpoint.- profileId is a string representing the ID of a profile.
- identityKey is an element of the tuple that specifies an identity.
- identityOrigin is an element of the tuple that specifies an identity.
- identityType is an element of the tuple that specifies an identity.
addIdentityToIdentityId(profileId, identityId) : JSONadds the identity, specified by identityId, to the profile specified by profileId.- identityId is the ID of the identity.
- profileId is a string representing the ID of a profile.
deleteProfileReferencesByProfileId(profileId) : JSONdeletes the profile referenced by the submitted profileId, including edges that associate the profile with identities. If, as a result, any such identities have no edges, the service deletes those identities.profileId is a string representing the ID of a profile.
deleteProfileReferencesByIdentityId(profileId, identityId) : JSONThis function deletes only relationships between the Identity and Profile nodes. If the function deletes the last remaining relationship, it deletes the Identity node as well.- identityId is the ID of the identity.
- profileId is a string representing the ID of a profile.
deleteIdentitiesByIdentityKeyTypeAndOrigin(identityKey, identityOrigin, identityType) : JSONdeletes an identity, specified by an identity tuple (key + type + origin). Before deleting the Identity, this operation deletes all relations this identity has with any other node.- identityKey is an element of the tuple that specifies an identity.
- identityOrigin is an element of the tuple that specifies an identity.
- identityType is an element of the tuple that specifies an identity.
deleteIdentitiesByIdentityId(identityId) : JSONdeletes an Identity node, specified by ID. It also deletes all of the Identity node's relationships.- identityId is the ID of the identity.
Properties
serviceBasePath: String [readonly]This is a string, containing the base path to the Identity service, used for audit logging. See the Audit SDK documentation for more information.
Identity service operations
The following examples show the source code of lambda enrichers that perform various operations in the Profile service.
Create a profile reference
This example shows an enricher that creates a profile reference using identity attributes.
function processEvent(tenant, operation, schema, data, sdk) {
    var identityKey = data.email;
    var identityOrigin = data.origin;
    var identityType = "email";
    var consentReference = data.consentReference;

    sdk.identity.createProfileReferencesByIdentityKeyTypeAndOrigin(identityKey, identityOrigin, identityType, consentReference);
}
Get profile references
This example shows an enricher that retrieves profile references.
function processEvent(tenant, operation, schema, data, sdk) {
    var profileId = event.metadata.profileId;
    return sdk.identity.getProfileReferencesByProfileId(profileId);
}
Delete profile references
This example shows an enricher that deletes profile references.
This example shows an enricher that deletes profile references.
function processEvent(tenant, operation, schema, data, sdk) {
    var identityKey = data.email;
    var identityOrigin = data.origin;
    var identityType = "email";

    sdk.identity.deleteIdentitiesByIdentityKeyTypeAndOrigin(identityKey, identityOrigin, identityType);
}
Real-Time Reporting Service API SDK
The Real-time Reporting SDK is a JavaScript client for accessing the Real-time Reporting service. It is published as an internal npm package called realtime-reporting. The package includes a TypeScript definition file.
Real-time Reporting service API
The client API is offered through the RealtimeReportingService object. You can access it in the Enricher Workbench as the realtimereporting property of the SDK:
var rtrSvc = sdk.realtimereporting
You can also instantiate the RealtimeResportingService outside of the Enricher Workbench in any JavaScript app by importing the npm package and then passing an appropriate ServiceConfig object to the RealtimeResportingService constructor.
const rtr = require("realtime-reporting");

var rtrSvc = new rtr.RealtimeReportingService({baseUrl: "http://some.yaas.url/", tenant: "myTenant", accessToken: "myOAuthToken"});
Functions
Include the parameters listed after the following functions in your requests.
getTables(): Array of TableDescription objectsretrieves an array ofTableDescriptionobjects.getTable(tableName): Tableretrieves a specifiedTableobject, containing one or moreColumnobjects.- tableName is the name of the table (String).
query(tableName, query): Queryexecutes a query against a specified table.- tableName is a string representing the name of a table.
- query is a valid
Query.
Properties
serviceBasePath: String [readonly]This is a string, containing the base path to the Real-time Reporting service, that you can use for audit logging. See the Audit SDK documentation for more information.
Code examples
The following code examples show how to use the functions listed in the previous section.
Get tenant tables
This example shows an enricher that retrieves all tables associated with the active tenant.
function processEvent(event, context) {
    return sdk.realtimereporting.getTables();
}
Get tenant table
This example shows an enricher that retrieves a specified table associated with the active tenant.
function processEvent(event, context) {
    return sdk.realtimereporting.getTable("someTableName");
}
Query table
This example shows an enricher that retrieves the results of a query targeting a specified table associated with the active tenant.
function processEvent(event, context) {
    var query = {
      "granularity": "all",
      "interval": "2017-03-02T19:00:00.000/2017-03-02T20:00:00.000",
      "aggregations": [
        {
          "type": "count_distinct",
          "name": "distinct_sessions",
          "column": "session_id"
        }
      ]
    };

    return sdk.realtimereporting.query("someTableName", query);
}
RTR - TableDescription
Properties
A Real-Time Reporting TableDescription object has the following properties.
name: String [readonly]This property is a string representing the name of the table.description: String [readonly]This property is a string describing the table.ingestionType: String [readonly]This property is a string representing the ingestionType of the table. The only valid value isclickstream.tenant: String [readonly]This property is the name of the table's tenant.
RTR - Table
A Real-Time Reporting Table extends the TableDescription.
Properties
In addition to the table description properties, it also provides a Column listing.
name: String [readonly]This is a string representing the name of the table.description: String [readonly]This is a string describing the table.ingestionType: String [readonly]This is a string representing the ingestionType of the table. The only valid value isclickstream.tenant: String [readonly]This is the name of the table's tenant.columns: Array of Column objects [readonly]This is an array of the column objects in the table.
RTR - Column
Properties
A Real-Time Reporting Column object has the following properties.
name: String [readonly]This is a string representing the name of the column.type: String [readonly]This is a string representing the type of the column. Valid values arestring,long,float, andtimestamp.description: String [readonly]This is a string describing the column.path: String [readonly]This is an xpath representing the path to the element in the input JSON data. For example,$.x.yindicates that this column is associated with ayelement in the JSON that is embedded in anxelement.
color with an element named y in the JSON.collection: Boolean [readonly]This is a Boolean value, indicating whether the column represents a collection of data elements (true), rather than a single data value (false).
RTR - Query
Properties
A Real-Time Reporting Query object represents the query passed to Real-Time Reporting service when querying for data.
dimensions: String Array <Optional> [readonly]This is the list of dimensions to retrieve.aggregations: Aggregation Array <Optional> [readonly]identifies the list ofAggregationsto perform.granularity: String [readonly]determines the scale of time groupings for retrieved data. Valid values are:hourdayweekmonthall
all yields no time grouping.interval: String (Format ISO Date Interval) [readonly]specifies the time interval to search for.
limit: Number <Optional> [readonly]limits the number of results returned, and is recommended for sampling raw events.
RTR - Aggregation
Properties
A Real-Time Reporting Aggregation object can be part of a Query specification.
type: String [readonly]defines the aggregating operation to apply to retrieved data. Valid values are:countfcount_distinctsumminmaxmeanstddevvariance
name: String [readonly]defines the name of the aggregated value that appears in the result set.column: String <Optional> [readonly]specifies the column that the aggregation applies to.
RTR - ServiceConfig
Properties
Use ServiceConfig to initialize the RealtimeReportingService outside of the Enricher Workbench.
baseUrl: String [readonly]This is the YaaS base URL for the desired environment. For example,https://api.stage.yaas.io/.tenant: String [readonly]specifies the tenant on whose behalf the API executes.accessToken: String [readonly]This is the raw OAuth access token that allows access to the Real-Time Reporting service. This value must reflect the appropriate tenant and the hybris.realtime_reporting_view scope.
Audit Ingestion Service API SDK
Use the following methods to record data changes and security events using the Audit Ingestion service.
Functions
Include the parameters listed after each function in your requests.
recordPersonalDataChange(objectId, objectType, attributes, serviceBasePath, time) : JSONrecords a change to personal data; for example: changing the billing address of a customer, or changing a customer's affinity to a product. Returns the response from the Audit Ingestion service unaltered.- objectId - The identifier of the owner of the object containing the personal data being changed. Within Hybris Profile, the profile id (
event.metadata.profileId) is always a valid objectId. - objectType - The type of the object containing the personal data. If changing personal data in the profile service, use "profile" as the objectType, and if changing personal data in the identity service, use "identity". Other values are also acceptable if the data being modified resides in another service.
- attributes - A list of changed attributes and associated values. Each attribute must contain at least "name" and "operation" fields, and can optionally include "value" and "oldValue" fields.
- serviceBasePath - The base path to the service that manages the object containing the personal data being changed. Each module in the lambda enricher sdk has the property
serviceBasePath, whose value can be used for this parameter. For example, if modifying personal data using the Profile service sdk, use the value of thesdk.profile.serviceBasePathproperty. - time - An optional timestamp in ISO 8601 format indicating the time at which the personal data change occurred; for example: "2017-05-13T17:30:00.52Z". If omitted, the current time will be applied.
- objectId - The identifier of the owner of the object containing the personal data being changed. Within Hybris Profile, the profile id (
recordPersonalDataChanges(changes) : JSONrecords multiple changes to personal data. Use this method to record many changes with a single command. Returns the response from the Audit Ingestion service unaltered.- changes - A list of javascript objects, each of which represents a single personal data change, with appropriate parameters for that change. For example:
  [
    {
      objectId: sdk.profile.profileId,
      objectType: "profile",
      attributes: [
        {
          name: "session.session1.resolutionSegment",
          operation: "delete"
        }
      ],
      serviceBasePath: sdk.profile.serviceBasePath
    }, {
      objectId: "8066cf85-3022-4230-8f31-ac6cbe89b8a9",
      objectType: "profile",
      attributes: [
        {
          name: "session.session1.color",
          operation: "change",
          value: "green",
          oldValue: "red"
        }
      ],
      serviceBasePath: sdk.profile.serviceBasePath,
      time: "2017-10-18T21:54:29.724Z"
    }
  ]
- changes - A list of javascript objects, each of which represents a single personal data change, with appropriate parameters for that change. For example:
recordConfigurationChange(objectId, objectType, attributes, serviceBasePath, time) : JSONrecords a change to a configuration; for example: changing the shipment provider in an order flow, or changing project memberships. Returns the response from the Audit Ingestion service unaltered.- objectId - The identifier of the owner of the object containing the configuration being changed. Within Hybris Profile, the profile id (
event.metadata.profileId) is always a valid objectId. - objectType - The type of the object containing the configuration. If changing a configuration in the profile service, use "profile" as the objectType, and if changing a configuration in the identity service, use "identity". Other values are also acceptable if the configuration being modified resides in another service.
- attributes - A list of changed attributes and associated values. Each attribute must contain at least "name" and "operation" fields, and can optionally include "value" and "oldValue" fields.
- serviceBasePath - The base path to the service that manages the object containing the configuration being changed. Each module in the lambda enricher sdk has the property
serviceBasePath, whose value can be used for this parameter. For example, if modifying a configuration using the Real-Time Reporting service sdk, use the value of thesdk.realtimereporting.serviceBasePathproperty. - time - An optional timestamp in ISO 8601 format indicating the time at which the configuration change occurred; for example: "2017-05-13T17:30:00.52Z". If omitted, the current time will be applied.
- objectId - The identifier of the owner of the object containing the configuration being changed. Within Hybris Profile, the profile id (
recordConfigurationChanges(changes) : JSONrecords multiple changes to configurations. Use this method to record many changes with a single command. Returns the response from the Audit Ingestion service unaltered.- changes - A list of JavaScript objects, each of which represents a single configuration change, with appropriate parameters for that change. For example:
  [
    {
      objectId: event.metadata.profileId,
      objectType: "profile",
      attributes: [
        {
          name: "some.configurable.property",
          operation: "delete"
        }
      ],
      serviceBasePath: sdk.profile.serviceBasePath
    }, {
      objectId: "da4b817d-45ce-469d-bb1b-319a903f23f3",
      objectType: "profile",
      attributes: [
        {
          name: "some.configurable.property",
          operation: "change",
          value: "123",
          oldValue: "321"
        }
      ],
      serviceBasePath: sdk.profile.serviceBasePath,
      time: "2017-10-18T21:54:29.724Z"
    }
  ]
- changes - A list of JavaScript objects, each of which represents a single configuration change, with appropriate parameters for that change. For example:
recordSecurityEvent(clientIp, message, serviceBasePath, time) : JSONrecords events which may impact the confidentiality, integrity, or availability of the system; for example: failed logins or failed authorization checks. Returns the response from the Audit Ingestion service unaltered.- clientIp - The IP address of the original client trying to access or amend personal data.
- message - The string value describing the security event. The minimal required value is an empty string.
- serviceBasePath - The base path to the service for which the security event occurred. Each module in the lambda enricher sdk has the property
serviceBasePath, whose value can be used for this parameter. For example, if recording a security event that occurred in the Identity service, use the value of thesdk.identity.serviceBasePathproperty. - time - An optional timestamp in ISO 8601 format indicating the time at which the security event occurred; for example: "2017-05-13T17:30:00.52Z". If omitted, the current time will be applied.
recordSecurityEvents(events) : JSONrecords multiple security events. Use this method to record many security events with a single command. Returns the response from the Audit Ingestion service unaltered.- events - A list of JavaScript objects, each of which represents a single security event, with appropriate parameters for that event. For example:
  [
    {
      clientIp: "123.45.678.910",
      message: "Failed profile update attempt.",
      serviceBasePath: sdk.profile.serviceBasePath
    }, {
      clientIp: "109.87.654.321",
      message: "Failed identity deletion attempt.",
      serviceBasePath: sdk.identity.serviceBasePath,
      time: "2017-10-18T21:54:29.724Z"
    }
  ]
- events - A list of JavaScript objects, each of which represents a single security event, with appropriate parameters for that event. For example:
Example 1: Record a single audit
To record a change to a profile document, adopt the format of this simple lambda:
function processEvent(tenant, operation, schema, data, sdk) {
  // modify the profile
  var profileId = event.metadata.profileId;
  var propertyPath = "sessions.session1.resolutionSegment";
  sdk.profile.deleteProperty(profileId, propertyPath);

  // record the data change
  var attributesChanged = [{name: propertyPath, operation: "delete"}];
  var result = sdk.audit.recordPersonalDataChange(profileId, "profile", attributesChanged, sdk.profile.serviceBasePath);
  sdk.logger.info("Audit ingestion result: " + JSON.stringify(result));
}
Example 2: Record batch audits
To record multiple changes to personal data in different services, adopt the format of this example lambda:
function processEvent(tenant, operation, schema, data, sdk) {
  // modify the profile and the identity
  var profileId = event.metadata.profileId;
  var propertyPath = "sessions.session1.browser";
  sdk.profile.deleteProperty(profileId, propertyPath);
  sdk.identity.createProfileReferencesByIdentityKeyTypeAndOrigin(data.email, data.origin, "email", data.consentReference);

  // record the data changes
  var result = sdk.audit.recordPersonalDataChanges([
      {
          objectId: profileId,
          objectType: "profile",
          attributes: [
              { name: propertyPath, operation: "delete" }
          ],
          serviceBasePath: sdk.profile.serviceBasePath
      }, {
          objectId: data.email,
          objectType: "identity",
          attributes: [
              { name: "email", operation: "create", value: data.email }
          ],
          serviceBasePath: sdk.identity.serviceBasePath
      }
  ]);
  sdk.logger.info("Audit ingestion result: " + JSON.stringify(result));
}
Test your lambda enricher
Test your lambda enricher
Test your lambda enricher in the TEST OPTIONS tab in the Enricher Workbench by simulating the delivery of an event to the lambda enricher.
To perform a test, provide these values:
- Consent reference: The value represents your consent reference. You can either provide the formerly-generated consent reference, or you can generate your consent reference directly in the Enricher Workbench by clicking the GET CONSENT-REFERENCE button. The value of the consent reference for a given tenant is preserved in the browser session. Each time you generate a consent reference within a given project, the Enricher Workbench returns the same value.
- Operation: The value determines the type of operation, for example
STORE. For the list of supported operations, see the Lambda Enricher API overview section. - Event: The value represents the input source event. The Enricher Workbench allows you to retrieve the details of the most recent event by clicking the GET RECENT EVENT button. You can retrieve the most recent event only if you define a triggering schema for your lambda enricher.
See the logs
If you click the SAVE & TEST button in the TEST OPTIONS tab, you can see the generated logs in the TEST RESULTS tab.
Save and deploy your lambda enricher
Save the draft
You can save the draft of your lambda enricher at any time. To save the draft, click on the SAVE button in the upper right hand corner of the screen.
By selecting the SAVE option, you:
- save your lambda enricher as a draft
- trigger the automatic creation of a dedicated Builder module
Deploy your lambda enricher
If you wish to register your lambda enricher in the metamodel, click on the DEPLOY FROM DRAFT button.
By selecting the DEPLOY FROM DRAFT option, you:
- deploy your lambda enricher
- validate the triggering schema
- trigger the automatic creation of a dedicated Builder module, unless you saved the enricher draft prior to the deployment of that enricher, and the dedicated Builder module for your lambda enricher already exists
- register your lambda enricher in the metamodel
When you introduce changes to the code of a public lambda, you can roll it out directly, omitting a redeployment. To do so, click the ROLLOUT CODE button, which is available for public lambda enrichers only. The DEPLOY FROM DRAFT button is not available for public lambda enrichers.
Monitor and trace the deployed lambda enricher
When you deploy your lambda enricher, additional tabs become available in the Enricher Workbench.
Configuration and code tabs
The DEPLOYED CONFIGURATION and DEPLOYED CODE tabs contain read-only data. Use those tabs to check the configuration and code of your deployed lambda enricher.
Monitoring & Tracing tab
From the MONITORING & TRACING tab located in the upper right-hand corner of the screen, you can detect undesired cycles, go directly to the Trace Explorer, or trace the currently deployed code.
Monitoring and tracing tools
- Cycles information
In the lambda enricher event flow, an event may enter a cycle, where enrichers keep triggering themselves infinitely. Enricher Workbench detects such cycles and informs the user when and where they occur. The user can then inspect why the cycle occurs.
- a lambda enricher writes to the same schema as it listens to, that is, the triggering schema is the same as the schema that the enricher uses to write to the Profile service or to schedule events,
- the user uses another lambda enricher that writes to the triggering schema of the enricher where the system detects a cycle.
You can either fix the code of the lambda which causes the cycle, or ignore this state. By clicking the IGNORE CYCLE caption, you acknowledge the cycle occurrence and postpone fixing the code.
The tool shows if your lambda enricher is involved in a cycle. If the lambda is not involved in a cycle, the section displays a link to this documentation. If the lambda is in a cycle, you can examine where the trace for your lambda enricher starts, at which point it causes the cycle, and where the trace stops. Click contextTraceId to go to the Trace Explorer.
- Production traces
To see the traces for a given lambda enricher, go to the MONITORING & TRACING tab and select the SHOW IN TRACE EXPLORER caption in the Production traces section. In the pop-up window that appears, confirm redirect to the Trace Explorer, or select CANCEL to remain in the Enricher Workbench. If you are unsure how to proceed, click on the documentation link included in the pop-up window to learn more about the Trace Explorer.
Trace currently deployed code
To see the traces for a new event, go to the MONITORING & TRACING tab to define the event or get a recent event, and select the SEND EVENT button. The system processes a given event as traceable. Click SHOW TRACE FOR RECENT EVENT to track this trace in the Trace Explorer.
For more details about the Trace Explorer, see the Track data in the Trace Explorer section.
Undeploy and delete your lambda enricher
Undeploy your lambda enricher
You can reverse the deployment of a private lambda enricher at any time. When you click the DEPLOYED toggle, you undeploy, or deactivate, your lambda enricher. This equals deleting the deployed enricher and removing it from the metamodel.
It is, however, not possible to undeploy a public lambda enricher.
Delete your lambda enricher
The Enricher Workbench also offers an option for deleting lambda enrichers. By clicking DELETE in the upper right-hand corner of the screen, you:
- delete the draft of your lambda enricher
- undeploy your enricher, which equals deleting the deployed enricher and removing it from the metamodel
User Interfaces Overview
You can easily handle and customize the SAP Hybris Profile microservices through intuitive user interfaces. Manage consents, configure your own variables, or trace customer activity in a user-friendly manner. Read about the available interfaces and experience the system's rich functionality in action.
The next sections describe how to access, use, and troubleshoot these user interfaces in SAP Hybris Profile:
- Profile Explorer
- Configuration Explorer
- Trace Explorer
- Extension Browser
Profile Explorer
The system stores the SAP Hybris Profile data related to users' profiles and their storefront activity in a JSON document database, which you can browse using the Profile Explorer tool.
Read on to learn how to use, access, and troubleshoot the Profile Explorer.
Purpose
The Profile Explorer is a debugging tool to examine documents containing users' profile data, and to verify that the system stores the particular data within the expected subdocument.
Access the Profile Explorer
The Profile Explorer is a part of the Profile Core Services package. When you subscribe to the Profile Core Services package, the system automatically enables the Profile Explorer in your Builder project. Follow the instructions in the Builder documentation to subscribe to this package.
Follow these steps to access the Profile Explorer.
- Open the Builder.
- Click your project.
- In the left navigation menu, click Hybris Profile Developer Tools.
- In the left navigation menu, click Profile Explorer.
Profile Explorer elements
This image shows the elements of the Profile Explorer interface.
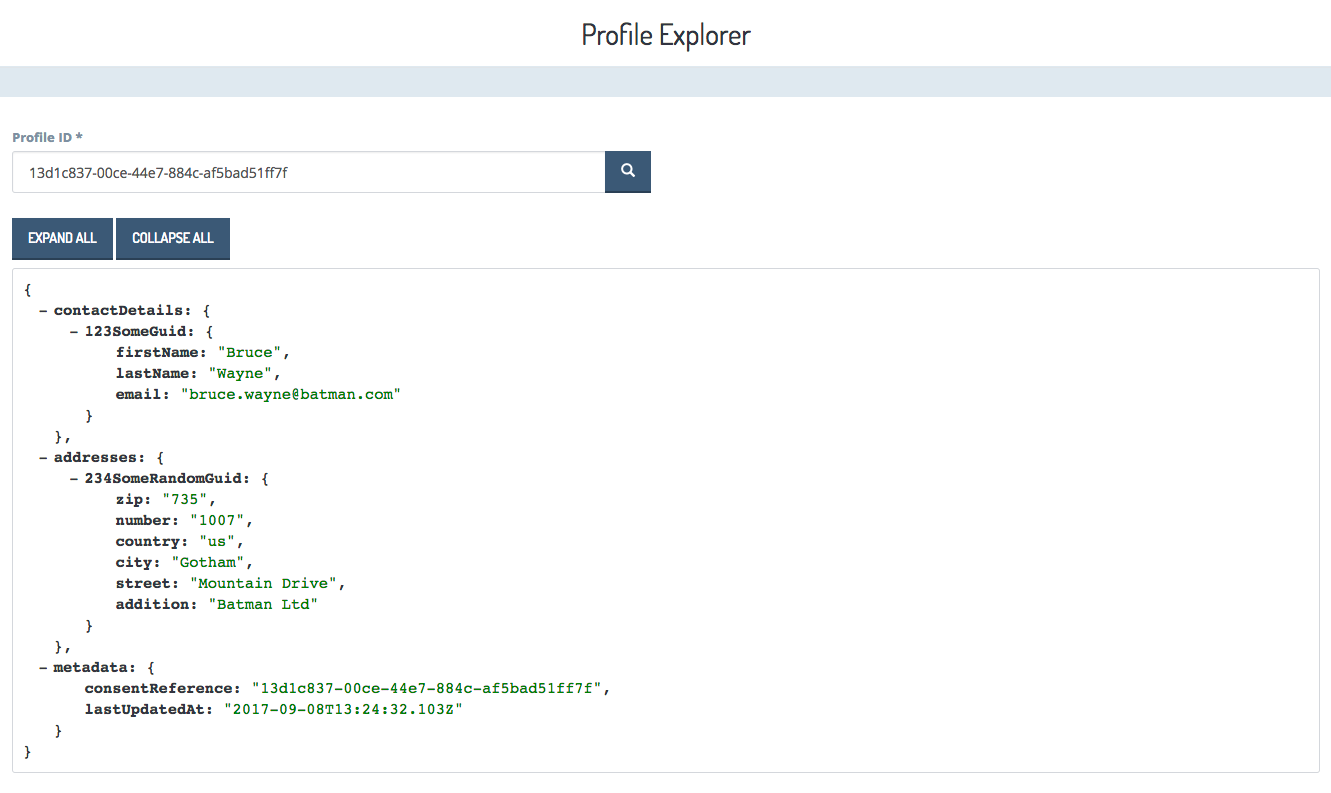
Sample use case
To view the data stored in a document, follow these steps:
- In the Profile ID field, enter the Profile ID of the targeted profile.
- Click the Search button.
- View the profile data, generated in the form of a JSON document, in the result pane beneath the search field.
As shown in the example, the search result is a JSON file. The - symbols, which precede all parameters, allow you to collapse selected portions of the data. When you collapse a subdocument, the - symbol turns into a + symbol, which allows you to expand the view again. Use the Expand all and Collapse all buttons to display or hide all data stored in the document.
Errors
| Error message | Explanation | Possible fixes |
|---|---|---|
| Cannot find a profile with the id: {your requested ID} | The search cannot find a document with the profile information for the requested ID. | Verify that you are using the correct value in the search field. Check whether the field contains any leading or trailing white spaces. |
Consent Manager
SAP Hybris Profile provides a consent management tool through which the customer can define consents for the collection of various types of customer data. Two components provide the functionalities of the service: the Consent Manager, a web application to manage user consents, and the dedicated Profile Management service to authenticate an anonymous user and to communicate with external services. The Profile Management service supports the anonymous authentication flow only.
The following sections explain the anonymous authentication flow in greater detail, and how to access and use the Consent Manager.
Anonymous flow
When a customer enters a storefront for the first time, the storefront calls the Consent service to generate a new consent reference. The Consent service returns the consent reference together with a consent reference token, which the system uses to provide security in the anonymous flow of granting and revoking consents. You can generate the token only once, when you create a new consent reference.
Integrate the Consent Manager with the tenant's system
You can integrate the Consent Manager, the service's visual user interface, with your system. To do that, build a link that consists of the consent reference, the consent reference token, and the name of your tenant, as follows:
- for the USA:
https://profile-manager.us-east.modules.yaas.io?t={tenant}&cr={consent-reference}&token={consent-reference-token} - for Europe:
https://profile-manager.eu-central.modules.yaas.io?t={tenant}&cr={consent-reference}&token={consent-reference-token}
Manage consent using Consent Manager
The Consent Manager is the visual user interface for the Profile Management service. You can grant or revoke your consent to the collection of selected data, grouped into several consent classes. Consent management is available per consent class only. Greater granularity of consent management is possible through the Consent service API.

Configuration Explorer
The Configuration Explorer is a visual interface for the Configuration service, which is a part of the Persistence package. Using the Configuration Explorer, you can change the behavior of your extensions more easily by adjusting the properties of the code, instead of modifying the code itself. Using the Configuration Explorer means less code, fewer bugs, and more control.
Because properties are scoped to the current project to which an enricher is subscribed, only members of that project can customize the enricher's behavior. Another benefit is that you can reuse some common parts of the code, routines, or even whole services, and run them parameterized. Create your own set of variables or configure the predefined variables to include them in your source code, and use them with other extensions, such as the Builder modules.
The Configuration Explorer allows you to define tenant-level configurations only.
To find information about consuming defined properties, refer to the Configuration service documentation.
Read on to learn how to access and use the Configuration Explorer.
Access the Configuration Explorer
The Configuration Explorer is a part of the SAP Hybris Profile Core Services package. When you subscribe to the SAP Hybris Profile Core Services package, the system automatically enables the Configuration Explorer for Builder projects of one tenant. Follow the instructions in the Builder documentation to subscribe to this package.
Follow these steps to access the Configuration Explorer.
- Open the Builder.
- Click your project.
- In the left navigation menu, click Hybris Profile Developer Tools.
- In the left navigation menu, click Configuration Explorer.
Use the Configuration Explorer
Use the Configuration Explorer to define, edit, or remove variables for use in other extensions.
To define a new variable, follow these steps:
- In the Configuration Explorer, click + variable. The Add a new variable window appears.
- Enter the name of your variable in the Variable Name field.The name of a property must must start with a letter or a number, be between one and 36 characters long, and can contain uppercase or lowercase letters, numbers, and the following characters: -, _, ., |, @.
- Provide the value of your variable in the field Value.
- Click Add to save your changes and add the newly-defined variable. The window closes automatically and a list of your variables appears.
Edit or remove variables
You can edit or remove entries at any time. To do so, use the pencil and bin icons on the right. Click the pencil icon to edit the details of your variable, or the bin icon to remove the whole entry.
Configuration Explorer elements
This image shows the elements of the Configuration Explorer interface.

Trace Explorer
Monitoring events in SAP Hybris Profile allows you to gather the details about the exact time of calls between services, and the duration of specific operations, like an update on a profile document or a store operation in the Context service that creates a scheduled event. Browse the collected trace events using the Trace Explorer Builder module.
Use case
Tracing operations can be useful for many reasons. Let's say you schedule an event to trigger your enricher after ten seconds. However, after one minute nothing happens. The system does not perform the scheduled operation, and the profile document is not enriched with new data. The Trace Explorer allows you to verify the system's delay and to check how long does it take for an event to get from a particular service to your enricher or another service.
Access the Trace Explorer
The Trace Explorer Builder module is a part of the Profile Core Services package. Subscribe to that package to get access to the Trace Explorer.
This section describes how to access and use the Trace Explorer.
Monitor event flow in the Trace Explorer
The Trace Explorer Builder module is a part of the Profile Core Services package. Subscribe to that package to get access to the Trace Explorer.
To fetch the tracked data, follow these steps:
- Go to the Builder.
- In the left navigation menu, click Hybris Profile Developer Tools.
- Select the Trace Explorer module.
- To read the timing data about the events that a given extension processes, go to the EXTENSION ID tab and complete the Search extension id field with the ID of that extension. Alternatively, to see which services processed that event, go to the CONTEXT TRACE ID tab and enter the id from the Context service response in the Search context trace id field.
- Click SEARCH in either of the tabs to display the visualized traces. The traces consist of the spans that symbolize the services involved in the flow, and their execution times.
Trace Explorer elements
These images show the elements of the Trace Explorer interface.

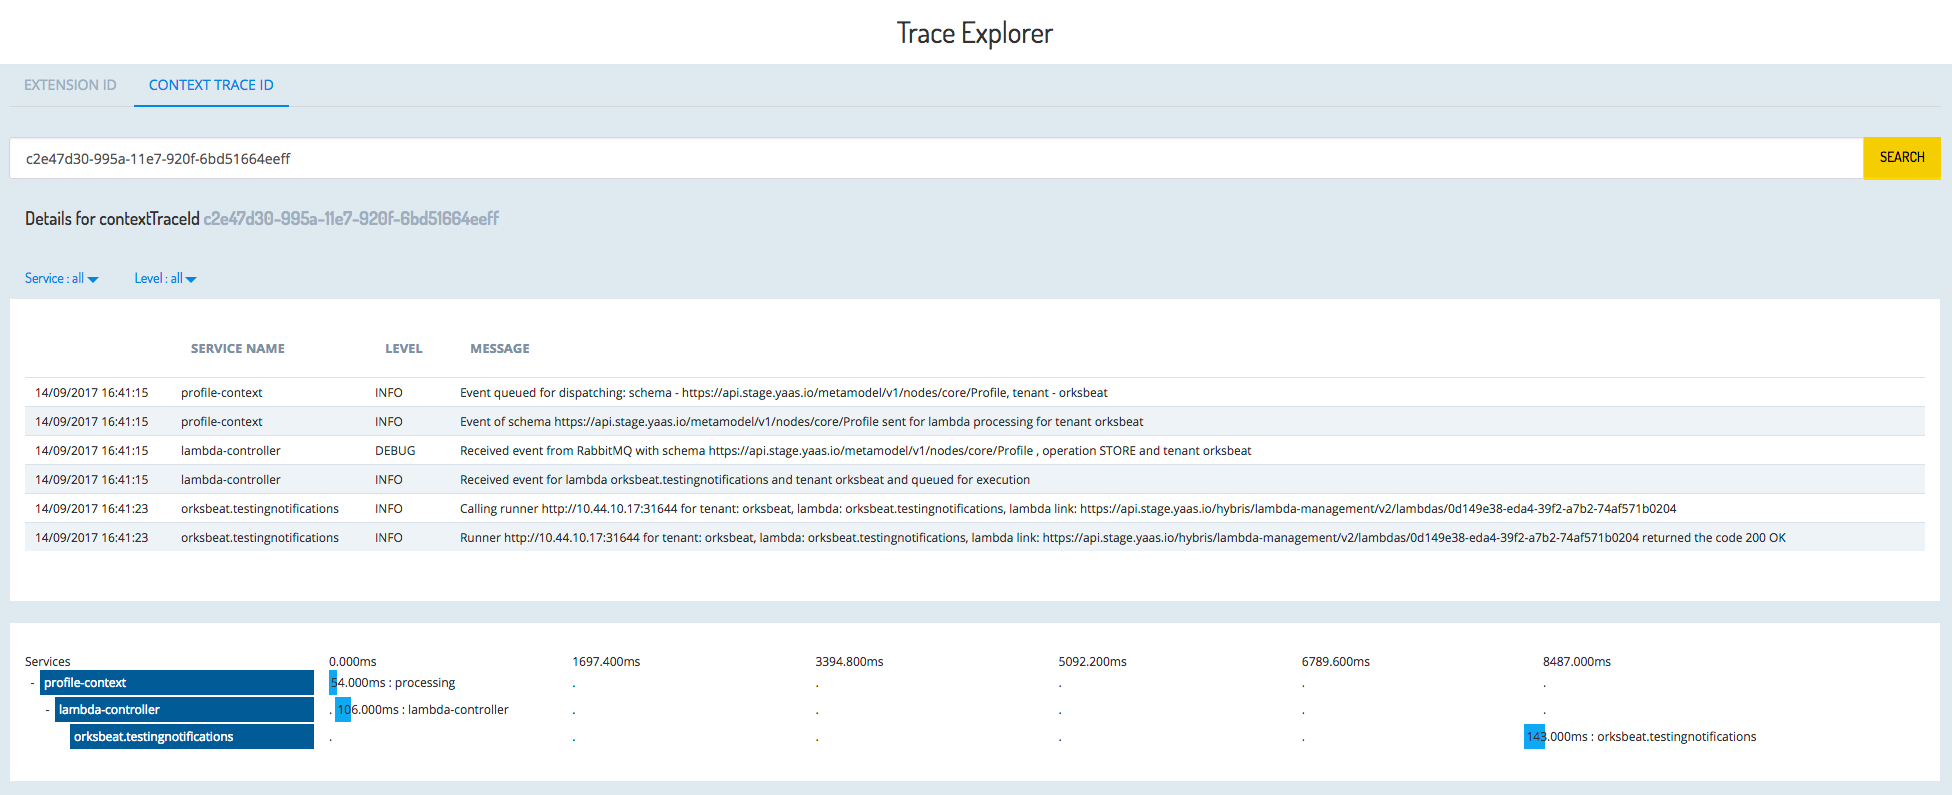
Extension Browser
The Extension Browser is a dedicated visual interface for the Extension Subscription service. It allows you to view and manage extensions that are available in the metamodel. The following sections describe how to access and use the Extension Browser.
Access the Extension Browser
The Extension Browser is a part of the SAP Hybris Profile Core Services package. When you subscribe to the SAP Hybris Profile Core Services package, the system automatically enables the Extension Browser in your Builder project. Follow the instructions in the Builder documentation to subscribe to this package.
Follow these steps to access the Extension Browser.
- Open the Builder.
- Click your project.
- In the left navigation menu, click Hybris Profile Developer Tools.
- In the left navigation menu, click Extension Browser.
Extension Browser elements
This image shows the elements of the Extension Browser interface.
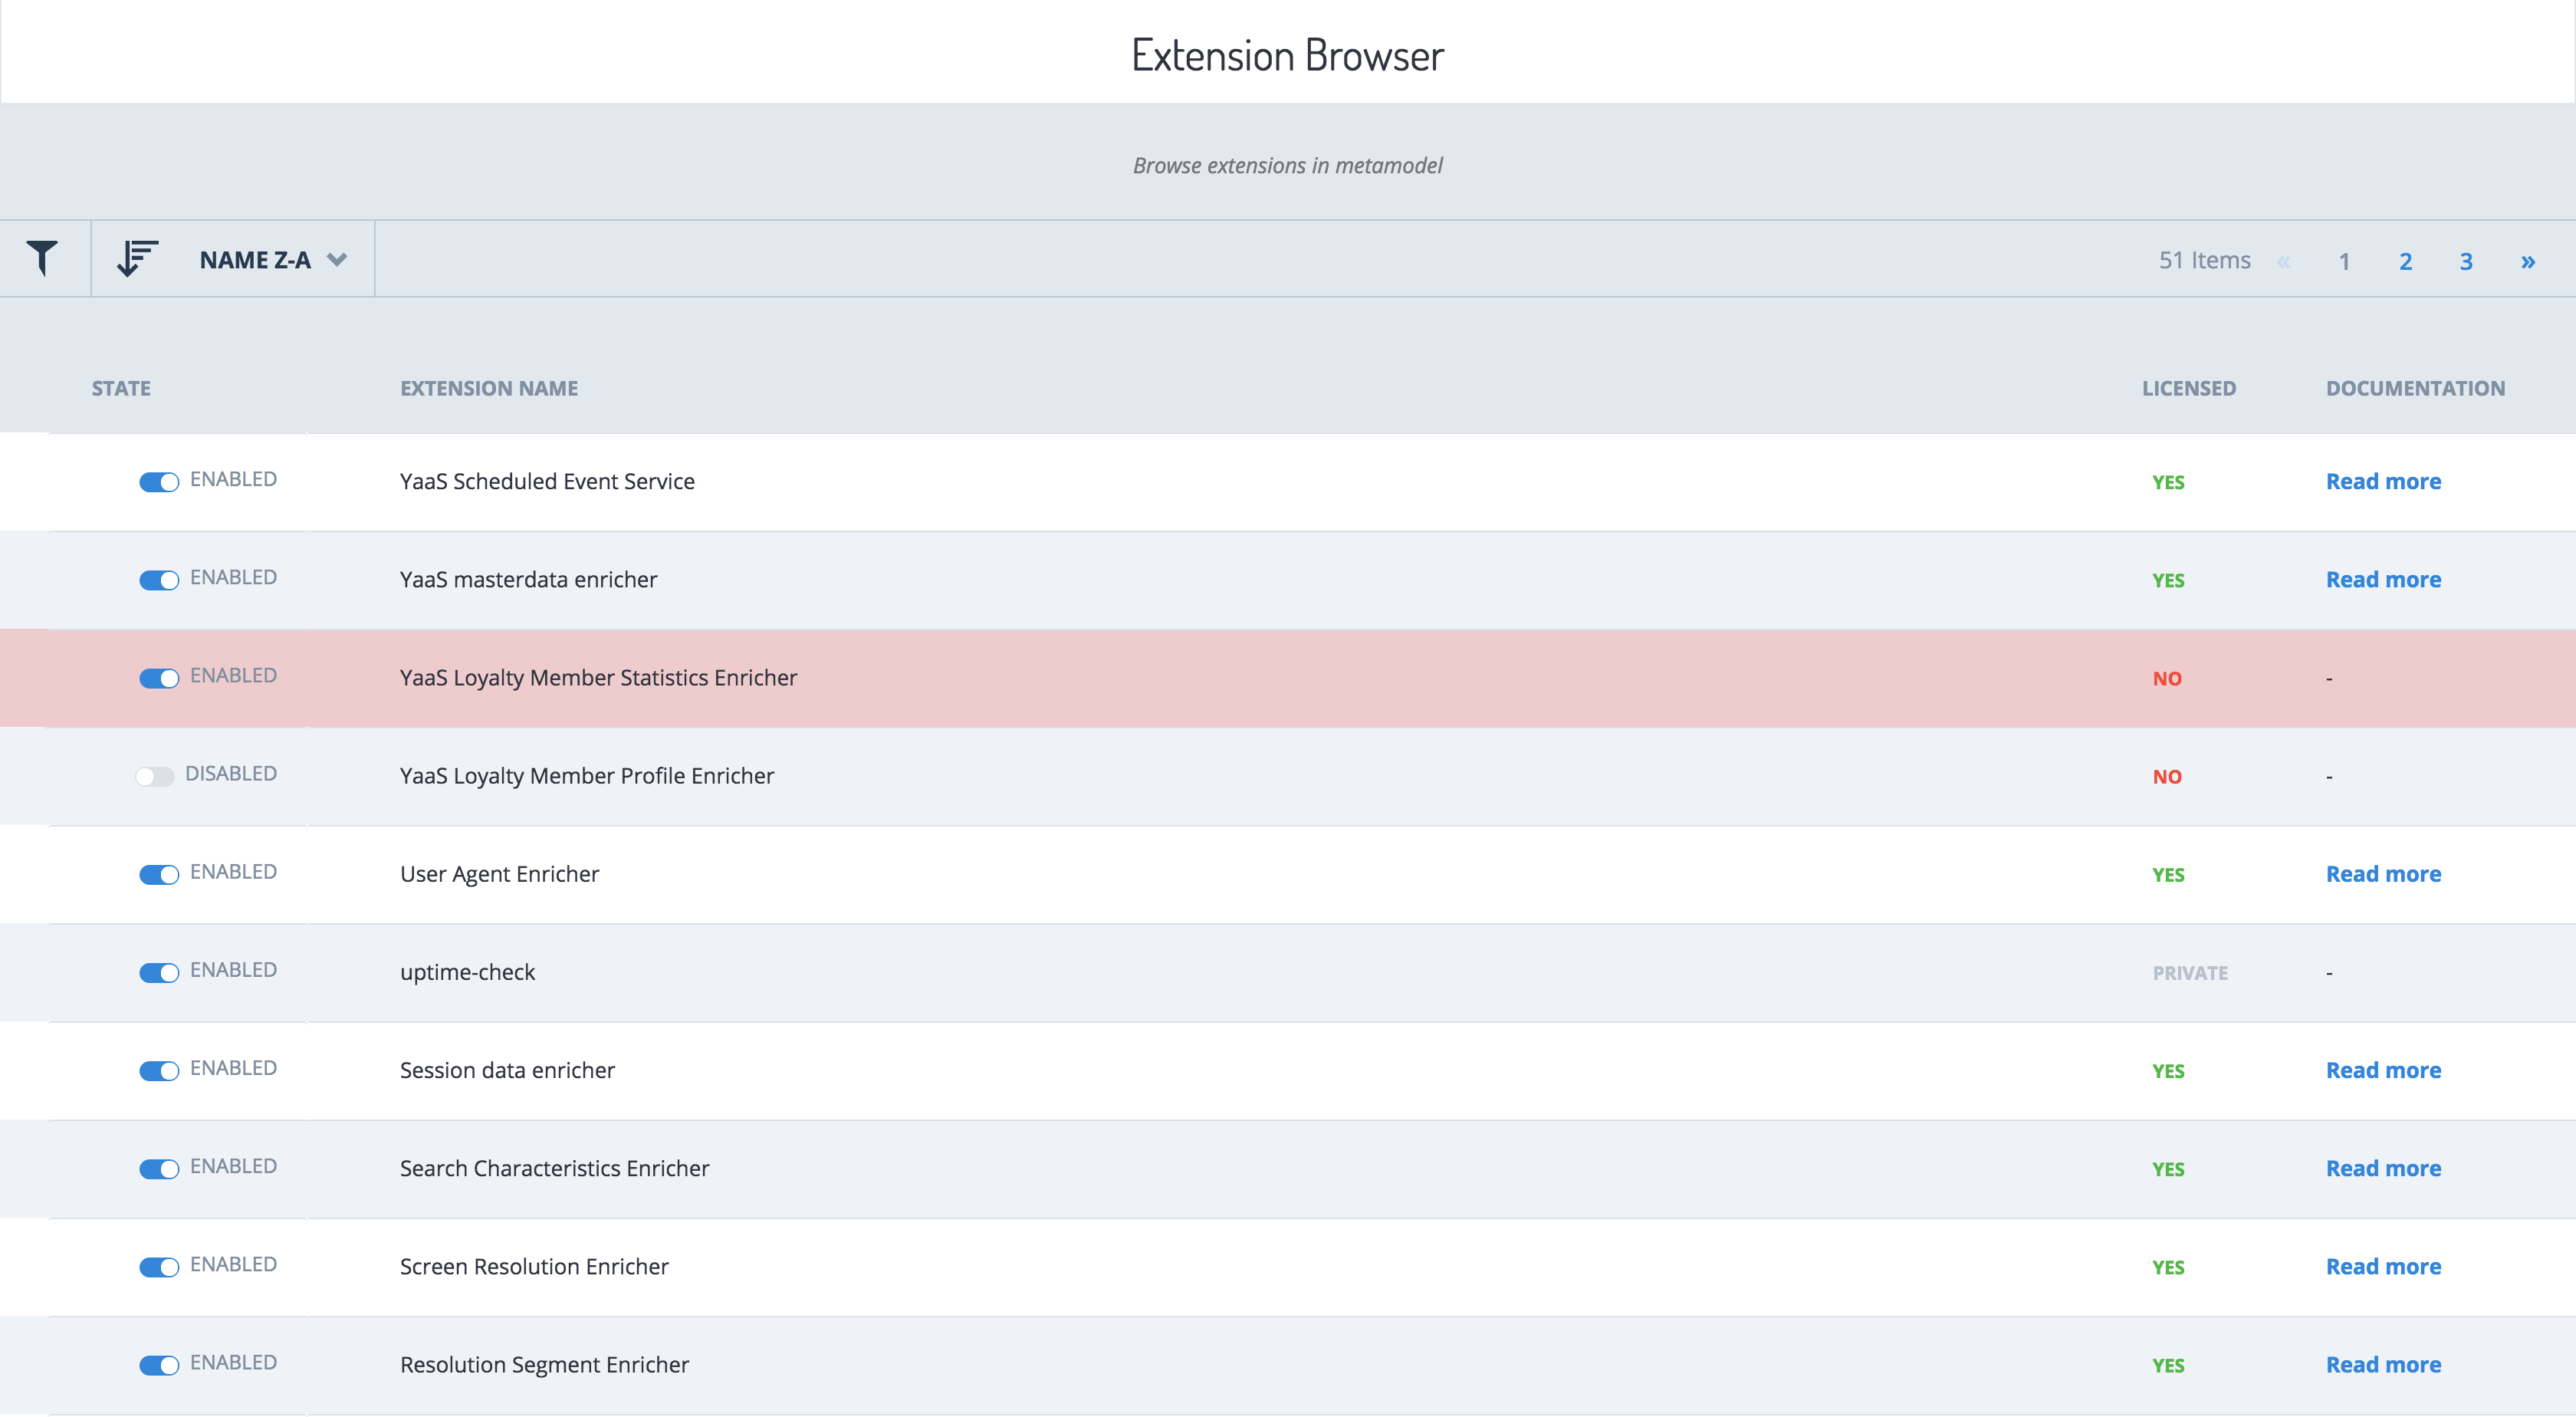
The interface displays the status of your extensions.
The STATE column represents whether your extension is enabled or disabled.
The LICENSED column has three available statuses, as follows:
- YES, when an extension is a part of your subscribed package
- NO, when an extension is a part of an unsubscribed package
- PRIVATE, when you are the owner of the extension
The DOCUMENTATION column displays a link that redirects to the relevant extension documentation. You can add this link when you register the enricher.
Enricher Workbench
The Enricher Workbench is a Builder module that allows you to create and test your own lambda enrichers. The following sections describe how to access and use the Enricher Workbench.
Access the Enricher Workbench
Follow these steps to access the Enricher Workbench.
- Go to the Builder and select your project (tenant).
- Click Administration > Subscribe. The YaaS Market page opens.
- In the YaaS Market, select the Profile Core Services private package with the version ID 58c904bb0dddc3000e1633cb and click Subscribe Now.
- Select your project and follow the prompts to confirm your subscription.
- In the left navigation menu in the Builder, click Hybris Profile Developer Tools.
- Go to the Enricher Workbench Builder module, and complete the required fields to start creating your lambda enricher.
Enricher Workbench elements
This image shows the elements of the Enricher Workbench interface.
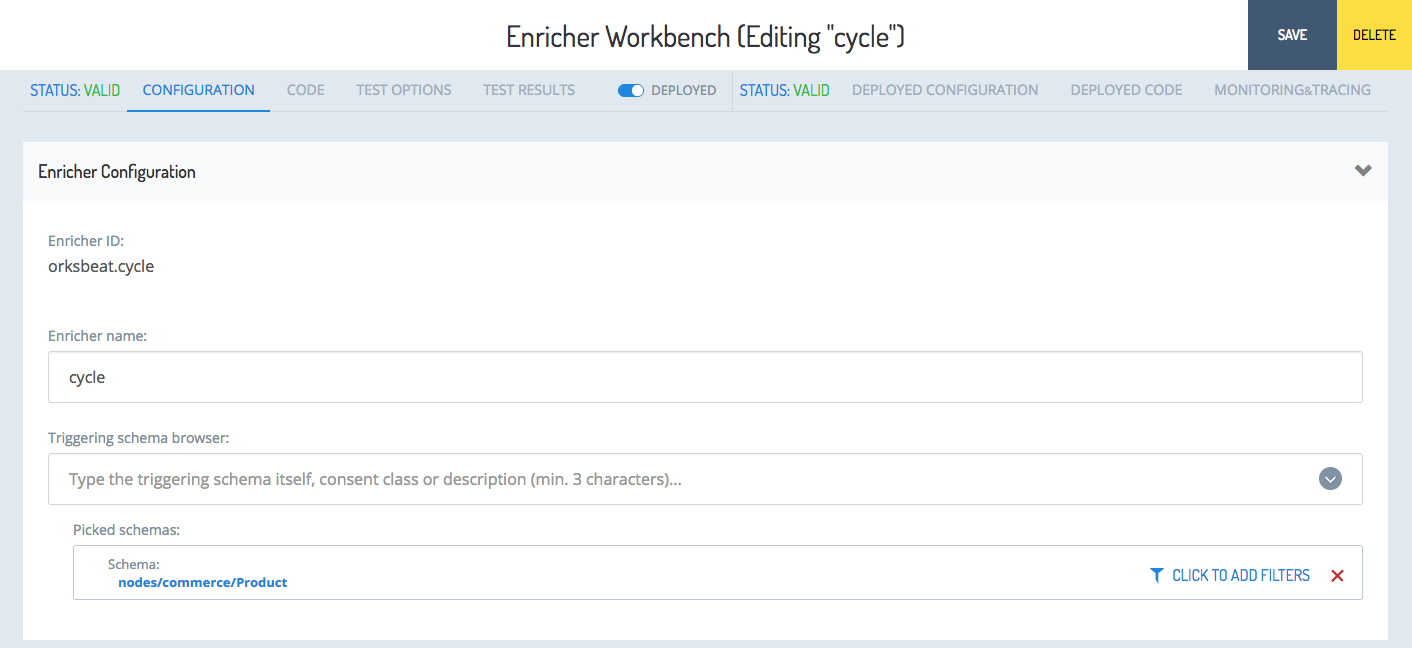
Profile Manager
The Profile Manager is an interface that shows how your profile changes in real time. Six tiles represent your favorite products and categories, interests, used devices, order statistics, and your funnel level. The funnel level is the stage in the customer's journey through an internet advertising system or search system.
The Profile Manager relies on the underlying Profile Management service to authenticate an anonymous user and to communicate with external services. The Profile Management service supports the anonymous authentication flow only.
The following sections explain how to access and use the Profile Manager.
Integrate the Profile Manager with the tenant's system
You can integrate the Profile Manager with your system. To do that, build a link that consists of the consent reference, the consent reference token, and the name of your tenant, as follows:
- for the USA:
https://profile-manager.us-east.modules.yaas.io/profile?t={tenant}&cr={consent-reference}&token={consent-reference-token} - for Europe:
https://profile-manager.eu-central.modules.yaas.io/profile?t={tenant}&cr={consent-reference}&token={consent-reference-token}
Display your profile using Profile Manager
The Profile Manager is a visual user interface that displays the current state of your profile. Whenever you browse a storefront, the Profile Manager depicts your activity by adjusting the details in the presented tiles. The system visualizes all changes in the profile in real time.

Profile Tag Overview
Tracking consumers on web pages requires capturing data while consumers browse the site. This is usually accomplished with a tracking pixel, or a tag: code inserted into a web page that sends data to the server. In the past, tracking pixels were transparent GIF images. Now, they are being replaced by more sophisticated tags based on JavaScript.
It can be cumbersome to manually create and maintain such tags throughout a website. SAP Hybris Profile Tag simplifies tag management and data capture. Using the easy-to-use Builder module, you configure the way data gets sent to SAP Hybris Profile. You can also test the configuration interactively in the live mode. SAP Hybris Profile Tag offers a flexible way to adapt to the structure of your online presence, and allows you to define the so-called events that you create by sending the information you wish to store in SAP Hybris Profile.
Profile Tag components
SAP Hybris Profile Tag consists of the following components:
- A Builder module, which is the graphical user interface to configure the tag for your website
- A JavaScript library to include in your website's code that:
- enables the live-tagging during design time, as well as page configuration
- captures elements of the page and sends its data to SAP Hybris Profile during the run time
For more details about the Profile Tag components, see the Elements of Profile Tag section.
Purpose
The configuration is the core of the Profile Tag. The configuration defines which tracking events to send and how to compose the payload. With each page view, the Profile Tag reads the current configuration of a specified site, creates tracking events according to the configuration, and sends these events to SAP Hybris Profile.
This section explains how to set up the Profile Tag for a site and how to define or edit the configuration.
Prerequisites for Profile Tag
The Profile Tag is part of the SAP Hybris Profile Services for Core package. Subscribe to the required packages in your project by following these steps:
- Select your project from the Projects section in the Builder.
- In the left hand side navigation menu, click Administration, and then Subscriptions.
- Click + SUBSCRIPTION. The YaaS Market page opens.
- Subscribe to these packages:
- SAP Hybris Profile Core Services
- SAP Hybris Profile Services for Commerce
For more information, see the Builder documentation.
Elements of Profile Tag
Site
A site is a set of web pages, such as a web shop or a website, from which you can collect the data about customer interactions to build up customer profiles. A site can be a website, or any other online presence, which is capable of executing JavaScript. In the most common use cases, the Profile Tag is used by an online shop, such as www.someshop.com. If the internal structure of the pages or privacy regulations between www.someshop.com/us and www.someshop.com/de differ greatly, set up two sites, one for the US version and one for the DE version.
Pages and Page Types
A site usually has many pages. A shop with 100 products most likely has a product detail page for each of these 100 products. Besides that, the site can have an "about" or "imprint" page, a start page, a cart page, perhaps a range of landing pages for SEM or other campaigns, category pages, keyword search result pages, and so on. The content of 100 pages might differ, each showing a different product, but their internal HTML structure does not differ. All pages have similarly composed titles, header elements, add-to-cart-buttons, and so on. A tenant that wishes to track user behavior on product detail pages, most likely wants to track it on all 100 pages.
That is why in the Profile Tag, you can configure Page Types, as well as define how the Profile Tag is supposed to compose and send tracking events.
Configuration
The goal of the Profile Tag is to create and send service calls to SAP Hybris Profile. In order to send the correct events with the correct payload, each tenant has to set up a configuration which tells the Profile Tag how to translate the elements of the tenant's site into the relevant service call payloads. A tenant makes the configurations in the Builder, and then store them in, and retrieve them from, a remote storage. A tenant creates separate configurations for different page types within his site.
Tag
If a page is supposed to send events to SAP Hybris Profile, the page needs to have the Profile Tag JavaScript introduced. This script fetches the configuration for this site and applies the appropriate configuration to the current page to generate and send off the tracking events to Profile.
Builder module
A user interface in the Builder is called a Builder module. The Profile Tag comes with a Builder module, which allows for setting up both site-specific and page-specific configurations that map page elements to Profile tracking service calls.
Mechanics of Profile Tag
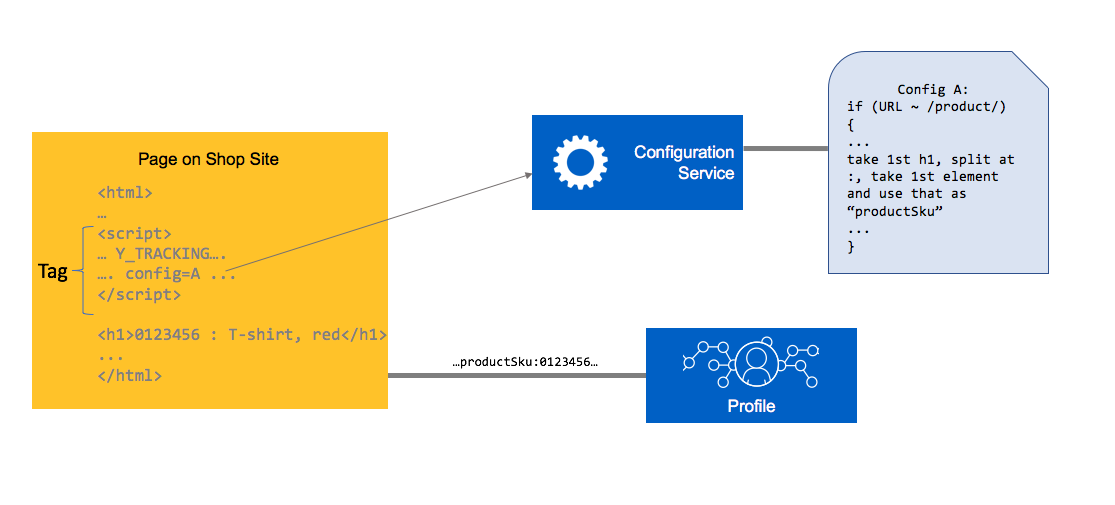
When a site containing the Profile Tag is served to a visitor, SAP Hybris Profile Tag sends events according to the configuration of the page types. What data gets sent for a page that a user visits depends on the page types that apply to that specific page. A page can belong to zero, one, or many page types. The configuration for each page type contains a set of abstract rules to define where to get the data from within the specified page, and what tracking parameter to use those data.
Example
A tenant can have this configuration:
- Whenever the URL of a site's page contains the string "&reviewid=", this is a Product Review Page.
- In Product Review Pages, seek the first <h1> element of the page, split its value at the ":" character, take the first element of the resulting array and use it as the productSku.
- In ProductDetailPageView event messages, this value will be used as productSku.
The getting started tutorial
- Make sure to subscribe to the right packages. To learn what packages to subscribe to, see the Prerequisites for Profile Tag section.
- When you open your project in the Builder, select Profile Tag in the menu on the left.
- Select + ADD SITE and follow the instructions in the Set up Profile Tag section.
- After setting up a site, you need to set up at least one new page. For more details, see the Set up a new page type section.
- Introduce the Profile Tag JavaScript to the pages of your site that you want to track. For more details, see the Insert Profile Tag into the website section.
- To check if everything works as expected, go the Builder, open the site that you created and the page you want to check. Click on START QUICK INGESTION and then TURN ON INGESTION. Next, click on the Test buttons in each row under Value Retrieval. You should see the desired values in the PREVIEW column.
Set up Profile Tag
If you use your YaaS project on one site, you need to configure only one site for the Profile Tag. If you have a second site using the same YaaS project, but the pages of the second site have the same internal HTML structure as the pages of the other site, technically you do not need a second site configured in the Profile. Nevertheless, it is recommended that you create a second site.
To set up a new site in the Profile Tag, select Profile Tag in the menu on the left, and then + ADD SITE".
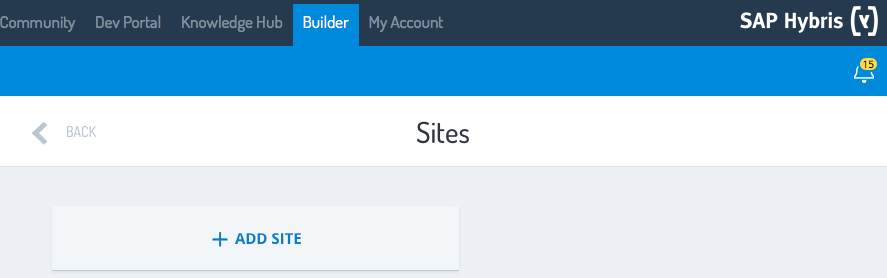
Next, specify the following details:
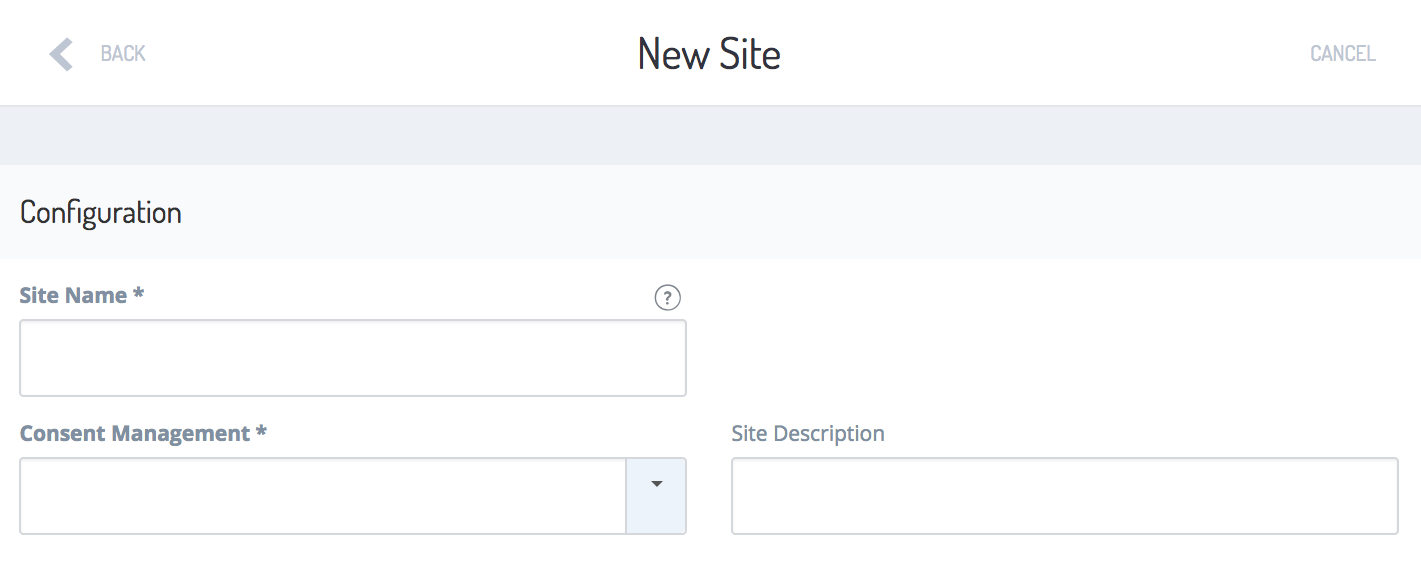
- Site Name
- The site name used in the Builder
- Must be unique within your project
- Consent Management
- This setting determines how your site deals with customer consents
- Consent management can be either implicit, or explicit:
- Implicit consent management
- Customer consent is assumed (opt-out). The customer does not need to express permission
- ProfileTag proactively makes requests to the Profile to create new user-individual consent records with the tenant's default consent settings. The records are stored and used during subsequent visits
- This setting overrides the type of consent management policy, defined for the site to which this page belongs
- Explicit consent management
- Customer consent is not assumed (opt-in). The customer must express permission
- This setting overrides the type of consent management policy, defined for the site to which this page belongs
- Add the Consent selector type that specifies how to create consents
- Implicit consent management
- Site Description
- This setting is optional
- It is a more detailed explanation of the purpose of a site. It is especially helpful if you have multiple sites.
When you save your changes, you are redirected to the site management page. This page contains more data and controls than the New Site page.
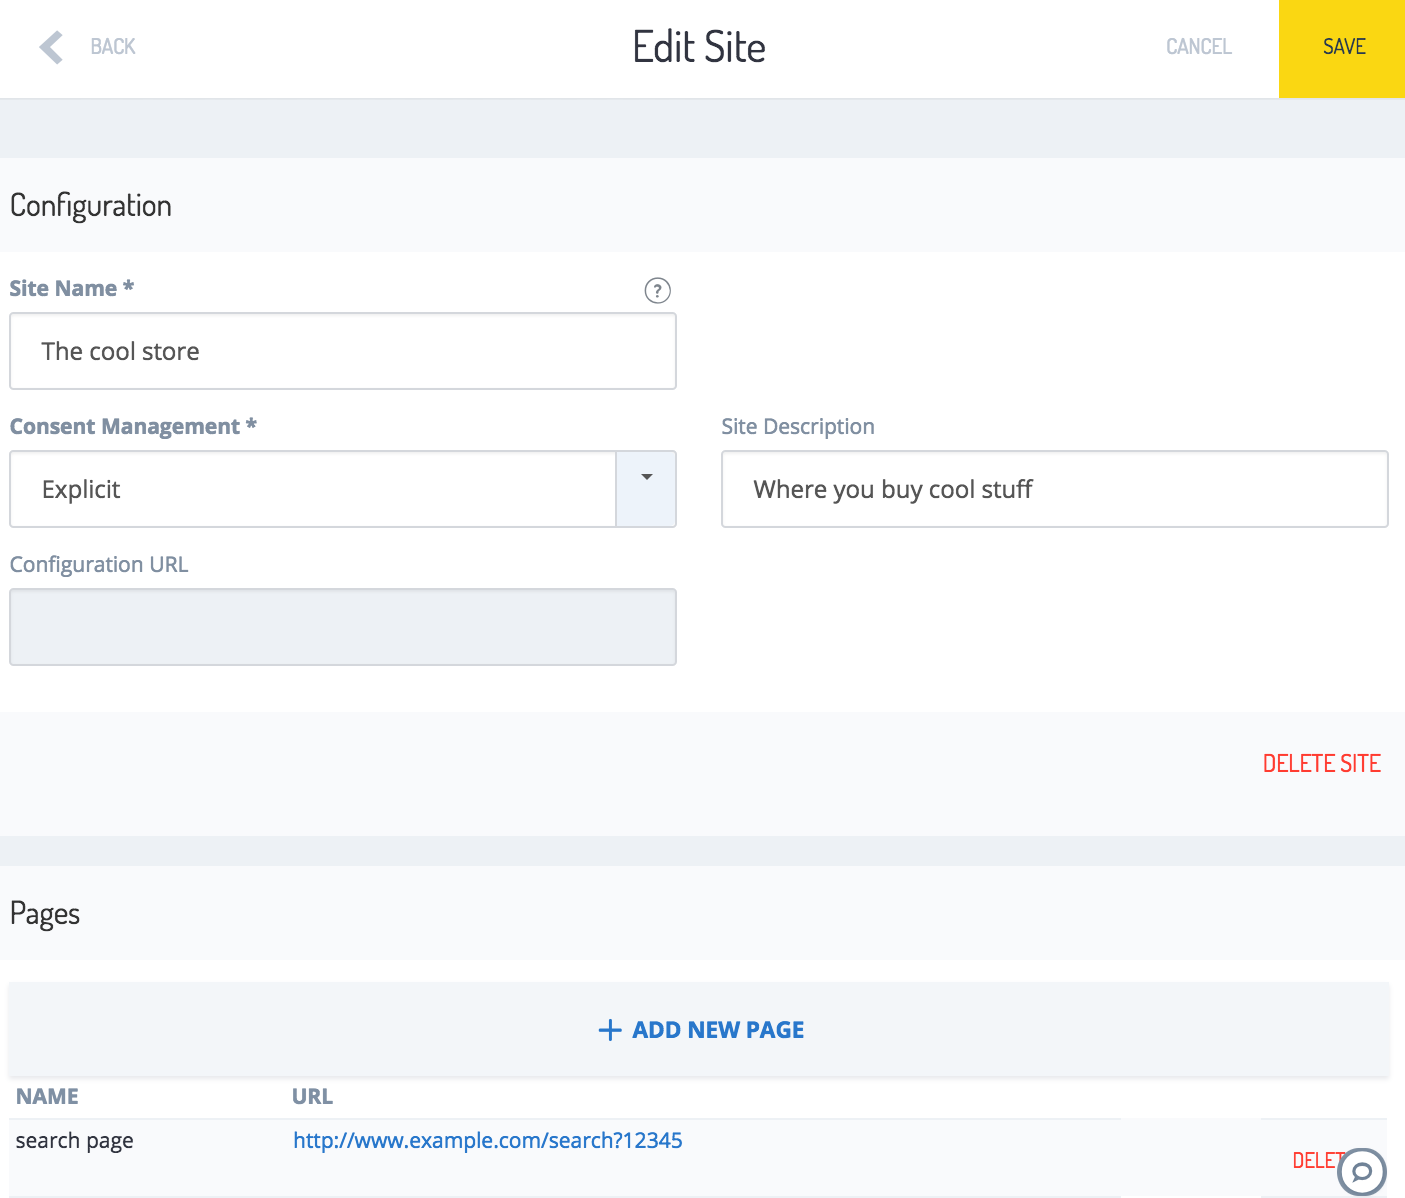
- Configuration URL
- This is the location where the site's configuration is stored
- Required when you introduce the tracking code to the pages of your site
- SAVE
- Click this button to save the site configuration
- DELETE SITE
- Removes the site and its configuration
- The delete operation is irreversible
- Pages
- The list of page types belonging to this site. For more detail, see the Set up a new page type section.
All site configuration changes must be saved to take effect. Click the SAVE button on the top right.
Set up a new page type
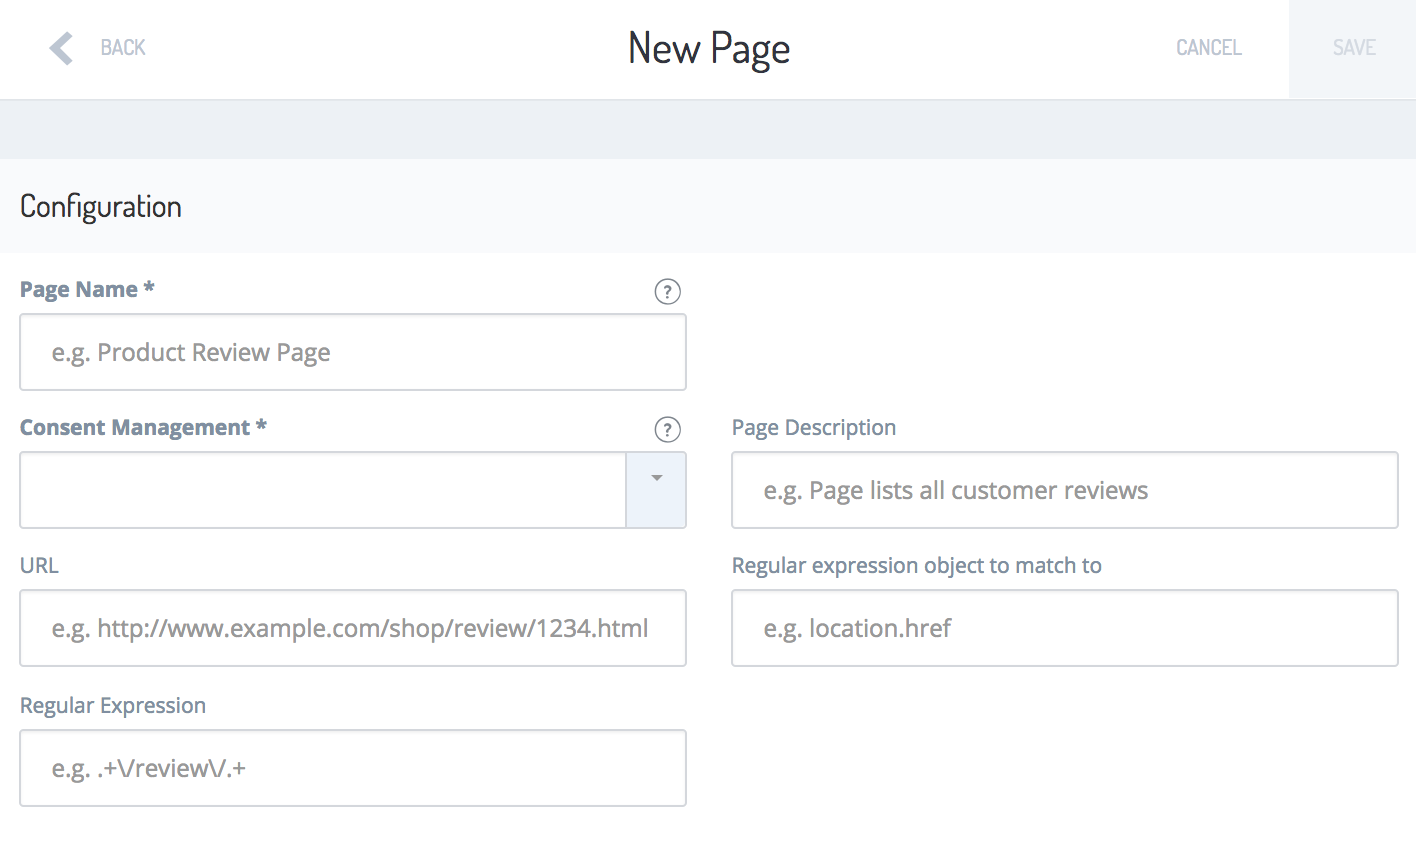
A site usually has several different types of pages in the abstract sense, and many actual pages to be visited. This natural structure is reflected by the Page Types defined in the Profile Tag. A page can be linked to one or multiple Page Types at once, or to no Page Types at all.
Sample scenario
In this sample scenario, a store offers 500 different products. While each product has its own product detail page with a unique URL, these 500 pages have the same DOM identifiers. That is why it is sufficient to configure a single page type, named Product Detail, to enable tracking for all pages offering a detailed view of a product.
If, however, a customer performs a keyword query, the site displays a page with a different internal structure. If keyword search result pages should send events to the Profile too, configure a new page in the Profile Tag.
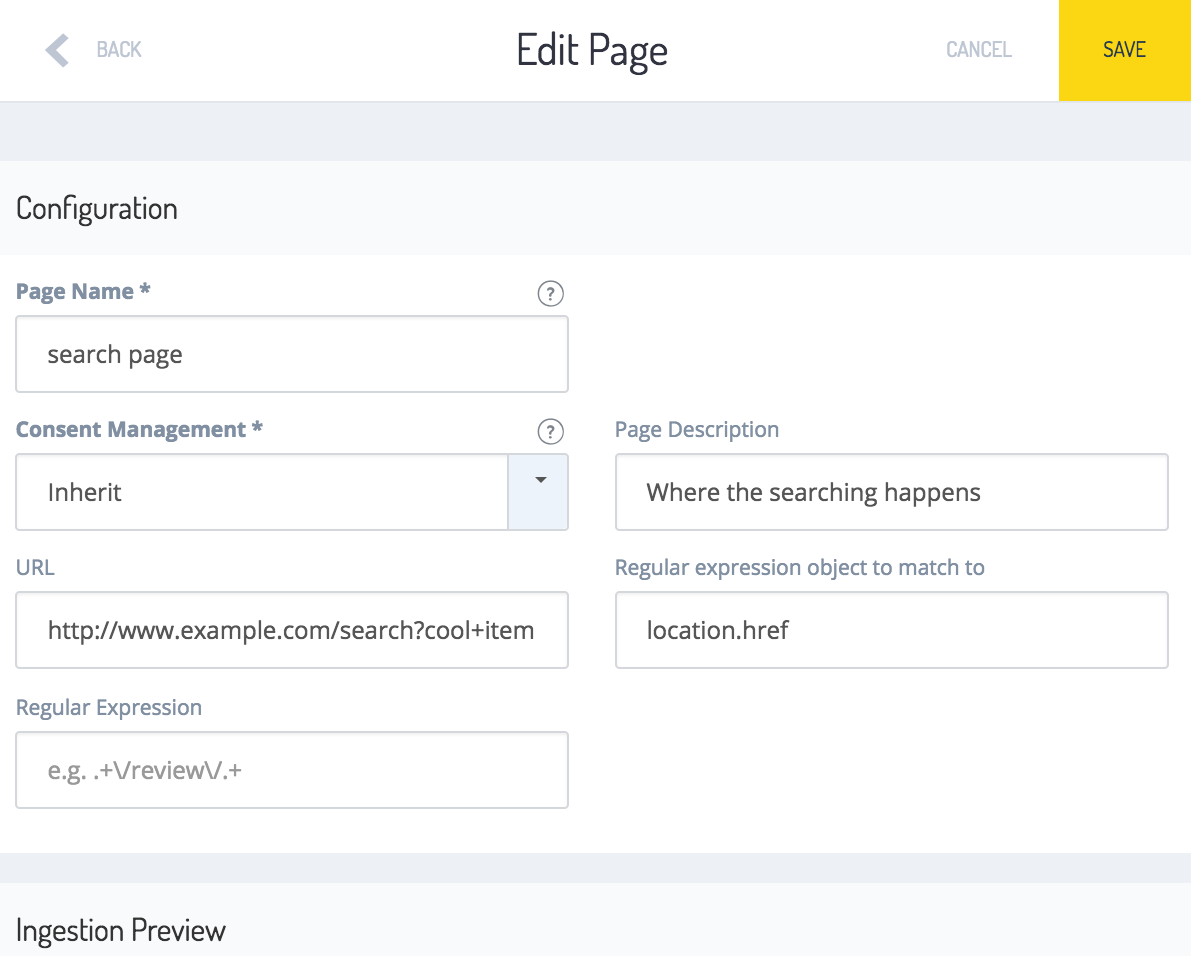
When creating a new page definition, supply the following information:
Name
- The name of the page type you are creating this definition for
- Use the vocabulary you are used to, or find a good fit
- Examples
- "Products overview"
- "Detailed_Product_View"
- "product review page"
- "StoreSearch"
- "Home"
Description
- Add a description to explain what the purpose of the page is, especially if the title is not self-explanatory. This setting is optional.
Consent Management
- Defines how this page type deals with customer tracking consents
- Consent policy options:
- Inherit
- The consent settings of the site this page belongs to are applied to this page
- Recommended setting, see the Best practices section
- Implicit
- For details about implicit consent, see the Set up Profile Tag section
- Explicit
- For details about explicit consent, see the Set up Profile Tag section
- Inherit
URL
- You can supply a complete URL of a representative page of your choice for this page type
- Examples
    - http://www.example.com/some/path/productname.html
    - http://www.example.com/store/product/12345a/Details
- Use this page to select and test the selectors
- You can change the URL at any time. Its sole purpose is to allow you to conveniently manage page configuration in the Builder.
- The tracking behavior of the Profile Tag remains unaffected by the page's availability
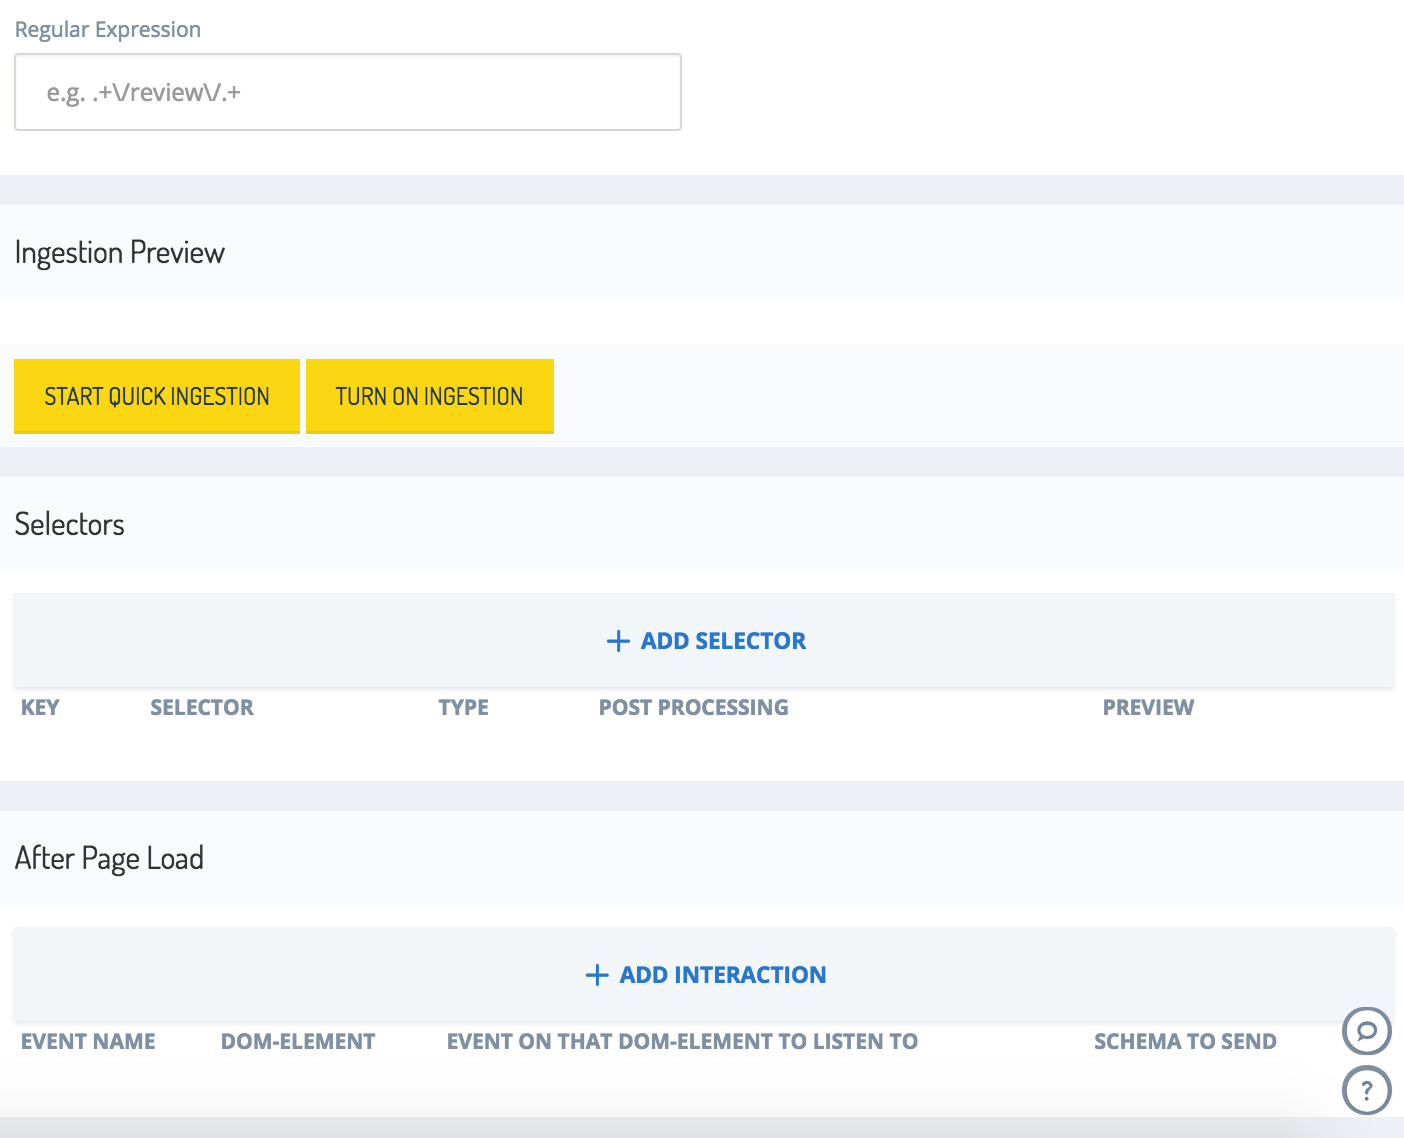
Regular expression
- How Profile Tag recognizes the page type gets defined here.
- Regular expression is the pattern applied to the Object to match with Regular Expression which can be:
- a JavaScript Object inside the top-level client side Object "window"
- Identify the JavaScript Object by inspecting the sources and DOM Structure of your page in the browser or, if possible, have a look at your website's code directly
- For more information about the JavaScript Object "window" see the Mozilla Developer Network
- For more information about the DOM Tree see the Mozilla Developer Network documentation
- The content of a DOM element inside the HTML-tags using CSS Selectors
- Identify the CSS selector by inspecting the DOM Structure of your page in the browser or, if possible, have a look at your website's code directly
- For more information about CSS Selectors see the Mozilla Developer Network documentation
- a JavaScript Object inside the top-level client side Object "window"
- Whenever a page containing Profile Tag is rendered all regular expressions detecting a page type defined in Profile Tag are evaluated
- If there is a match, that is, if the evaluation returns the value "true", the Page Type is recognized and the corresponding events are sent
- A single instance of a page can get recognized as several different page types simultaneously. The event settings of all Page Types are applied.
- Standard JavaScript Syntax is used for defining regular expressions
- For tutorials on regular expressions, see the
- codeproject.com and the
- regular-expressions.info tutorial
- To check if a regular expression is working as expected, see the
- Examples:
Page Type Actual page structure characteristics Object to match with Regular expression Regular expression "Product Detail Page" "/product/" in the URL location.href \/product\/ "Cookie missing" In the URL, there is no text "cookie" followed by a single dollar sign and a 5 digit number location.href ^(?!.cookie\$\d{5}).$ "Search Page" After clicking on the search button, the user is directed to "www.example.com/frenchStore/searchqueryterm?"; both http and https are possible document.referer (http|https):\/\/www.example.com\/frenchStore\/searchqueryterm\? "Product Detail Page" A title containing the word "Details" with a capital "D" as an attribute value .title [value] Details "Searched" A span element inside an element with the identifier "query" containing the text "you searched for" #query span \byou\b\s\bsearched\b\s\bfor\b\s
To take effect, all changes made to the configuration of a page type must be saved. Click the SAVE button on the top right corner of the screen.
Now that the Profile Tag knows under which circumstances it can assume that a rendered page is of a certain page type, it can analyze the details of a customer's visit to extract information enriching the customer's profile:
- Profile Tag needs to know what events should be sent
- An event has a number of attributes, which is represented by a map of key-value-pairs
- Some events derive their values from the automatically created message body, therefore having no mandatory attributes to be configured
- Other events need manual configuration to be sent using the message body. If that is the case, for every key, the Profile Tag requires information on what element or Object contains the relevant data
- The raw data may be post-processed before being sent
Configure events
Selectors and interactions
SAP Hybris Profile uses events, which are messages that contain data from a tracked page and visitors. SAP Hybris Profile processes the event data to enrich a visitor's profile.
A trigger prompts these event messages to send. SAP Hybris Profile differentiates between events that occur while the page is loaded, which you configure using selectors, and events that can occur after the page is loaded, which you configure using interactions. All events, regardless of the trigger, must contain meaningful data in the message body. You can configure the Profile Tag to send any data from the page as properties in the body, be it from a DOM element, a JavaScript object, cookie, or a static value.
To edit the existing selectors and interactions, click the relevant row of the respective list.
Selectors
Selectors allow you to define data that SAP Hybris Profile Tag extracts from a website every time this website is loaded. This section explains how to add, edit, and remove selectors as well as the configurable paramaters of selectors and their effects.
Create a new selector
To configure a new selector:
- Click ADD SELECTOR. A configuration window opens.
- Add properties to an existing event, or configure a new event. See Fields to configure for more details.
- Click SAVE in the bottom-left corner of the window. The window closes.
To let your changes take effect:
- Click SAVE in the top-right corner of the screen.
- Click BACK in the top-left corner of the screen.
- Click ROLL OUT in the top-right corner of the screen.
Fields to configure
Specify the data that you send in the body of an event. In particular, you must define these elements:
- Key
- Selector
- Attribute
- Type
- Post-processing functionality and parameters
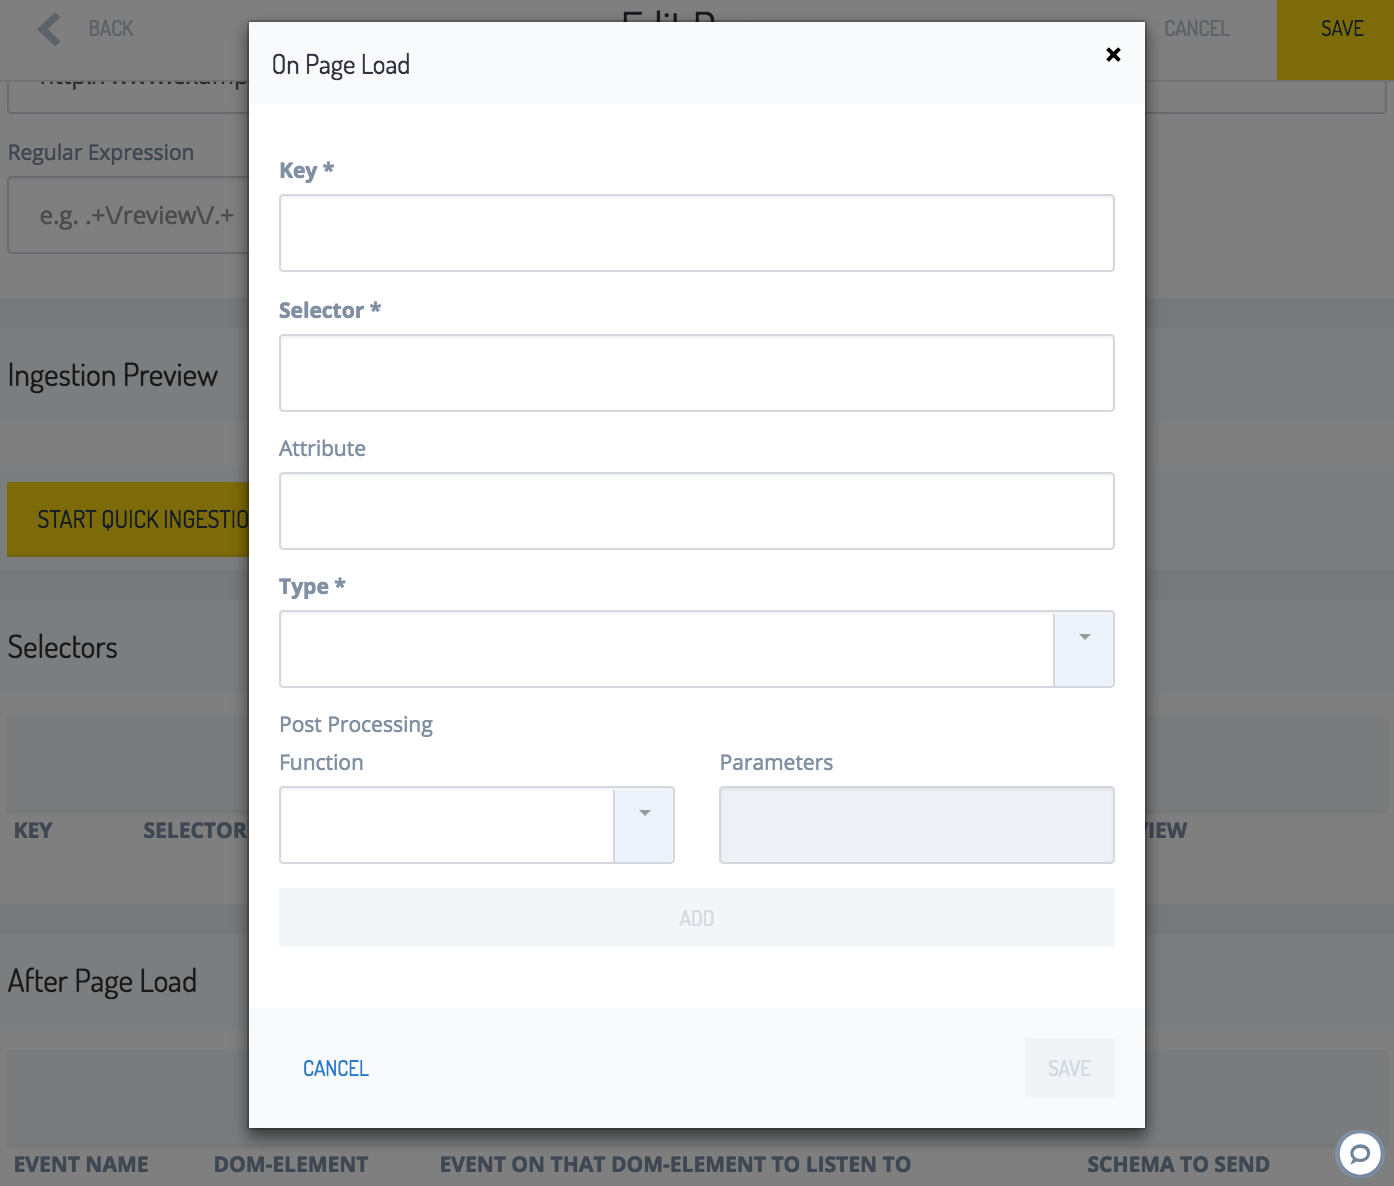
Delete selectors
Deleting a selector is an irreversible operation, which means that you would need to re-enter the data if necessary.
To delete a selector:
- Click DELETE.
- Click the SAVE button in the top right corner to make the deleted operation take effect.
Test selectors
Currently, testing works only for a selector of the type Text, added using ingestion. This operation outputs the value, in the form in which it is sent, as an event to SAP Hybris Profile. It includes post-processing steps, if given.
To test a selector:
- Click START QUICK INGESTION.
- Click TEST.
- See the output in the PREVIEW column.
Selector.Key
Keys act as names, and accordingly, as identifiers for the properties to send in the message body. You can send data either within the generic PageView event or within specific, predefined events.
- Provide certain, reserved keys to create specific events implicitly.
- Fill in all of these reserved keys with non-empty string values to trigger the respective, specific event.
- If a key is not in the list of reserved keys, it is appended to the generic PageView event.
The following table shows a list of specific events and reserved keys.
| Event Type | Reserved keys to create event |
|---|---|
| PageView | none |
| ProductDetailPageView | productSku (stock-keeping unit, the shop-wide unique identifier of the product) productName productCategory productPrice |
| CategoryPageView | productCategory |
| Search | searchTerm productCategory (optional and, if provided, the predefined logic uses it) |
Selector.Selector
When configuring a selector, define the Selector field to indicate where to collect the data from. The syntax of retrieving data from the page depends on the type you select.
Selector.Type
There are various sources where you can retrieve the data to be sent. Select the appropriate type of data source according to the structure of the page. This means that you can obtain the values from the following sources or actions:
- the DOM tree using CSS selectors
- reading from a JavaScript object inside the top-level client-side object window
- reading the visitor's cookie
- sending a static string
For more information about:
- the DOM tree, see the Mozilla Developer Network documentation
- the CSS selectors, see the Mozilla Developer Network documentation
- the JavaScript
querySelector()method targeting the first DOM tree element matching the specified CSS selector(s), see the Mozilla Developer Network documentation - the JavaScript object window, see the Mozilla Developer Network documentation
- cookies, see the Mozilla Developer Network documentation
Different selector types in detail
SAP Hybris Profile supports different types of selectors, from simple constant values, to extracted data from the DOM of a website, or even user's cookies.
DOM tree elements using CSS selectors
By using CSS selectors, you can extract the inner Text, the inner HTML content, or DOM-Attributes of an element.
Text
- Include only plain text inside the opening and closing HTML tags of the DOM element
- Removes the opening and closing HTML tags of the element
- Removes HTML tags from the nested tags
Example:
<div id="demo"><a href="url">My text</a></div>
<script>
var x = document.querySelector("#demo").innerText; // The value of x is "My text"
</script>
DOM element
The DOM element:
- includes the entire content of the DOM element and the opening and closing HTML tags of the DOM element
- does not remove any tags, either from the element itself, or from the nested tags, if applicable
- omits HTML attributes (for more information about HTML attributes, see the Mozilla Developer Network documentation)
Example:
<div id="demo"><a href="url">My text</a></div>
<script>
var x = document.querySelector("#demo"); // The value of x is Html DOM Element <div><a>My text</a></div>
</script>
HTML
HTML:
- includes the entire content of the DOM element but without the opening and closing HTML tags of the DOM element
- removes tags from the element itself but not from the nested tags, if applicable
- omits HTML attributes (for more information about HTML attributes, see the Mozilla Developer Network documentation)
Example:
<div id="demo"><a href="url">My text</a></div>
<script>
var x = document.querySelector("#demo").innerHTML; // The value of x is "<a href="url">My text</a>"
</script>
Identify the CSS selector
There are multiple ways to identify the DOM tree element to select.
Inspect the page or code
As described in the Regular expression section, the usual procedure for identifying the DOM tree element to select is as follows:
- Inspect the page in the browser or, if possible, look at the code directly.
- Click ADD SELECTOR.
- Enter the correct CSS selector into the Selector field.
Use ingestion
For DOM elements of the type Text, DOM Element and HTML there is an alternative way using the Ingestion Mode. This approach adds a new selector without clicking ADD SELECTOR.
There are two prerequisites for this approach:
- You must add the Profile Tag JavaScript part to the sample page as explained in the Insert Profile Tag into the website section.
- The sample page must use the jQuery library.
To identify the CSS selector using this approach:
- Click START QUICK INGESTION. The page specified in URL field of the page loads inside the preview window in an embedded fashion.
- Decide which DOM tree element to select by looking at that page. You can also open the page in a separate browser tab if you feel restrained by the small preview window.
- When you make your decision, click TURN ON INGESTION. This switches from the regular mode to the ingestion mode.
- Hover over the page to see the DOM tree elements highlighted with red rectangles, which means that you can select them.
- Click a highlighted element to select it. The selected DOM identifier of that element is added to the list of selectors.
- Complete the configuration of the selector by clicking on the row of the corresponding selector in the list of selectors.
JavaScript as the type of data source
The JS variable reads from a JavaScript object inside the top-level client-side object window.
See the Mozilla Developer Network documentation for further details.
Write the name of the function in JavaScript syntax just like you would call it in the code, including round brackets and parameters, if needed. The returned value can be an array, an object, a string, or a number. To receive meaningful data, SAP Hybris Profile Tag requires simple values, otherwise, it cannot process the data. The array or object must be post-processed to extract the relevant simple value, such as a string.
Example:
<script>
var x = window['location']; // the value of x is "https://www.example.com/search?cool+item"
</script>
For further details, see the Post-processing function and parameters section.
Cookie as the type of data source
To use a cookie as the data source type, complete the Selector field with the exact name of the cookie.
For more information about cookies, see the Mozilla Developer Network documentation.
Example:
With JavaScript, you can create a cookie like this:
document.cookie = "username=John Doe";
To retrieve the value of the cookie, complete the Selector field with the name of the cookie username
Consent as the type of data source
If your page uses an explicit consent management, or your page inherits the explicit consent management option from its site, define how a user can opt-in to track data. In all other selectors, you define the source of where to get data. With consent as the type of data source, add an event listener to the defined source. Usually, it's a site that contains a button or link the user clicks on. Then, the event listener processes the opt-in request.
Add a new Selector with the following information:
- Key: Any descriptive string
- Selector: The query selector of an HTML element, such as a button or link, that listens to an opt-in request by the user.
- Type:
consent
Once you establish the configuration, Profile Tag adds a JavaScript event click listener to the specified HTML button. It does not send any information until the user selects the opt-in button manually.
See the Create Selectors section for more information.
Other types of data sources
In addition, SAP Hybris Profile supports two other selector types.
Constant
Use this type to submit a static value with each event to SAP Hybris Profile. To do so, enter the string in the Selector field.
GTM Data Layer
When your page uses the Google Tag Manager (GTM), you can configure Profile Tag to access the JavaScript variables defined in the GTM data layer. To do so, enter the name of the variable, which is case-sensitive, in the Selector field. The Attribute field in this case is ignored.
Selector.Attribute (optional)
This optional selector reads the value from the HTML attribute. It is only applicable for a selector of the type DOM Element.
Example:
Setting Attribute to src with the img tag
<img src=www.example.com/example.png>
results in Profile Tag obtaining and sending www.example.com/example.png, assuming it has no post-processing in place.
For more information about HTML attributes, see the Mozilla Developer Network documentation.
Post-processing functions and parameters (optional)
There are several possibilities to process values that are captured by your selectors before Profile Tag feeds them into SAP Hybris Profile. The following picture highlights the post-processing configuration section.
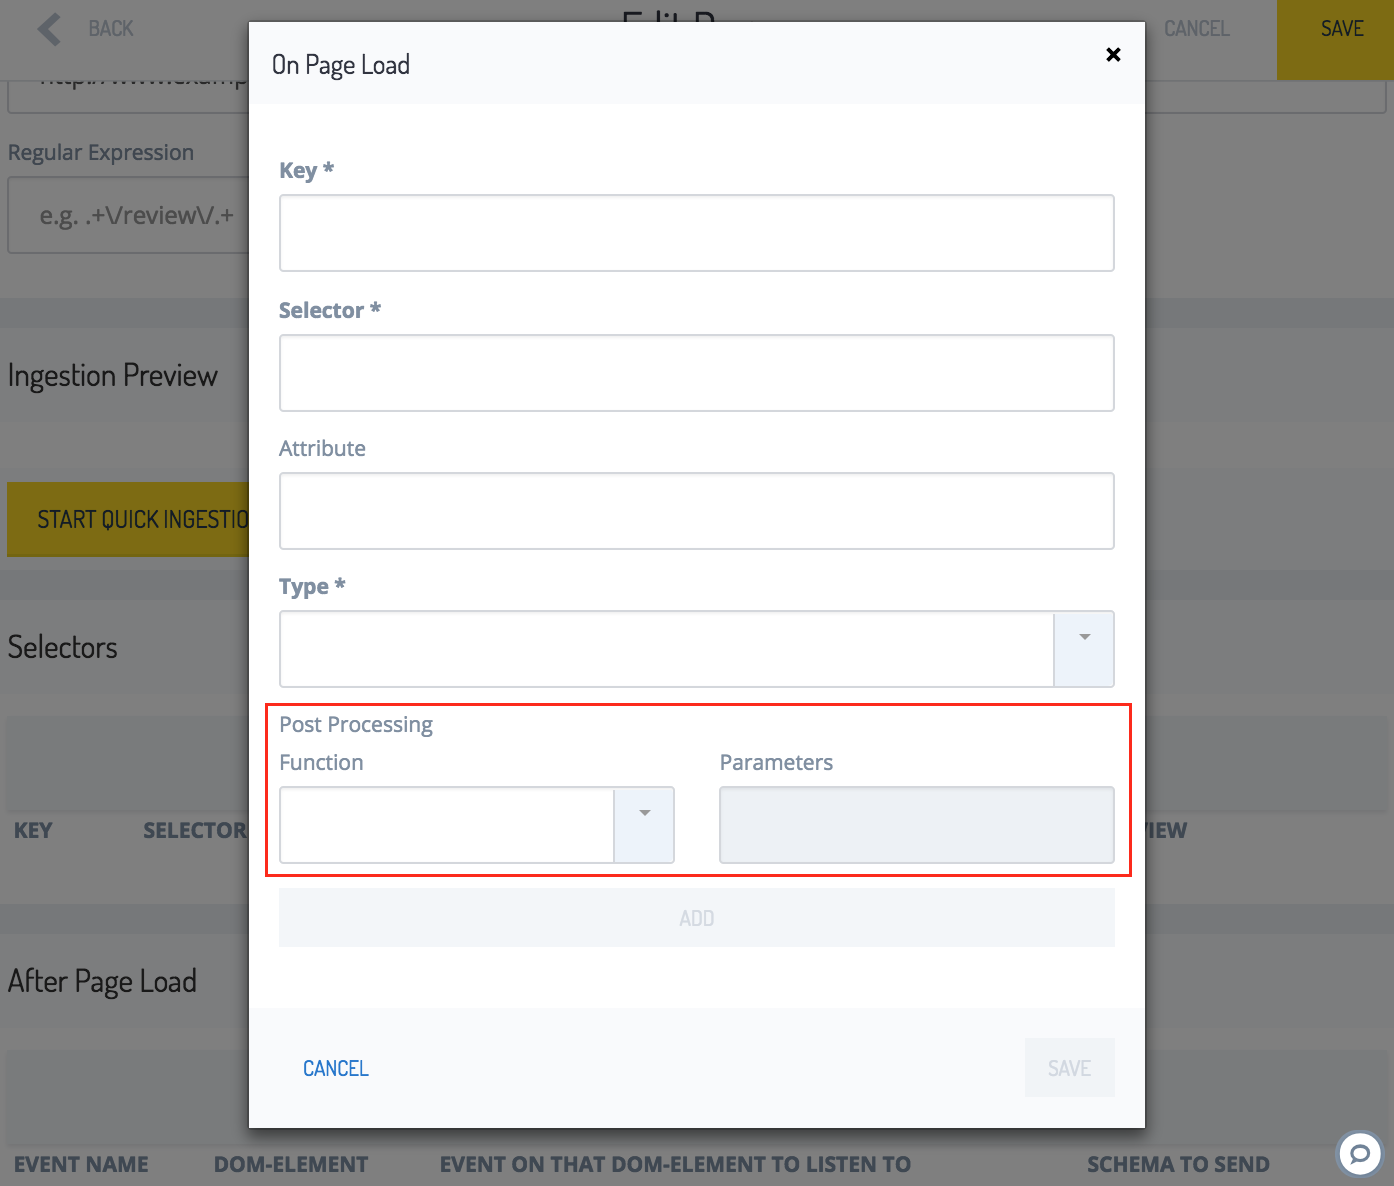
To add post-processing steps:
- Choose a function from the Function dropdown list.
- Set Parameter to a certain value, if the function takes this value as a parameter. Otherwise leave it empty.
- Click ADD.
- Repeat steps 1-3 for more post-processing steps.
For more information about post processing options and their functions and parameters, see the Post-processing function and parameters section.
Interactions
How the visitor interacts with the page after the page renders can be the starting point for sending events to SAP Hybris Profile, too. This way, the service can register a click on a button that does not make the page reload. Define the key, selector, and attribute properties to send, and the schema that determines how to send the data to SAP Hybris Profile, according to your needs. Additionally, an interaction can contain a list of mappings where each mapping contains data collected from different DOM elements.

Create a new interaction
To configure a new interaction:
- Click ADD INTERACTION. A configuration window opens.
- Add properties to an existing event, or configure a new event. See Fields to fill in and List of Mappings for more details.
- Click SAVE in the bottom-left corner of the window. The window closes.
To let your changes take effect:
- Click SAVE in the top-right corner of the screen.
- Click BACK in the top-left corner of the screen.
- Click ROLL OUT in the top-right corner of the screen.
Fields to fill in
| Fields | Description |
|---|---|
| Event name | The freely defined name for the event. |
| DOM-element | Select a DOM-element, as described in the Selector.Type section, which triggers the event. |
| Event on that DOM-element to listen to | Uses DOM events. For more information about DOM events, see the Mozilla Developer Network documentation. Examples: click, mouseover |
| Schema to send | Either use one of the predefined event schemas to send as an interaction, or define your own. When configuring an interaction on your own, without referencing one of the reserved interaction Schemas, keep in mind that an enricher needs to catch and process these attributes to be able to enrich a profile. Predefined events:
|
List of Mappings
| Fields | Description |
|---|---|
| Key | states the name of the attribute to send to SAP Hybris Profile, for example: cartID, searchTerm, videoTopic. |
| Selector | states the HTML DOM element from which to read the data |
| Attribute | states where to get the data from within the HTML DOM element using the HTML DOM attribute notation, such as:
|
Example:
Your web page contains the following markup and you want to send an event that contains videoTopic: coolMovie.mp4.
<video width="320" height="240" controls>
  <source src="coolMovie.mp4" type="video/mp4">
</video>
To achieve this, do the following steps:
- Enter
sourceinto the Selector field (becausecoolMovie.mp4is a component of thesourcetag of your markup). - Enter
srcinto the Attribute field (because within thesourcetag, thesrcattribute is the relevant one). - Enter
videoTopicinto the Key field (because that is the key you want the sent event to contain). - Click ADD MAPPING.
This is a list of the reserved schemas and their required attributes:
| Schema to send | Mandatory Attributes |
|---|---|
AddToCart | cartID the identifier of the visitor's shopping cart productName productSku stock-keeping unit: the shop-wide unique identifier of the product productPrice qty quantity: defaults to 1, if not set productCategory |
ChangeQuantityInCart | see the AddToCart event |
RemoveFromCart | see the AddToCart event |
KeywordSearch | searchTerm productCategory |
VideoInteraction | none |
Download | none |
Outlink | none |
When you finish configuring an event or an interaction, or you edit a page type in any other way, click SAVE in the top-right corner to make your changes permanent.
Post-processing functions and parameters (optional)
There are several possibilities to process values that are captured by your interaction mappings before Profile Tag feeds them into SAP Hybris Profile.
Assume there is already a certain interaction defined, as well as a mapping from a key key to the selector #selector. The list of mappings contains this mapping. A click on the key highlighted in blue unfolds the postprocessing options. The following picture shows that situation.
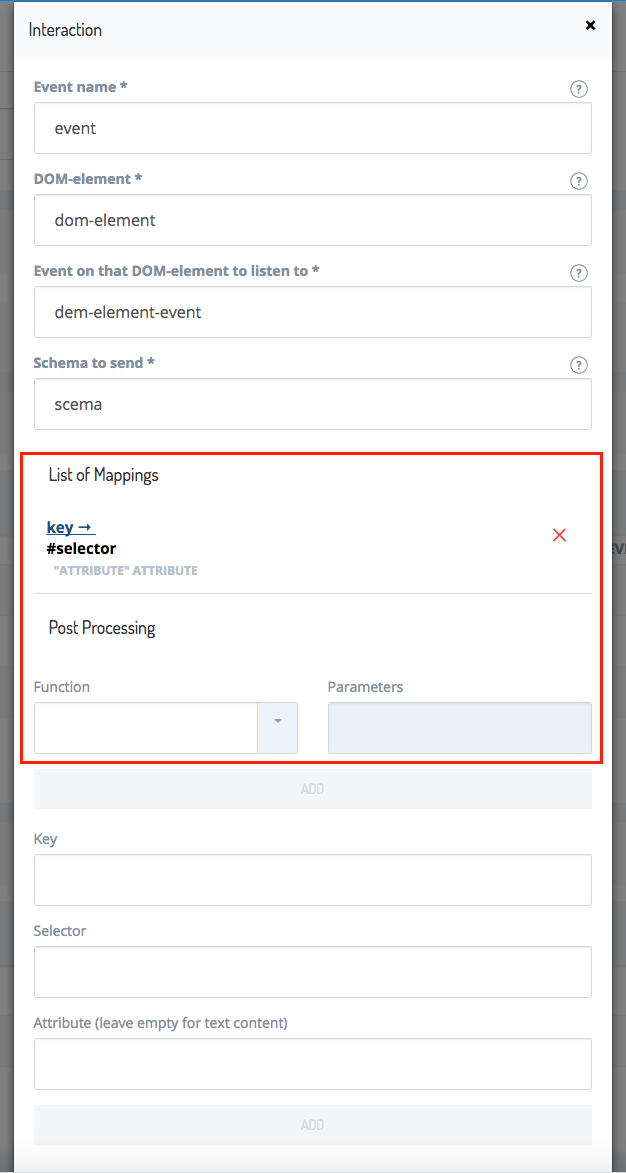
To add post-processing steps:
- Choose a function from the Function dropdown list.
- Set Parameter to a certain value, if the function takes this value as a parameter. Otherwise leave it empty.
- Click ADD.
- Repeat steps 1-3 for more post-processing steps.
For more information about post-processing options and their functions and parameters, see the Post-processing function and parameters section.
Post-processing functions and parameters
Sometimes taking the value of a selector and using it 1:1 in the generated payload is a suboptimal solution. SAP Hybris Profile also needs simple values, i.e. strings, to process data. Therefore you can specify a list of post-processing steps. The steps run one after another, like a stack of papers with each paper containing an instruction, i.e. the order of these post-processing steps matters.
To insert a post-processing step between two already existing steps, or to add a step before an existing step, delete all post-processing steps and start over from scratch.
To retain the settings used previously, take a screenshot of your existing work and reference it when configuring the new list of steps.
With the post-processing inside the Builder module, you can alter the string, array, and object values.
Simple value post-processing with JavaScript methods
Post-processing regarding simple values is based on the selected standard JavaScript String methods.
For more information about JavaScript String methods, see the Mozilla Developer Network documentation.
Trim
trim removes leading and trailing whitespaces. The value remains a simple value.
Example:
var str = "       Hello World!        ";
var x = str.trim();     // the value of x is "Hello World!"
Split
split requires a non-empty, non-whitespace string as a split pattern in the field Parameters. The string is converted to an array. Use array methods after using the split method to manipulate the result further, for example by using a combination with pop or shift.
Example:
var txt = "a,b,c,d,e";   // String
txt.split(",");          // Split on commas
txt.split(" ");          // Split on spaces
txt.split("|");          // Split on pipe
Array post-processing with JavaScript methods
Post-processing regarding arrays is based on the selected standard JavaScript array methods.
As explained in the JavaScript as the type of data source section, you must post-process a JavaScript array or object to extract the relevant simple value, whether it is a string or a number. Because an array can be nested, that is, contain arrays as elements, you might need to apply post-processing several times to allow Profile Tag to use the data.
For more information about JavaScript array methods, see the Mozilla Developer Network documentation.
Shift
shift returns the first element of an array and does not take parameters.
Example:
var arr = ["a", "b", "c", "d"];
var x = arr.shift();     // the value of x is "a"
Pop
pop returns the last element of an array and does not take parameters.
Example:
var arr = ["a", "b", "c", "d"];
var x = arr.pop();      // the value of x is "d"
Object post-processing
Use the map_get function for object post-processing. This function requires the selector to be an object at this point of the post-processing chain.
JavaScript objects are technically maps, where the stored data is called attributes. Each attribute has a value and a name, known as the key. Using the key, you can reference and obtain the desired value. Put the key inside the Parameter field.
JavaScript objects can contain multiple layers, which means that you can nest them, just like an HTML tag can contain more HTML tags inside of it. They can also contain arrays. Because of this, you might need to use map_get multiple times, or array methods, to obtain simple values.
For more information about JavaScript objects, see the Mozilla Developer Network documentation.
Example:
var myMap = {"key1": "value1", "key2": "value2"};
var x = myMap["key1"];      // the value of x is "value1"
Post-processing combination examples
Combining post-processing steps together can be quite powerful to fulfill certain use cases. The following examples demonstrate some selector possibilities. They work for post-processing mapping results in interactions, too.
String and array post-processing example
If you want to take the productSku from the title of the page using the selector type text, but your page titles are constructed as follows: ProductSKU + ' - ' + ProductName + ' - ' + YourShopName, take the page title and do some post-processing to cut away the unnecessary parts. Select the first element as shown in the example.
Example:
- Add a
splitfunction with the Parameter-. This creates an array containing three simple values:ProductSKU,ProductName, andYourShopName. - Add the
popfunction. This will obtain the last value,ProductSKU, a simple value usable by SAP Hybris Profile.
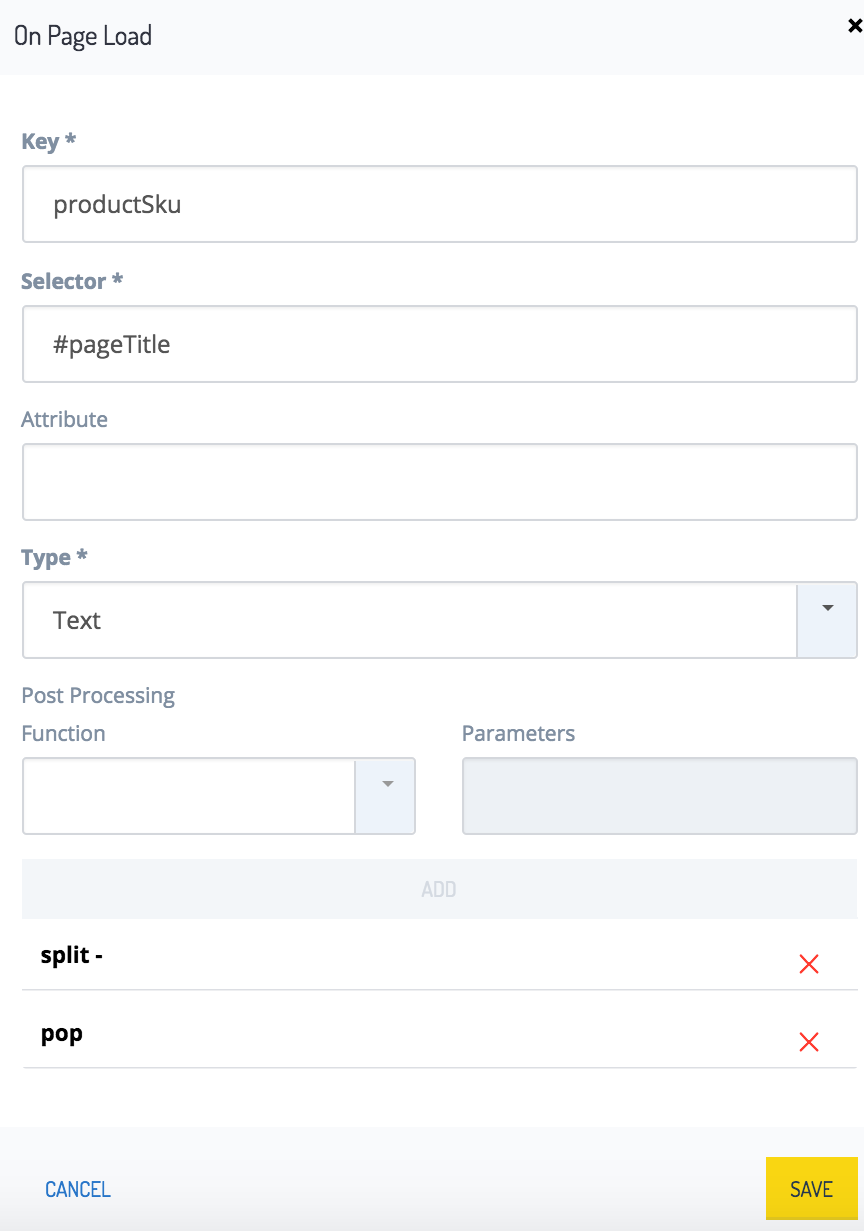
Object post-processing example
If you want to obtain the year a customer was born in, and the JavaScript object for the customer you obtained has the following structure, use the following procedures to get the birth year.
{ "customer": {
    "contactInformation": {
        "firstName": "Groucho",
        "lastName": "Marx".
        "birthday": "1890/10/2"
    },
    "productsBought": {
        "product:" [
            {"name": "glasses", "category": "eyeglasses and sunglasses", "sku": "12345"},
            {"name": "cigar", "category": "foodstuffs, drinks and tobacco", "sku": "23456"},
            {"name": "mustache", "category": "other", "sku": "34567"},
            {"name": "eyebrowes", "category": "other", "sku": "45678"},
        ]
    }
 }
}
To obtain the customer's birth year, access the contactInformation value by its key, using the map_get function. Use that function again with birthday as a parameter, then use split the resulting string by /, and finally use pop to get just the year.
- Add a
map_getfunction with the Parameter field set tocontactInformation. - Add a
map_get" function with the Parameter field set tobirthday. - Add a
splitfunction with the Parameter field set to/. This splits the simple value into an array with three elements. - Add a
shiftfunction. This gets the first element.
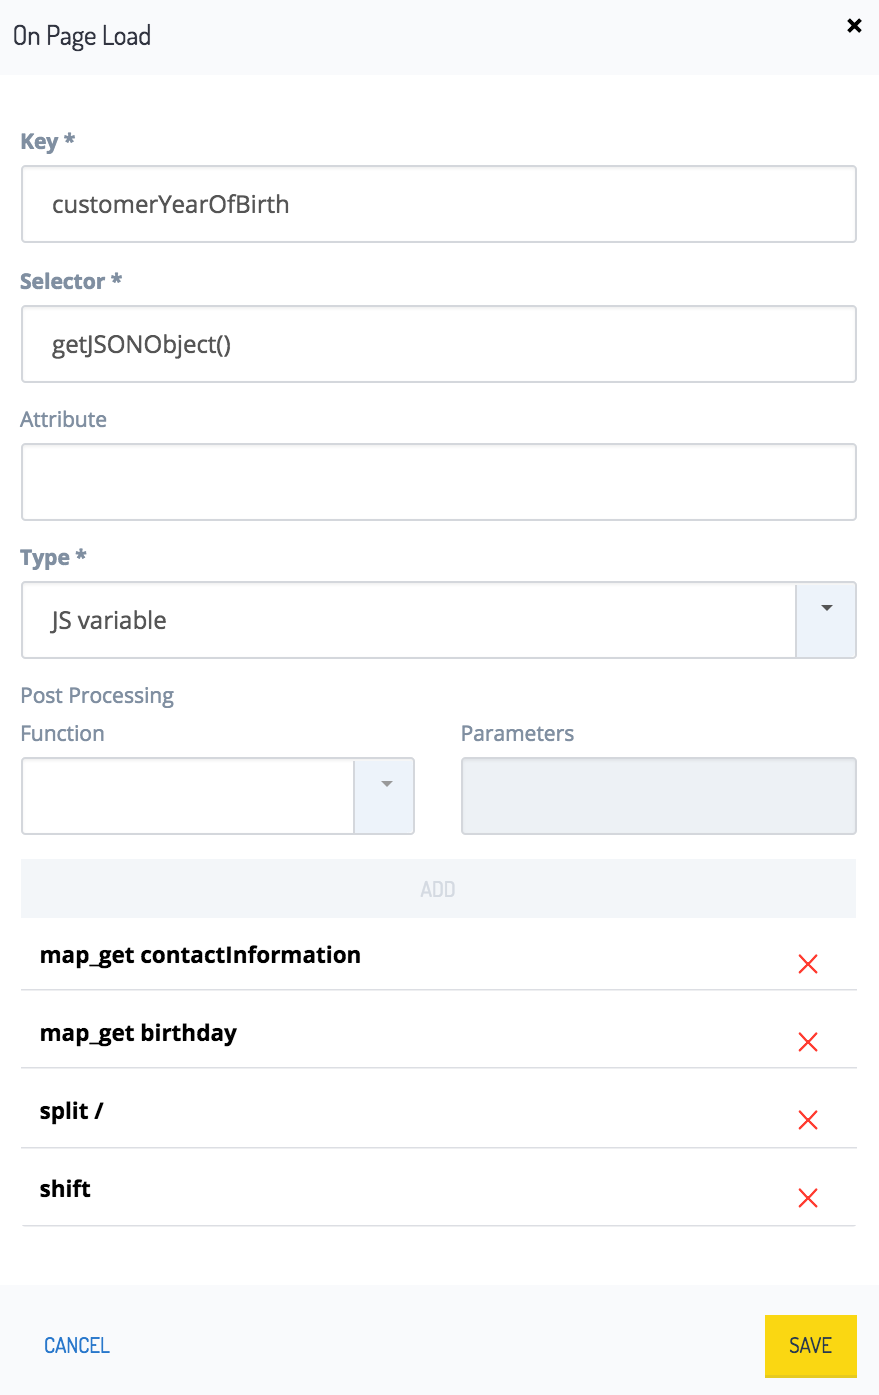
The result is the simple value 1890 sent with the generic PageView event.
Insert Profile Tag into the website
Include the JavaScript Tag in the code for each web page, or web page template. Edit the JavaScript Tag before inserting it into your web page code:
<script>
    (function () {
        window.Y_TRACKING = window.Y_TRACKING || function () {
            (window.Y_TRACKING.q = window.Y_TRACKING.q || []).push(arguments);
        };
        var s = document.createElement('script');
        s.type = 'text/javascript';
        s.async = true;
        s.src = '{profile Tag URL}';
        var x = document.getElementsByTagName('script')[0];
        x.parentNode.insertBefore(s, x);
    })();
    window.Y_TRACKING({tenant: '{tenant ID}', clientId: '{Client ID}', configUrl: '{Config Url}'});
</script>
- Replace the {tenant ID} with the Identifier value of your Builder project. In the Builder, select {Your Project}, and click Administration in the left navigation column. Next, click Details in the left navigation column, and copy the value of the Identifier.
- Replace the {Client ID} with the Identifier value of the appropriate client. In the Builder, select {Your Project}, and click Clients in the left navigation column. Then, select the appropriate client, and copy the value of the Identifier.
- Replace {Config Url} with the value of the Configuration URL, for example https://s3.amazonaws.com/profile-tag/58d934c9974013000ec3e2fb.
- Replace the {profile Tag URL} with a link from Profile Tag links. This explains which URL to use according to your specific scenario.
<script>
    (function () {
        window.Y_TRACKING = window.Y_TRACKING || function () {
            (window.Y_TRACKING.q = window.Y_TRACKING.q || []).push(arguments);
        };
        var s = document.createElement('script');
        s.type = 'text/javascript';
        s.async = true;
        s.src = '{profile Tag URL}';
        var x = document.getElementsByTagName('script')[0];
        x.parentNode.insertBefore(s, x);
    })();
    window.Y_TRACKING({tenant: '{tenant ID}', clientId: '{Client ID}', configUrl: '{Config Url}', allowInsecureCookies:true});
</script>
Example
This is an example for an HTTP website, which uses the EU version of Profile Tag. Note that the values of the tenant, clientId, and configUrl parameters are examples only, and you need to replace them with your own values.
<script>
    (function () {
        window.Y_TRACKING = window.Y_TRACKING || function () {
            (window.Y_TRACKING.q = window.Y_TRACKING.q || []).push(arguments);
        };
        var s = document.createElement('script');
        s.type = 'text/javascript';
        s.async = true;
        s.src = 'https://s3.amazonaws.com/profile-tag/js/eu/profile-tag.min.js';
        var x = document.getElementsByTagName('script')[0];
        x.parentNode.insertBefore(s, x);
    })();
    window.Y_TRACKING({tenant: 'mycomicsshop', clientId: 'jk3eUX9wNXtGqXITd0STfoRseYEomYWX', configUrl: 'https://s3.amazonaws.com/profile-tag/c8cfar0w605c5400dd2wx1ax', allowInsecureCookies:true});
</script>
Decide which Profile Tag link to use
Profile Tag links
For the Profile Tag, major versions, minor versions, and patches are released in all available zones. Three digits, such as x.y.z, represent these versions of the Profile Tag. X stands for the major version, y for the minor version, and z for the patch version. The Profile Tag has eight URLs available. The following sections explain when to use each of those links.
US links
These links point to the US server.
- The link https://s3.amazonaws.com/profile-tag/js/us/profile-tag.min.js points to the latest version of the Profile Tag on the US server. If you use this link, your application points to the latest version of the Profile Tag. With this URL, you automatically make use of all patch, minor, or major releases for the Profile Tag.
- https://s3.amazonaws.com/profile-tag/js/us/1/profile-tag.min.js points to a major version. It gets updated with minor or patch releases, but not with major releases. A new major version is released whenever a major functionality or a breaking change is introduced. A major version receives all minor and patch changes, but a major functionality or a breaking change are released as a new major version.
- https://s3.amazonaws.com/profile-tag/js/us/1.2/profile-tag.min.js points to the major version
1and the minor version2of the Profile Tag in the US server. Minor versions introduce minor changes for a released major version, usually introducing functionalities and non-breaking changes. - https://s3.amazonaws.com/profile-tag/js/us/1.2.0/profile-tag.min.js points to the major version
1, the minor version2, and the patch version0of the Profile Tag on the US server. Patches generally repair the unwanted behavior of a program.
EU Links
These links point to the EU server.
- https://s3.amazonaws.com/profile-tag/js/eu/profile-tag.min.js points to the latest version of the Profile Tag on the EU server. If you use this link, your application points to the latest version of the Profile Tag. With this URL, you automatically make use of all patch, minor, or major releases for the Profile Tag.
- https://s3.amazonaws.com/profile-tag/js/eu/1/profile-tag.min.js points to a major version. It gets updated with minor or patch releases, but not with major releases. A new major version is released whenever a major functionality or a breaking change is introduced. A major version receives all minor and patch changes, but a major functionality or a breaking change are released as a new major version.
- https://s3.amazonaws.com/profile-tag/js/eu/1.2/profile-tag.min.js points to the major version
1and the minor version2of the Profile Tag in the EU server. Minor versions introduce minor changes for a released major version, usually introducing functionalities and non-breaking changes. - https://s3.amazonaws.com/profile-tag/js/eu/1.2.0/profile-tag.min.js points to the major version
1, the minor version2, and the patch version0of the Profile Tag on the EU server. Patches generally repair the unwanted behavior of a program.
Which URLs to use
It is recommended that you use the URLs for the latest version of the Profile Tag. To test your application before using a changed version of the Profile Tag, use a specific major, minor, or patch version explicitly, and switch to a new version of the Profile Tag if your tests succeed.
Release Notes published in the Dev Portal explain new version changes with every release of the Profile Tag service.
Consent management setting
SAP Hybris Profile tracks only the type of information for which the consumer or the tenant grants consent. If a website tracks the customer's activities, legal regulations in most countries make it necessary to inform the customer about this tracking, and guides the customer to a page containing further details.
If you want SAP Hybris Profile to track the customer's activities using the default consent settings, set the consent management setting to implicit. The system then assumes that the customer's consent exists.
If you want SAP Hybris Profile to track the customer's activities after the customer explicitly expresses consent, set the consent management setting to explicit. Then specify through which action a customer consented to be tracked. Profile Tag only tracks when the customer performs that specific action.
Profile Tag allows different consent management settings for each page. In each case, Profile Tag sends a request to Profile to receive a new consent reference. In every subsequent request, Profile Tag includes that consent reference, which represents the customer's consent settings.
For more details about consent management, see the Set up Profile Tag and Consent as the type of data source sections.
Best practices
- Try to minimize your efforts. If you have several different page types which all are supposed to send the same events, create a single page type in the Profile Tag instead.
- If the page already has meta information in JavaScript, use it.
- If possible, use those elements of the page that are least likely to change at a redesign as attribute values.
Real-time Reporting
The SAP Hybris Profile system provides a Real-time Reporting service that enables analysis of time-aggregated data from multiple sources, across multiple dimensions. The service allows you to:
- process and analyze event streams such as clickstreams or commerce data in real time
- create, update, and delete data tables
- retrieve metadata about existing data tables
- query about data using any combination of columns (dimensions), different aggregation levels and different granularity levels
For details, see the Real-time Reporting documentation.
Data ingestion
Data is usually ingested into the Real-time Reporting system from commerce storefronts or any website through Profile Tag. The Real-time Reporting system ingests data fields in submitted clickstream events into a table that you define. The table definition defines which fields in the event are ingested, and which table columns accept data from each event field.
Here is a sample clickstream table definition.
{
  "description":"Profile clickstream events",
  "ingestionType":"clickstream",
  "columns": [
    {
      "name": "date",
      "type": "timestamp",
    },
    {
      "name": "productCategory",
      "type": "string",
    },
    {
      "name": "sku",
      "type": "string",
      "path": "$.productSku"
    },
    {
      "name": "views",
      "type": "string",
      "path": "$.stats.views"
    }
    ...
  ]
}
In this sample table definition:
The name attribute specifies the label of the column in the table that holds the event field's data.
The path attribute specifies the target field's location in the submitted event, using XPath notation. For example, the
skucolumn holds data extracted from the event'sproductSkufield; theviewscolumn holds data extracted from the event'sstats:{views}element.
productCategory column holds data extracted from the event's productCategory field.- A single
timestamp-type column is required.
The following sample clickstream event includes fields that are ingested into the clickstream table:
{
    "action_name": "ProductDetailPageViewEvent",
    "productName": "Canon Powershot SX 530",
    "date": "1501799650635",
    "productSku": "product234",
    "productCategory": "cameras",
    "stats": {
        "views": 3
    },
    ...
}
This event yields the following data entry in the clickstream table. Note that the action_name and productName fields are not included in the table definition, and thus are not ingested.
TABLE: clickstream
| date | productCategory | sku | views |
|---|---|---|---|
| 2017-08-03T16:34:10.000Z | cameras | product234 | 3 |
Data retrieval
The Real-time Reporting service's rich query language enables retrieval and aggregation of ingested data in a wide variety of ways, across multiple dimensions, including:
- Targeting specified fields, time intervals, and value-matching criteria
- Grouping results by hour, day, week, or month
- Limiting the number of returned results
- Ordering results by specified fields, and applying hierarchical sub-ordering within result sections
- Aggregating results by requesting one or more of the following: count, distinct count, maximum, mean, minimum, sum, standard deviation, and variance
For detailed information about querying aggregated data, see the Table Queries section of the Real-time Reporting service documentation.
Here is a sample query. Note that the query URL, rather than the query itself, specifies the target table.
{
    "interval": "2017-04-01/2017-04-03T12:00:00Z",
    "granularity": "hour",
    "dimensions": ["sku", "productCategory"],
    "order": [
        {"column": "productCategory", "direction": "ascending"},
        {"column": "sku", "direction": "ascending"}
    ],
    "limit": 10,
    "filter": { "type": "notequal", "column": "productCategory", "value": null },
    "aggregations": [
        {"type": "count", "name": "recordCount"},
        {"type": "mean", "name": "avg_views", "column": "views"}
    ]
}
The query specifies the following:
interval: Retrieves data within the interval from April 1, 2017 (inclusive) to noon on April 3, 2017 (exclusive)
granularity: Groups results by hour
dimensions: Retrieves data from the specified table's
skuandproductCategorycolumnsorder: Orders results by
productCategory, and byskuwithin eachproductCategorygrouplimit: Retrieves no more than ten one-hour result groups
filter: Retrieves data only if the data row's
productCategorycolumn has a non-null valueaggregations: Each record includes the
recordCountof entries in each result group, and the mean of views labeled asavg_views
The query results in the following form. Note that the query groups results by hour and orders them by productCategory and sku.
[[
    {
        "date": "2017-04-01T17:00:00.000Z",
        "productCategory": "cameras",
        "sku": "product234",
        "recordCount": 2,
        "avg_views": 6
    },
    {
        "date": "2017-04-01T17:00:00.000Z",
        "productCategory": "cameras",
        "sku": "product567",
        "recordCount": 5,
        "avg_views": 11
    },
    {
        "date": "2017-04-01T17:00:00.000Z",
        "productCategory": "tools",
        "sku": "product890",
        "recordCount": 2,
        "avg_views": 3
    },
    {
        "date": "2017-04-01T18:00:00.000Z",
        "productCategory": "cameras",
        "sku": "product234",
        "recordCount": 2,
        "avg_views": 6
    },
    {
        "date": "2017-04-01T18:00:00.000Z",
        "productCategory": "tools",
        "sku": "product890",
        "recordCount": 6,
        "avg_views": 9
    },
    {
        "date": "2017-04-01T18:00:00.000Z",
        "productCategory": "tools",
        "sku": "product999",
        "recordCount": 2,
        "avg_views": 2
    },
    ...
]]
SAP Hybris Profile Quick Start Guide
This section presents the functionalities that the SAP Hybris Profile system offers out-of-the-box. The document provides a sample scenario that is easy to set up for the customer and results in a rich user profile.
Step 1: Subscribe to packages
To start using SAP Hybris Profile, make sure that you subscribe to the right package, and that all relevant services and modules are available in your project. To learn what packages to subscribe to, see the Prerequisites for Profile Tag section.
Step 2: Tag a website
Tracking consumers on web pages requires capturing data while consumers browse the site. This is usually accomplished with tags based on JavaScript. SAP Hybris Profile Tag offers a flexible way to adapt to the structure of your online presence. It allows you to define events together with the data to capture from your web pages. If such an event occurs, Profile Tag triggers a process that stores the event and the captured information in SAP Hybris Profile. For a detailed description, see the Profile Tag documentation.
This quick start step explains how to get and tag a simple test page.
Get or create a page to tag
Follow these steps for a simple e-commerce website representing a product detail page. The website contains all of the elements that are necessary to make Profile Tag send a rich PageView event, a ProductDetailPageView event, and an AddToCart event. The web page is published using an ExpressJS server, but you can publish it on any other web server, such as Apache or nginx. If you only need the example page document, go to the bottom of this section. If you already have a published web page that you want to tag, you can skip this section.
- Download node, including the node package manager (npm), from the node.js download page and install it on your local machine.
- Download this ZIP file.
- Unzip the file at the location of your choice. Move the unzipped content to the folder
profiletag_example_page and initialize your ExpressJS server instance as shown:
~$ unzip profiletag_example_page.zip
~$ cd profiletag_example_page
~/profiletag_example_page$ ./init.sh
The initialization procedure asks you some questions. Press ENTER at each step, until finished, to apply the default settings. Because this is a simple example server, these default settings suffice. The procedure also installs the ExpressJS server dependencies.
Start the ExpressJS server as shown:
~/profiletag_example_page$ ./start.shTo check your example page, open http://localhost:3000/profiletag_example.html in your browser.
Unfold the following code section by clicking + to see the content of the example page.
Add Profile Tag to the website
Unfold the following code section to see how you can add Profile Tag to your example page. See the Insert Profile Tag into the website section for more details.
Configure Profile Tag to send events
- Open your project in the Builder, and select Profile Tag from the menu on the left.
- Click + ADD SITE and follow the instructions in the Set up Profile Tag section.
- After setting up a site, set up at least one new page.
- Configure the following selectors and interactions in the following sections.
Configure a selector to capture the product ID
<h1>Product Number 123456 Hybris - Coffee Mugs</h1>123456- Click ADD SELECTOR.
- Set Key to
productSku. - Set Selector to
h1. - Set Type to
Text. - Set Function to
split. - Set Parameter to
' '. - Click ADD.
- Set Function to
map_get. - Set Parameter to
2. - Click ADD.
- Click SAVE in the bottom-left corner of the window.
Configure a selector to capture the product name
<h1>Product Number 123456 Hybris - Coffee Mugs</h1>Coffee Mugs- Click ADD SELECTOR.
- Set Key to
productName. - Set Selector to
h1. - Set Type to
Text. - Set Function to
split. - Set Parameter to
'-'. - Click ADD.
- Set Function to
pop. - Click ADD.
- Click SAVE in the bottom-left corner of the window.
Configure a selector to capture the product price
<div id="price">
  <p>
     275,- €
  </p>
</div>275- Click ADD SELECTOR.
- Set Key to
productPrice. - Set Selector to
#price p. - Set Type to
Text. - Set Function to
split. - Set Parameter to
‘,’. - Click ADD.
- Set Function to
Shift. - Click SAVE in the bottom-left corner of the window.
Configure a selector to capture the product category
<div id="description">
    <a href="url" product_category="Mugs">Category: Mugs</a>
</div>Mugs- Click ADD SELECTOR.
- Set Key to
productCategory. - Set Selector to
#description a. - Set Type to
DOM Element. - Click SAVE in the bottom-left corner of the window.
Configure an interaction to capture an AddToCart event
<button id="add_to_cart_btn" class="button" value="buttonValue" cart_id="54321">
Add to cart
</button>- Click ADD INTERACTION.
- Set Event name to
AddToCart. - Set DOM element to
#add_to_cart_btn. - Set Event on that DOM-element to listen to to
click. - Set Schema to send to
context/commerce/AddedToCart. - In the List of Mappings, add the selectors for product ID, product category, product price, and product name as mappings to this interaction.
- Click SAVE in the bottom-left corner of the window.
Step 3: Retrieve and browse user profiles
The events that you send to SAP Hybris Profile from your storefront trigger the enrichers. Depending on the event type, the triggered enrichers introduce various changes to the profile document.
For example, by clicking on a product in the storefront, you send the ProductDetailPageViewEvent, associated with the context/commerce/ProductView schema, to SAP Hybris Profile. This event triggers the specified enricher, which modifies the profile document by creating or updating the following subdocuments:
{
  "insights":{
    "affinities":{
      "products":{
        "product234":{
          "score":"0.3010299956639812",
          "recentViewCount":"0",
          "recentScore":"0.0"
        }
      }
    }
  },
  "observations":{
    "web":{
      "productViews":{
        "product234":{
          "link":"http:/url.to.a.sample.product",
          "recentViewCount":"1"
        }
      }
    }
  }
}
Using the dedicated Profile Explorer interface, you can browse the selected user profiles.
Explore the profile document through Profile Explorer
Access the Profile Explorer to browse the user's profile document. In the corresponding subdocument, you can find previously-saved data about page views and asset views. Thanks to the incorporated logic, the system can calculate, for example, the user's affinities for particular content. When the user views these materials again, the subdocument that contains the assets affinities score changes accordingly.
Retrieve all or part of the profile document
To retrieve a full profile document, access the Profile Explorer and provide the ID of the targeted profile in the Profile ID field. After clicking the Search button, the service returns the requested profile document in JSON format. To access part of the profile document, you can either search for it in the whole profile displayed in the result pane of the Profile Explorer, or run the following cURL command:
curl -X GET -H "Authorization: Bearer access_token" 'https://api.yaas.io/hybris/profile/v1/{tenant}/profiles/{profileId}?fields={property1},{property2}'
Step 4: Feed clicks into Real-time Reporting
Data enters the Real-time Reporting service through clickstream events that Profile Tag submits. The service ingests data fields in submitted events into a Real-time Reporting table that you define. The table definition determines which fields in the event are ingested, and which table columns accept data from each event field.
This sample table defines table columns and associates each with a clickstream event field.
{
  "description":"Profile clickstream events",
  "ingestionType":"clickstream",
  "columns": [
    {
      "name": "date",
      "type": "timestamp",
    },
    {
      "name": "productCategory",
      "type": "string",
    },
    {
      "name": "sku",
      "type": "string",
      "path": "$.productSku"
    },
    {
      "name": "views",
      "type": "string",
      "path": "$.stats.views"
    }
    ...
  ]
}
In this sample table definition:
The name attribute specifies the label of the column in the table that holds the event field's data.
The path attribute specifies the target field's location in the submitted event, using XPath notation. For example, the
skucolumn holds data extracted from the event'sproductSkufield; theviewscolumn holds data extracted from the event'sstats:{views}element.
productCategory column holds data extracted from the event's productCategory field.- A single
timestamp-type column is required.
The following sample clickstream event includes fields that are ingested into the clickstream table:
{
    "action_name": "ProductDetailPageViewEvent",
    "productName": "Canon Powershot SX 530",
    "date": "1501799650635",
    "productSku": "product234",
    "productCategory": "cameras",
    "stats": {
        "views": 3
    },
    ...
}
This event yields the following data entry in the clickstream table. Note that the action_name and productName fields are not included in the table definition, and thus are not ingested.
TABLE: clickstream
| date | productCategory | sku | views |
|---|---|---|---|
| 2017-08-03T16:34:10.000Z | cameras | product234 | 3 |
Step 5: Query aggregated data in Real-time Reporting
The Real-time Reporting service's rich query language enables retrieval and aggregation of ingested data in a wide variety of ways, across multiple dimensions, including:
- Targeting specified fields, time intervals, and value-matching criteria
- Grouping results by hour, day, week, or month
- Limiting the number of returned results
- Ordering results by specified fields, and applying hierarchical sub-ordering within result sections
- Aggregating results by requesting one or more of the following: count, distinct count, maximum, mean, minimum, sum, standard deviation, and variance
For detailed information about querying aggregated data, see the Table Queries section of the Real-time Reporting service documentation.
Here is a sample query. Note that:
- "column" refers to table dimensions
- the target table is specified in the query URL, rather than in the query itself
{
    "interval": "2017-04-01/2017-04-03T12:00:00Z",
    "granularity": "hour",
    "dimensions": ["sku", "productCategory"],
    "order": [
        {"column": "productCategory", "direction": "ascending"},
        {"column": "sku", "direction": "ascending"}
    ],
    "limit": 10,
    "filter": { "type": "notequal", "column": "productCategory", "value": null },
    "aggregations": [
        {"type": "count", "name": "recordCount"},
        {"type": "mean", "name": "avg_views", "column": "views"}
    ]
}
The query specifies the following:
interval: Retrieves data within the interval from April 1, 2017 (inclusive) to noon on April 3, 2017 (exclusive)
granularity: Groups results by hour
dimensions: Retrieves data from the specified table's
skuandproductCategorycolumnsorder: Orders results by
productCategory, and byskuwithin eachproductCategorygrouplimit: Retrieves no more than ten one-hour result groups
filter: Retrieves data only if the data row's
productCategorycolumn has a non-null valueaggregations: Each record includes the
recordCountof entries in each result group, and the mean of views labeled asavg_views
The query results in the following form. Note that the query groups results by hour and orders them by productCategory and sku.
[[
    {
        "date": "2017-04-01T17:00:00.000Z",
        "productCategory": "cameras",
        "sku": "product234",
        "recordCount": 2,
        "avg_views": 6
    },
    {
        "date": "2017-04-01T17:00:00.000Z",
        "productCategory": "cameras",
        "sku": "product567",
        "recordCount": 5,
        "avg_views": 11
    },
    {
        "date": "2017-04-01T17:00:00.000Z",
        "productCategory": "tools",
        "sku": "product890",
        "recordCount": 2,
        "avg_views": 3
    },
    {
        "date": "2017-04-01T18:00:00.000Z",
        "productCategory": "cameras",
        "sku": "product234",
        "recordCount": 2,
        "avg_views": 6
    },
    {
        "date": "2017-04-01T18:00:00.000Z",
        "productCategory": "tools",
        "sku": "product890",
        "recordCount": 6,
        "avg_views": 9
    },
    {
        "date": "2017-04-01T18:00:00.000Z",
        "productCategory": "tools",
        "sku": "product999",
        "recordCount": 2,
        "avg_views": 2
    },
    ...
]]
Step 6: Trace data and understand the data flow
You can track the events sent from the storefront to SAP Hybris Profile in the Trace Explorer. Tracking allows you to collect details about the exact time of calls between services, and the duration of specific operations. Additionally, it allows you to detect any latency problems.
To enable tracing in your storefront, use Profile Tag in the debug mode. Activate the Profile Tag debug mode by adding the profileTagDebug flag to your storefront URL and setting its value to true. Assume your storefront URL is http://example.com. With the debug flag it looks as follows: http://example.com?profileTagDebug=true.
To navigate to the Trace Explorer, click the contextTraceId link that appears at the top of the screen each time the storefront sends an event to SAP Hybris Profile. In the Trace Explorer, you can find the logs containing the details of event processing, such as the information about the changes that your events introduce to the profile document.
Step 7: Outlook: Make use of the data in commerce and marketing
This comprehensive end-to-end flow results in a rich customer profile, which you can feed to other platforms. For example, you can use the data in SAP Hybris Commerce for personalization purposes. The moment you know your user's browsing past you are in a position to adopt the offering, the commercials, and even the layout of your storefront according to your user's interests or needs. That results in a highly personalized browsing and shopping experience. Another example is in SAP Hybris Marketing. You can use the data from SAP Hybris Profile for market segmentation to identify segments that are likely to be the most profitable or that have growth potential. Or you can use the data to generate well-known marketing contacts that you can use for efficient targeting in marketing campaigns.
If you find any information that is unclear or incorrect, please let us know so that we can improve the Dev Portal content.
Use our private help channel. Receive updates over email and contact our specialists directly.
If you need more information about this topic, visit hybris Experts to post your own question and interact with our community and experts.