
Builder
Overview
The Builder is a YaaS administration interface for the development, registration and management of modules and services that originate from subscriptions or your own development. It consists of a set of views that can expand the Builder navigation.
YaaS requires you to have an account to take advantage of its functionality. With this YaaS account, you can do the following in the Builder:
- Create a project in the context of a YaaS organization.
- View the projects in which you have a membership.
- Manage the projects in which you have membership and the project's resources according to the user roles in the project.
- Use third-party Builder modules in the name of the projects.
Regardless of whether you are a brand or a developer, the Builder offers a consistent experience for managing your business.
Benefits of the Builder
As a business owner, you can manage users and projects in your organization. You can add a project and subscribe to packages with different services in the YaaS Market. For each project, you can define user roles, invite staff members, and manage your subscriptions, products, and orders.
As a developer, you can earn money by offering your services and packages in the YaaS Market. You can create services, UI modules called Builder modules, and subscribe to packages.
Additionally, the Builder includes user interfaces to the Commerce services to which you have a subscription.
Create Projects
It's possible for a user to receive an invitation to a project or to create one. If you have not already received and invitation to a project, you can create one provided your user role has the necessary permission.
To create a project, you can click + PROJECT on your organization home page.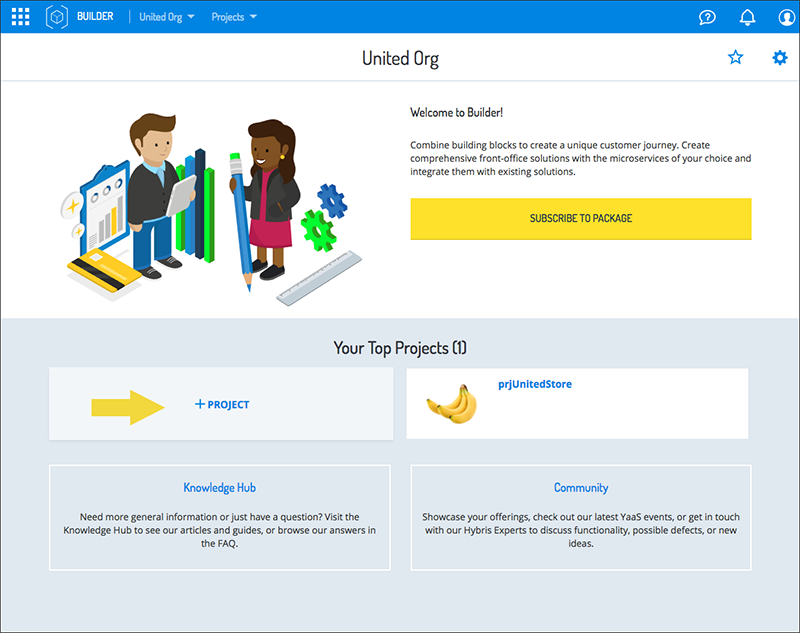
You can also click + PROJECT in the project dropdown menu at the top of the page.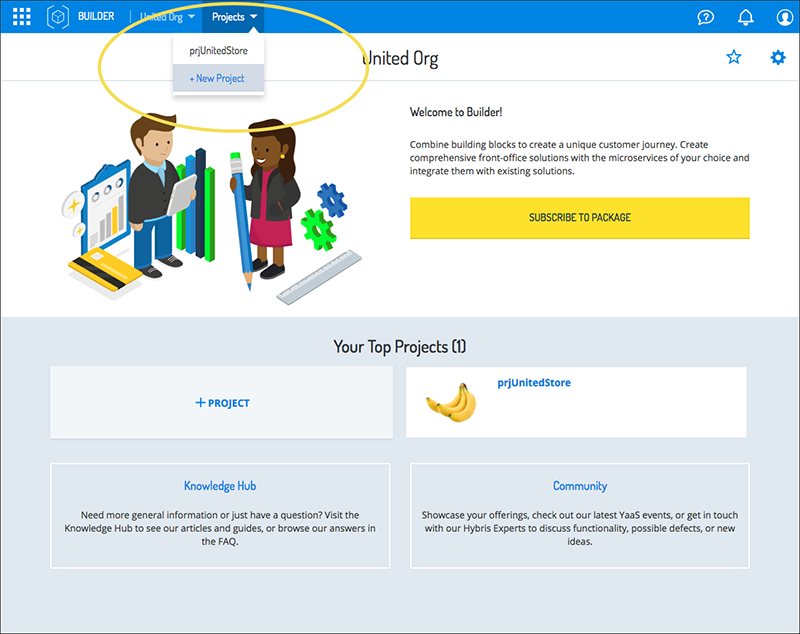
- Click + PROJECT.
- Enter the Display Name, Identifier and the Description.
- Click the SAVE button

The project dashboard and widgets
After you finish creating the project, a project dashboard is available that contains widgets offering easy access to and oversight of project-related information. It is also easy to navigate to the project dashboard by simply selecting your project from the top menu. By default, the current types of data displayed include:
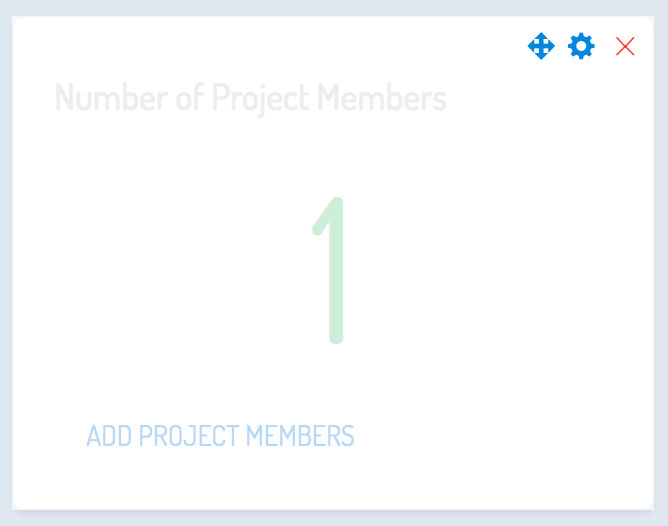
- the number of project members
- how many project user roles exist and
- the number of subscriptions used in the project.

Adding and editing widgets
From the project dashboard, click on the gear icon in the top right corner of the Builder. The screen enters edit mode. Click on Add Widget to select a widget to add.
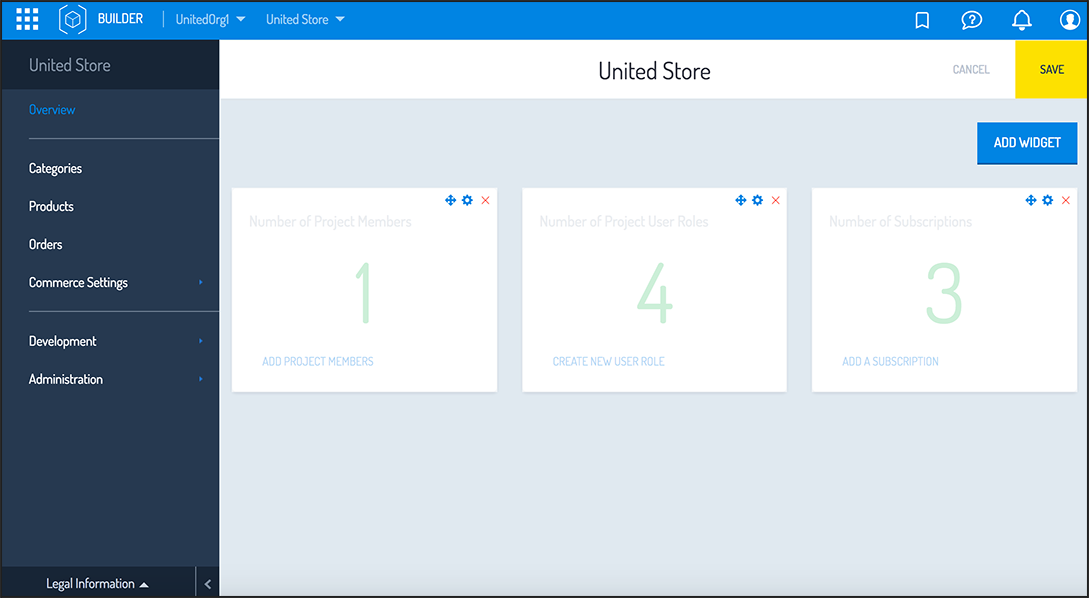
In the top right corner of each widget there are icons that allow you to move, configure and delete the widget.
Set the width, height and placement of each widget.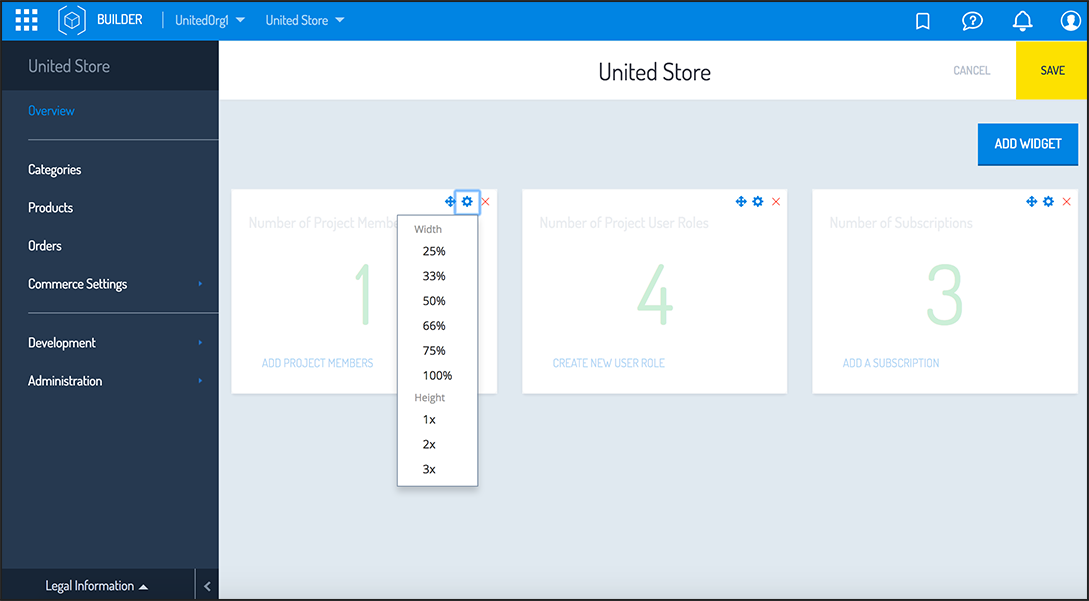
Using single project mode to access a project
Single project mode makes it possible for the developer to navigate directly to a specific project by indicating the project ID within the builder.yaas.io URL. Here is the URL syntax that takes you to a specific project:
https://builder.yaas.io/project/{PROJECT_ID}
It is important to note that the user must have the hybris.account_view scope enabled in order to use single project mode.
The following images compare the appearance of the UI when it is in single project mode to its normal appearance. You can see single project mode to the left.


Features excluded in the context of single project mode
In single project mode, the following limitations exist:
- The starting point is the single project that you access.
- No other projects are visible.
- The user cannot navigate to any other project.
- The user cannot navigate to an organization.
- The navigation bar at the top of the page is not visible.
- There is no organization overview page.
Invite members and create user roles
After you finish creating the project, a dialog gives you the option to invite members to the newly-created project. Click INVITE PROJECT MEMBER.
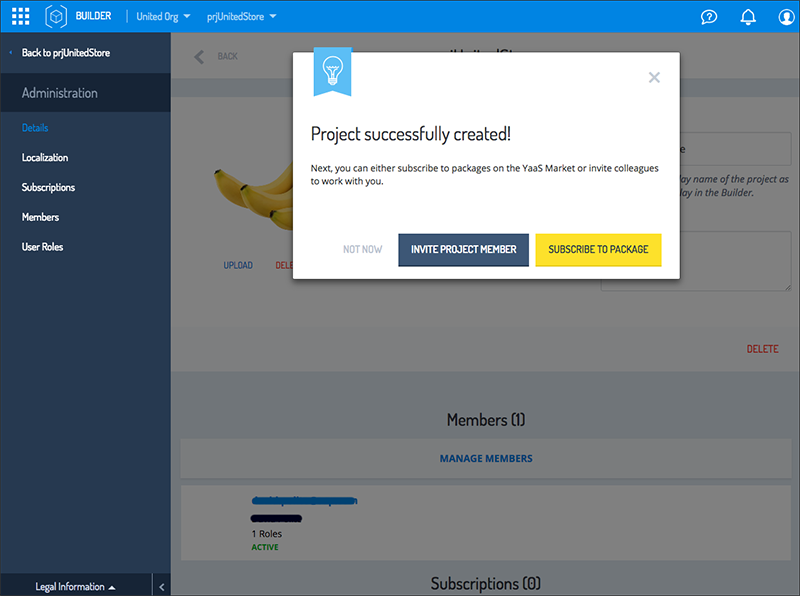
Alternatively, you can invite members to your project from the project home page. Click Administration in the left menu. Choose the button Manage Members in the main section. Under the section User Roles, create user roles and assign them to different users.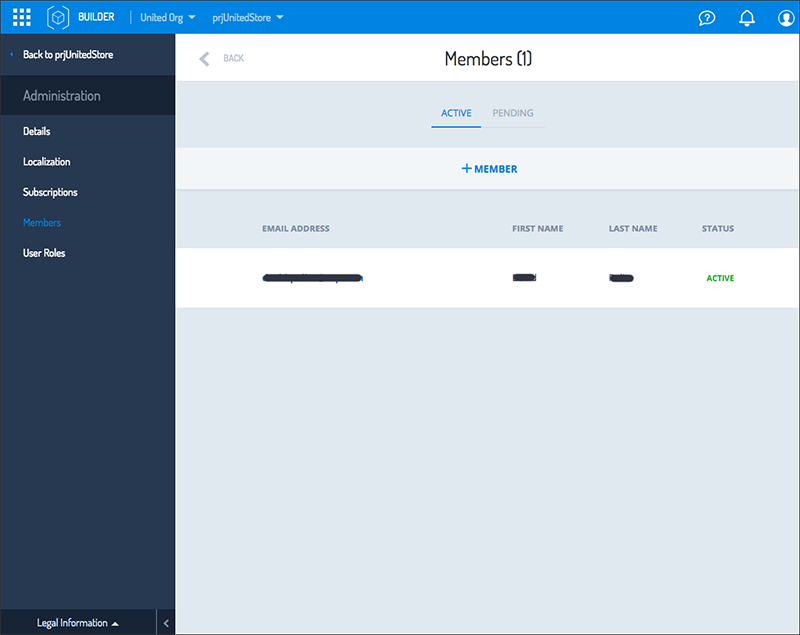
User roles, scopes, and navigation node visibility
There are various default user roles in the Builder. These roles are:
- Owner
- Developer
- Publisher
- Viewer
Each role receives an assignment of scopes. Scopes determine the range of functionality available for that role as well as the visibility of nodes in the navigation.
Example:
The user role Developer has the scopes hybris.api_view, hybris.marketplace_submit, hybris.api_manage and hybris.account_view assigned to it.
This scope assignment allows the developer user role to view and manage services, clients, and builder modules. The navigation that appears in the Builder for the developer corresponds with these rights.
By contrast, the user role Publisher does not have these same scopes granted to it. Clients with the Publisher user role cannot manage services, clients, or builder modules. The navigation nodes available to Developers are hidden for the Publisher user role.
Add a package to your project
If you choose to add a package to your project:- Navigate to your project home page. Click on the button MANAGE SUBSCRIPTIONS.

- Click + SUBSCRIBE. (Click on +TEST to use a package for which you have the package version ID.)
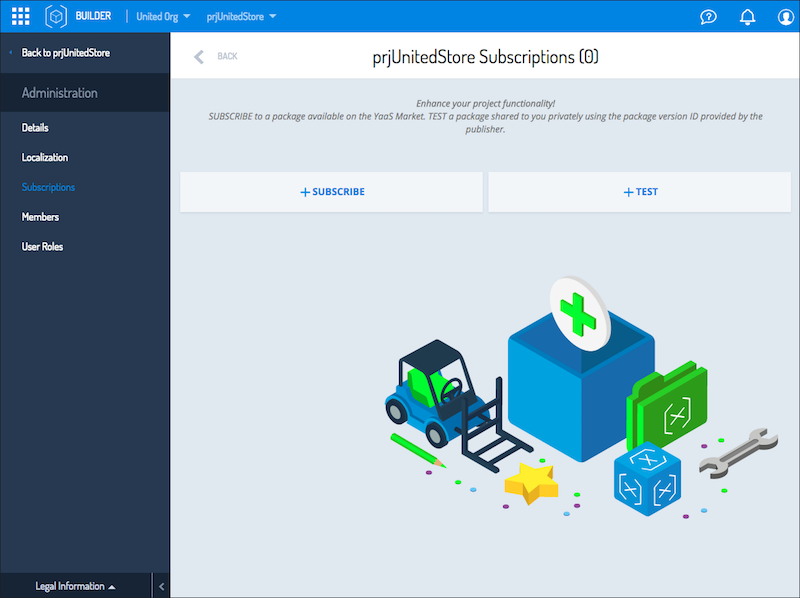
- Your browser then automatically forwards you to the YaaS Market within the context of your organization and project. Choose from several packages on the YaaS Market. The packages on the YaaS Market are divided into two categories that are based on your company location:
- Standard – Available to companies located in the United States, Germany, Switzerland and the United Kingdom.
- Worldwide (Beta) – Available only to worldwide companies

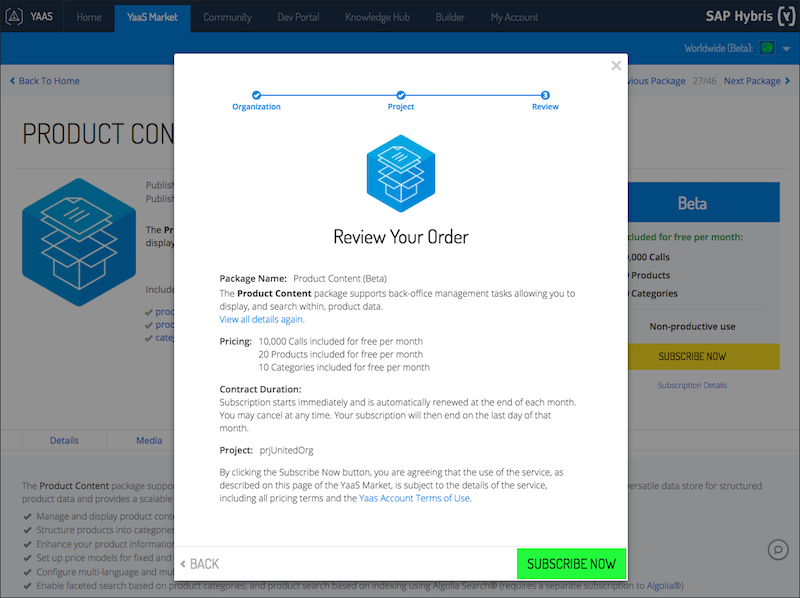
- Click on a package to see its details.
- Subscribe to the package by clicking on the button SUBSCRIBE NOW. Your project information will be preset in the window. Confirm that the subscription is for the project listed and click on the button SUBSCRIBE NOW.
- You can subscribe to more packages by clicking GET MORE or click the button CONFIGURE IT to begin configuring the package in the Builder.
Your project in the Builder
Once the browser directs you back to your project in the Builder, the navigation tree on the left has changed based on the UI included in the package. For example, the PRODUCT CONTENT package offers the possibility of creating products and publishing them to an online shop.
Go to the Products node in the Builder after you subscribe to the package.
- Click the button + PRODUCT.
- Enter the product information. Set the product to active so that it will appear immediately online.
- Click on the SAVE button.


All of your created products are located on the Products page. You can sort by the newest or alphabetically from A-Z or Z-A. When you subscribe to the Product Content package, an online shop is automatically created at the URL: http://shops.yaas.io/Your-Project-Identifier. (The project identifier is located on the project details page.)
Create Packages
A developer's ultimate goal is to create packages and sell them on the YaaS Market. Services and Builder Modules combine to form packages. Test your packages internally before publishing them.
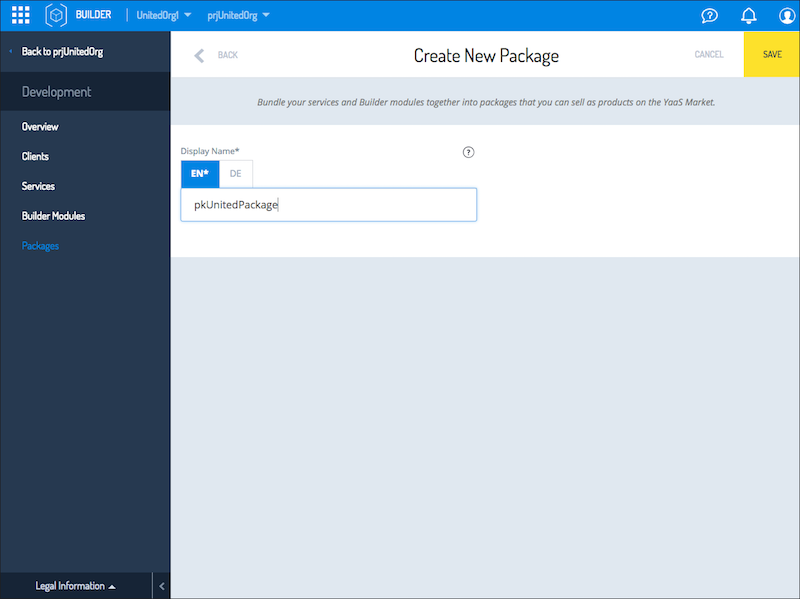
- Click Development in the left navigation of your project home page. Click on Packages > + PACKAGE. Enter the name of the package in the languages it is available. Click the SAVE button.

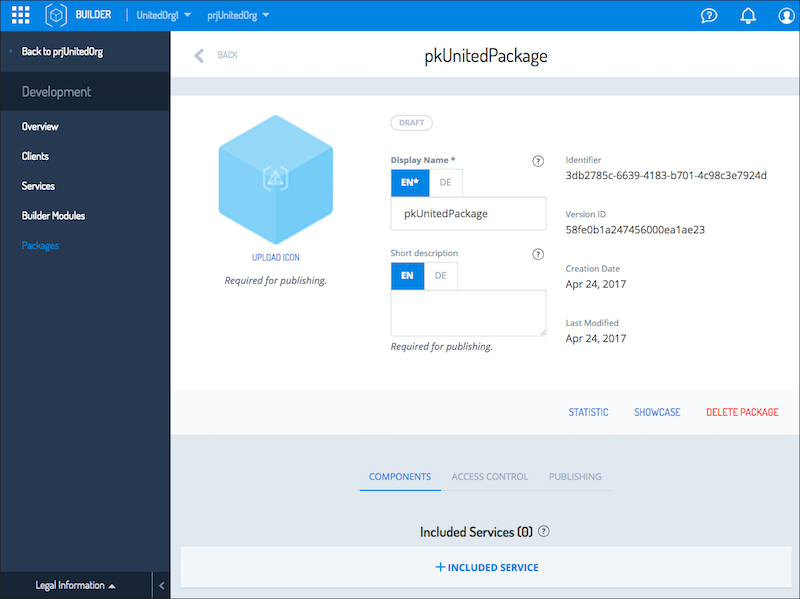
- On the package detail page, provide your package with an icon. Also, you can edit the display name and short description on this page. Enrich your package with more services and Builder modules under the COMPONENTS tab.
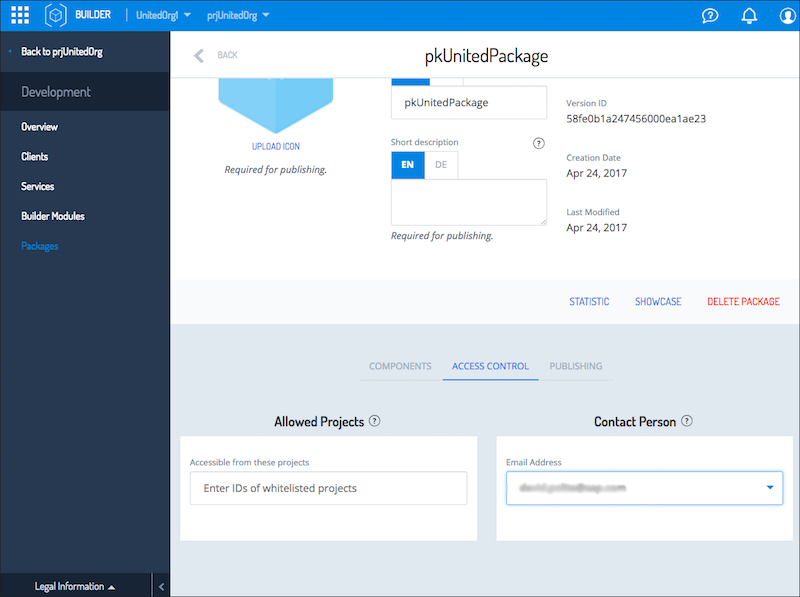
- Under the tab ACCESS CONTROL, you can list projects that can access your package. You can also specify the email address of a contact person.
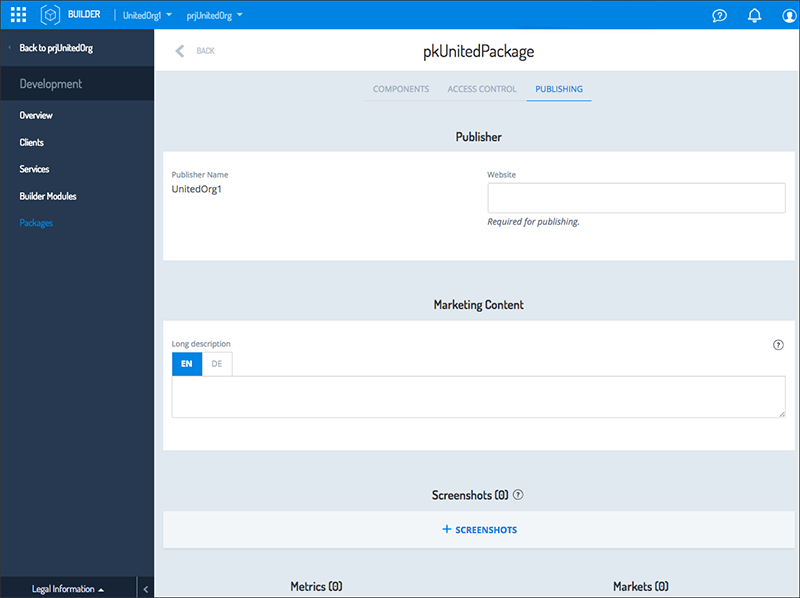
- If your organization has been approved for publishing you can click on the PUBLISHING tab on the package details page to enter all of the details required for publishing such as publisher details, marketing content, screenshots as well as metrics and markets.
- Before you can create a market, you have to first define at least one metric under the section Metrics. Click on SAVE
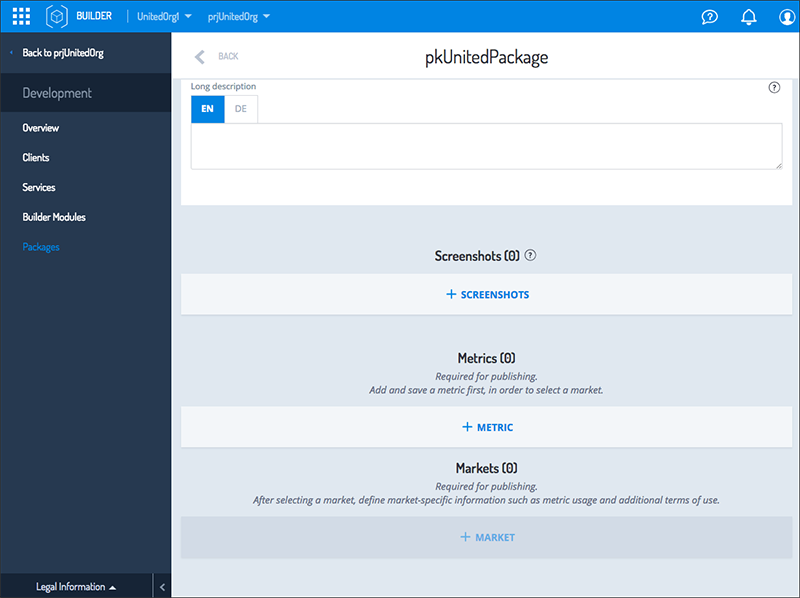

- Once you have saved the metrics, you'll see that the button + MARKET is enabled.

Select a market. Define the metric usage.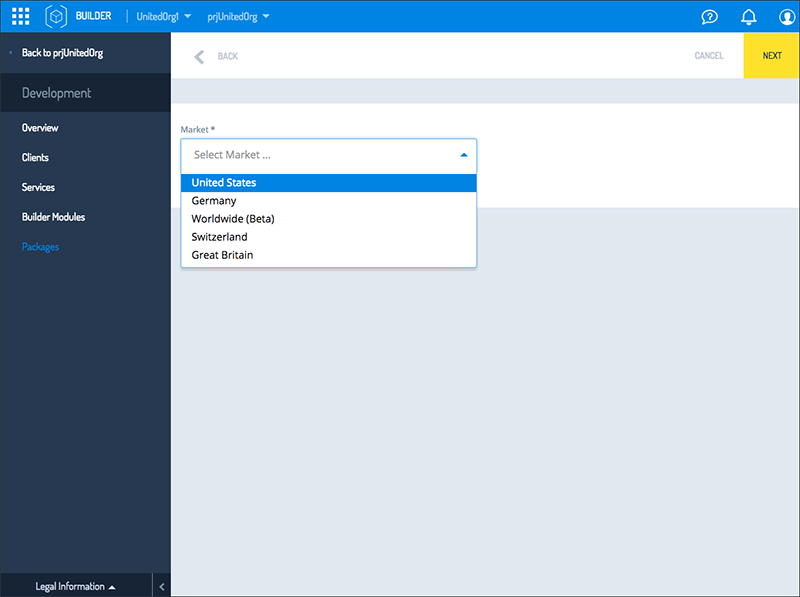
Enter additional terms and conditions if your package requires them. Click on SAVE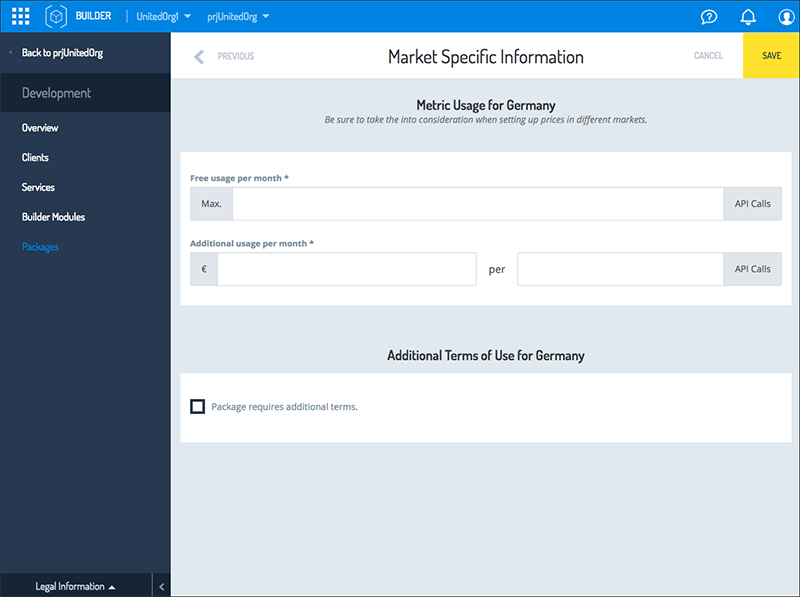
- After entering all of the mandatory package information, click on the PUBLISH button. The market operator has to first approve your package before it can be listed on the YaaS marketplace.
After your package is available on the YaaS Market, the button STATISTICS appears. As soon as your package has subscribers, the graph provides details on how subscribers use your package.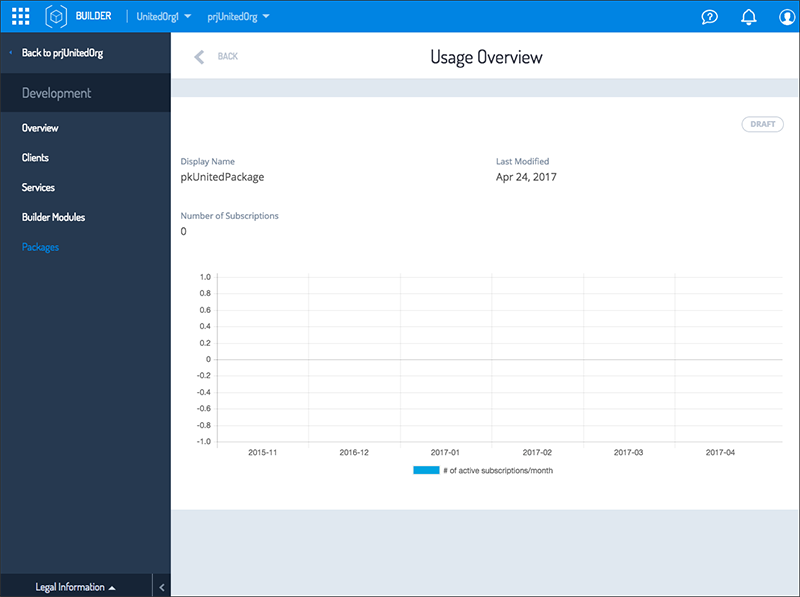
Create services and clients
In addition to using services outside of your project, create clients in the Builder as well. A client allows a user or one service to access another service. Create clients in the Builder as well.
To create a service:
- From your project home page, click Development > Services.
- Click the button + SERVICE.
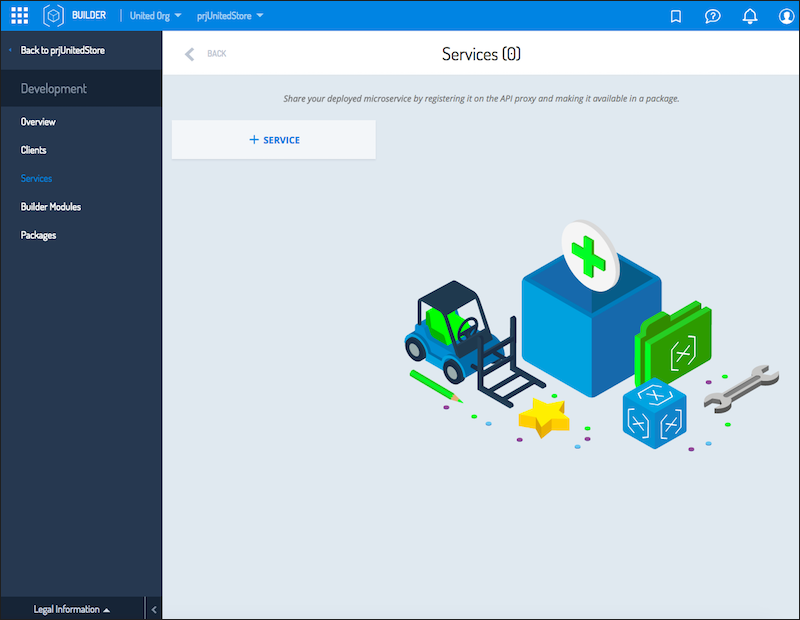
- Enter an identifier and version for the service. A preview of the proxy URL appears on the page.
- Click SAVE.

To create a client:
- From your project home page, click Development > Clients.
- Click + CLIENT.
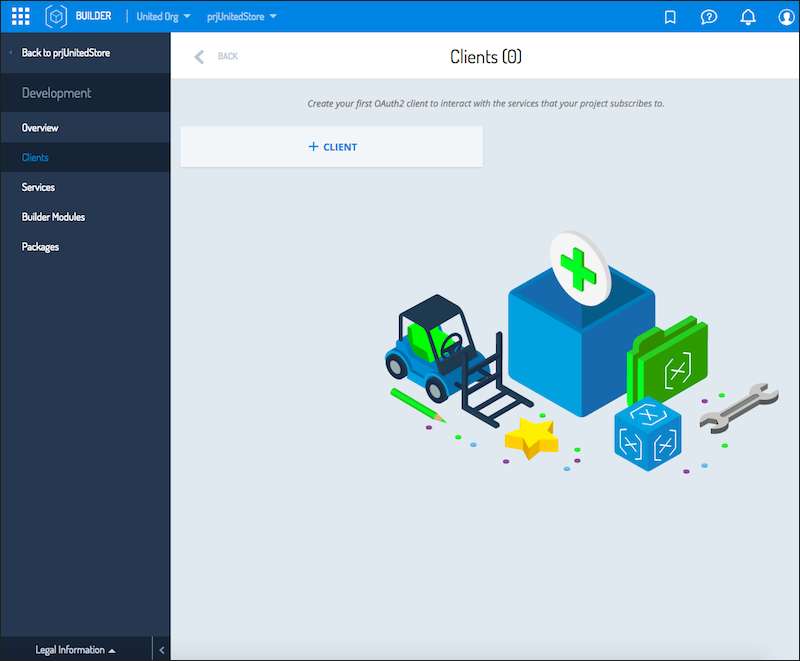
- Select the scopes that your client must have for successful service access.
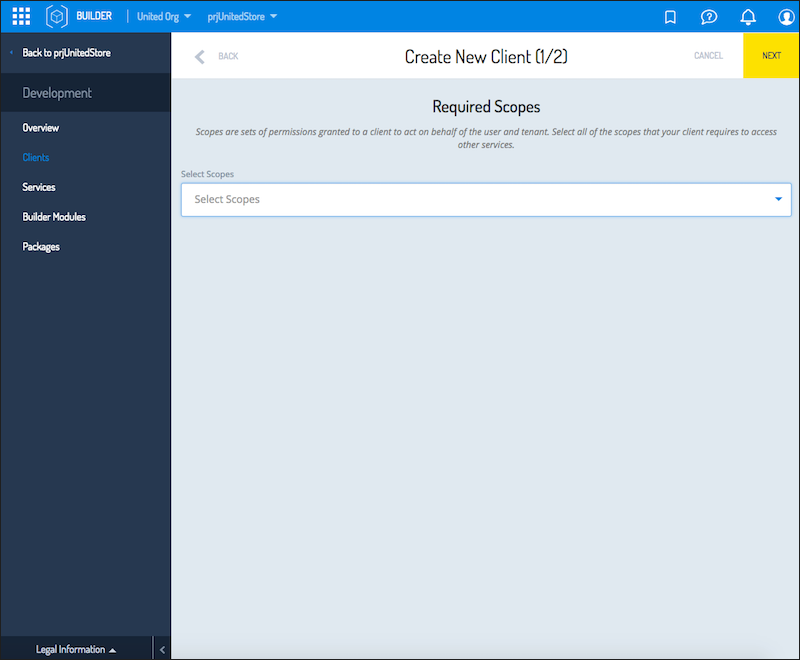
- Assign a client identifier, display name, description, and redirect URIs to the client.

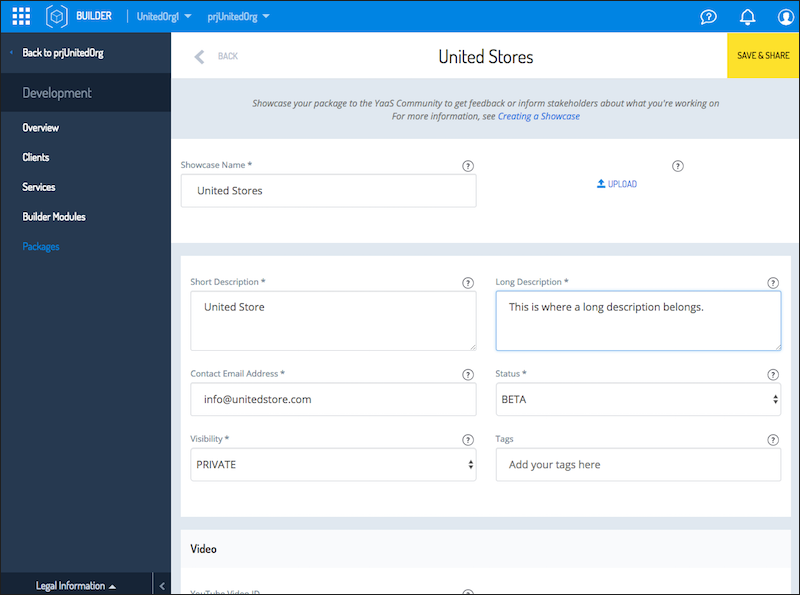
Create Showcases
The YaaS Community is a place to showcase your projects and business applications to a broader audience.
Click on SHOWCASE on the package details page to enter information about your package that you would like to make visible to the YaaS Community for feedback. You can also upload an icon. Click on the SHARE & SAVE button. Your package is then visible on https://community.yaas.io/.
Glossary
| Term | Description |
|---|---|
| authorization rule | The access rights for different endpoints of a service, as defined in the scopes. |
| client authorization | Authorization that defines what a client can access. |
| Client ID | A unique identifier to access an application or service. |
| Client Secret | A password that matches the Client ID. |
| identifier | A unique sequence of alphanumeric characters, which uniquely identifies an item. |
| locales | The set of languages used in YaaS. |
| module location | The URL where the Builder module"s JSON descriptor is deployed, such as `/builder/module.json`. |
| YaaS client | The YaaS Client is composed of the base path of the organization and the identifier of the service or builder module. It is the unique identifier for an application across YaaS. The Yaas client is necessary when your client, service, builder module or application has to call a service that uses application isolation. An example of this is the repository service. |
If you find any information that is unclear or incorrect, please let us know so that we can improve the Dev Portal content.
Use our private help channel. Receive updates over email and contact our specialists directly.
If you need more information about this topic, visit hybris Experts to post your own question and interact with our community and experts.